Vermont Yoga Retreat


When Regina and I signed up for a yoga retreat in Vermont a couple of weeks ago, I had no idea that it would come as such a perfect time. Dealing with Brad’s injuries and care these last couple of weeks has been really stressful for him and for me, and I think we both needed some space. Getting to go away to practice yoga 3 times a day, hike the Green Mountains of Vermont, have an incredible private chef cook organic food for us, and be surrounded by the yoga community that’s at the core of Balance Yoga was everything I needed.


Good Commons – a totally charming 1800s home completely revamped into a retreat space – was our spot for the weekend. Tescha, the proprietress, is an adorable, warm woman who definitely surrounds herself with similar people. From the time we on “The Good Bus” picked up our chef, Martin, on the way up to Vermont, we knew we were in for a wonderful weekend.
Martin, Tescha, and Rosie (our masseuse!)


The next couple of days went like this: yoga, gourmet breakfast, yoga, gourmet lunch, yoga, gourmet dinner, glass of wine, bedtime.  Add a day trip to Woodstock for an afternoon of shopping, a hike one afternoon, some hot tub time, an awesome massage, and you have our Thursday – Sunday.  It was fantastic.
The kitchen prepped for Martin with a stock of local, organic food

 We were all so into what Martin was cooking for us, and how tasty it all was! With the exception of one dinner (a fantastic chicken and dumplings stew) it was 100% vegetarian, and you hardly even noticed that the meals didn’t have meat. 

 Vermont was beautiful – so clean and chill and easy. My high school boyfriend Nash went to college at UVM, so I spent some time in Burlington our freshman year, but aside from a skiing trip or two to Stowe while at BC, I don’t think I’ve been to Vermont since college. I have a new appreciation for that kind of space after living in Colorado, though. Similarly minded people who care about their community and their world, who try to practice healthy living through organic choices (in both consumption and decisions), are really inspiring to me. Scranton is an amazing community itself, and I love it here, but I sometimes really appreciate the – should I say – hippie kind of vibe that comes along with that whole “we are a family” thing in Colorado and VT.  I’ve been really fortunate to live and work in a bunch of places throughout this country, and I feel incredibly lucky to have gained the experience that came along with following my wanderlust through my 20s.  NEPA has my heart, but some other places in this beautiful country really speak to my spirit.

bloody mary on a Saturday afternoon


Did I mention that Martin is a nationally acclaimed pastry chef? #omg

A word about yoga. I remember when Madonna came out with her “Ray of Light” album, and the insanely sculpted arms that she had on that tour. When she attributed all that definition to yoga, I couldn’t believe it. Wasn’t yoga just stretching? At the time, my sophomore year of college, yoga was nothing more to me than a class my Seattle-raised boyfriend Kyle liked to take at our gym at Boston College (which I found to be equal parts sexy and weird, if I’m being honest). But Madonna’s arms inspired me. Just like Madge, I would try this yoga thing. 

What followed was my introduction to a practice that has taught me about recognizing and conquering limitations (both physically and mentally), learning to quiet my mind, being fully in the present moment, and making me feel equally strong and graceful. I love running, and totally get how 5 miles makes you feel incredible, but an hour class of yoga just does something different for me. Four days of classes were everything I needed and more. I came back rested, rejuvenated, centered.

Good Commons does more than just yoga retreats – check them out here if you need your own weekend away: http://www.goodcommons.com/ 

And locally, for yoga, Balance Yoga is amazing, and they share some instructors with Mission Yoga  here in Scranton. Jennifer Ciarimboli at Balance put together this retreat, but both studios are incredible for their classes and their community. 

Baked Kale Chips


Kale packs a ton of vitamins into your diet, and on top of that, it contains antioxidants, anti-imflammatory nutrients, and anti-cancer nutrients. There is a ton of kale available at the farmers’ market right now, so I decided to get Brad to try kale chips as an alternative to the bag of pretzel chips we eat on a weekly basis. These kale “chips” look kind of unusual, but are really delicious, healthy, and a great alternative snack. They’ll keep for a couple of days in an airtight container, but odds are they’ll be gone before then!

BAKED KALE CHIPS
– 1 head of kale, “ribs” removed, torn into chip-size pieces
– olive oil (2 tbsp, approx.)
– heavy pinch kosher salt, or Herbamare, or garlic powder

1. Preheat oven to 300.

2. Thoroughly wash the kale, then remove “ribs” and tear into chip-size pieces.
gorgeous kale from the farmers’ market!


3. In a bowl, toss kale with 2 glugs olive oil, massaging onto the kale to make sure each piece is coated. Add seasonings (kosher salt, herbamare, garlic powder, etc.). The flavors will concentrate somewhat when you bake the chips, so add a little less than what you otherwise would.


4. Spread kale chips into a single layer on a parchment paper-lined baking sheet.  Bake at 300 for 20 minutes. I’ve read about kale chips being bitter, but I think the key is not to overcook them – like, at all. 20 minutes at 300 will work for most ovens.


5. Let cool and enjoy!

Fish En Papillote (“Fish in Parchment Paper”)


This has got to be one of the simplest, healthiest, most delicious things I make. It’s pretty. It has a great presentation. There is next to zero cleanup, and it’s about as “clean” as you can get as far as recipes are concerned. Basically, you pick your veggies and fish, pick your herbs & other flavorings, pack it all up in a cute little parchment paper pouch, and then throw them in the oven. The fish and flavorings will steam and cook all together, blending flavors and creating an incredibly tasty dinner. Best of all – this can be ready start to finish in 30 minutes, which makes it a perfect weeknight meal, but it looks so nice that it could be served at dinner parties. 
FISH EN PAPILOTTE (serves as many people as you need it to) 
– 6 oz. of fish per person (any kind – I used cod here, but flounder, tilapia, monkfish, sea bass, salmon, etc. would work. You get the picture.) 
– Veggies. I would julienne squash, carrots, peppers. You can half cherry tomatoes. Cut onions or shallots into thin strips, cut baby potatoes into thin rounds. I used baby bok choy this time, and just put a couple of leaves into each packet, which was also really nice. 
– Herbs. Thyme is fantastic, savory is a bit stronger but also nice. Fresh is best, but if you add dried, add about half of what you would with fresh herbs. 
– Flavors. Thin rounds of lemon to top, a splash of white wine, super thin shavings of butter, etc. 
– Kosher salt and pepper to taste

1. Heat oven to 375. 

2. Prep whatever veggies you’ve decided to use.

lemon sliced into thin rounds, baby bok choy, halved cherry tomatoes, julienned zucchini, shallot cut into thin rounds

3. Cut a heart (like you did in grade school – half a heart on folded paper, then unfold) in parchment paper. Spritz one side with olive oil.


4. Add veggies to the side of the parchment paper with olive oil. Top with the fish, then lemons/butter/”flavors”. Top with salt & pepper.


5. Fold the other half of the “heart” over the fish & veggie combo. Working from the top, crimp the paper over itself into little pleats so it forms a little pouch. Make sure it’s a bit loose in the middle, so steam can circulate and cook the fish and veggies inside.


6. Put pouches on a baking sheet to catch any juices that spill, then bake for 20 minutes or so, or until fish is flaky and cooked through.  The parchment paper will puff a bit, and get golden brown in spots.


7. Serve pouches on individual plates. You can either cut into the top part of the pouch to eat directly from there, or you can open the entire pouch to empty the contents on the plate. The juices (and flavors) will stay concentrated a little more if you do it the first way, but either way, it’s a delicious dinner that I hope you enjoy as much as we do!

Kale, Roasted Butternut Squash, Apple & Parmesan Salad


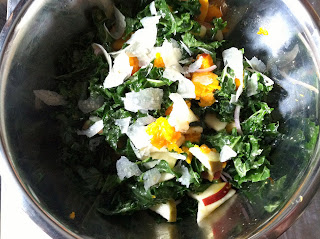
This salad is all fall. The sweetness of roasted butternut squash and thin slices of apple blend perfectly with the kale dressed in a simple lemon vinaigrette, and topped with curls of parmesan. We had this alongside a tuna chickpea salad for a filling, healthy lunch. Kale is incredibly good for you on so many levels, and I try to work it into as many recipes as I can while it’s available in abundance at our Scranton Farmers’ Market (my favorite grocery place in town, BY FAR. Have you found your local farmers’ market yet?).

KALE, ROASTED BUTTERNUT SQUASH, APPLE & PARMESAN SALAD (serves 2-4)
– 1/2 head of kale, “ribs” cut out and discarded, leaves torn into pieces
– 1/2 butternut squash, roasted
– 1-2 apples (gala, macintosh, etc. Any sweeter apple will work)
– shaves of parmesan cheese (thin pieces of fresh cheddar would also work)

Lemon Viniagrette
– Juice of 1/2 lemon (approx. 1 tbsp)
– 2 Tbsp EVOO
– Kosher salt and pepper to taste

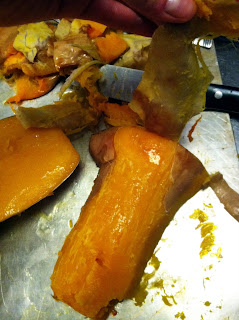
1. Get the squash roasting. The easiest way to do this is to punch a couple of small holes into a whole squash (with a fork, or similar) and throw the whole thing in an oven at 400 for about 20 minutes.  After this time, the squash should be soft enough that you can cut off the bottom without any trouble, then slice it in half and scoop out the seeds.


2. Rub a couple of drops of olive oil on each cut side of the squash, then place cut-side down on a baking sheet. Roast at 400 for approx.30 – 45 minutes, depending on the size of the squash.

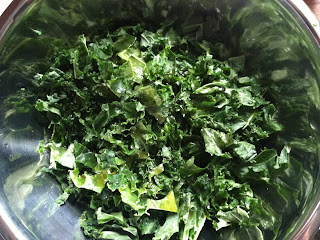
3. Meanwhile, prep the kale. After washing thoroughly, cut out the “ribs” and discard, then roughly tear or cut the kale into similar-size pieces.


4. Wash the apples, then cut them into thin slices. Delicate slices as opposed to larger chunks will give this salad a refreshing little bite with every forkful.

5. When squash is finished roasting, remove from oven, peel the skin (this should come right off if the squash has been fully roasted), then cut squash into chunks.


6. Whisk together dressing, then add to the kale and massage into the kale pieces (kale can be kind of tough, so massaging the dressing into the leaves will make them a little more chewable). Add squash, apples, and gently stir to combine. Top with parmesan (or cheddar) and serve as either a side or a main dish.

Tuna Chickpea Salad with Cucumber and Red Onion – No Mayo

Canned tuna can be so much more than something that’s mixed with mayo, onion, and celery, and served on a sandwich. Mayonnaise kind of skeeves me out, but I get that it’s unavoidable sometimes. This tuna salad, however, substitutes mayo with an olive oil-lemon vinaigrette, adds chickpeas, and some teeny tiny pieces of red onion and english cucumber. It’s fresh, light, and healthy – and actually keeps really well for up to 2 days – I think it’s a perfect lunch.

TUNA CHICKPEA SALAD WITH CUCUMBER AND RED ONION
– 2 cans tuna (a note about this – I know canned tuna can be loaded with mercury. If you can find it, Wild Planet has incredible canned, sushi-grade and wild-caught tuna)
– 1/2 english cucumber, diced into tiny pieces
– 1/4 red onion, diced into tiny pieces
– 1 can chickpeas, drained and rinsed
– handful of parsley, chopped
– Kosher Salt & Pepper to taste
For Dressing:
– Juice of 1/2 lemon
– 2 tbsp. EVOO
– Kosher salt (or Herbamare for a little extra boost of vegetables and minerals) and freshly ground black pepper to taste


1. In a medium size bowl, combine chickpeas, tuna, and parsley.

2. Finely chop the cucumber and red onion. The tiny size of these pieces really “makes” this salad – the overall taste is just different, somehow, from a salad that would have larger chunks of cucumber and red onion. 


Remove the middle “seeded” part of the cucumber (even though english cucumbers are seedless) to get a little more color from the dark green skin of the cucumber.


3. Add cucumber and red onion to chickpea/tuna/parsley mix.

4. Combine dressing ingredients, adjust seasonings to taste.

5. Pour dressing over tuna/chickpea/cucumber/red onion mixture. Stir well to combine. If tuna seems a little dry, add more olive oil and/or lemon juice to taste. Serve by itself or in a wrap with some lettuce.


Roasted Carrot Soup With Thyme and Ginger (aka, “Finally Went to the Farmers Market”)

I finally got out today to go grocery shopping, so we can stop the whole “eating every meal as take-out” thing we’ve been doing. And we’re starting small. This roasted carrot soup is one of the simplest, most surprisingly delicious things I make. The roasted carrots get sweeter, and give the soup this depth of flavor that’s incredible. Since there are only 6 ingredients in this, make sure you get the best quality available – locally grown carrots, a good organic vegetable stock (I use either Pacific or Imagine broths, which are both amazing), etc. This soup tastes so flavorful and rich, you won’t believe so little went into it.

ROASTED CARROT SOUP WITH THYME AND GINGER (recipe source: Food52)
– 8 carrots
– 1/2 vidalia onion, chopped
– 6 cups vegetable stock (8 oz. = 1 cup, so 48oz.)
– 1 piece ginger, peeled, approx. 1 inch long
– Couple sprigs of thyme
– 2 garlic cloves, chopped
– Kosher Salt & freshly ground black pepper to taste
– EVOO

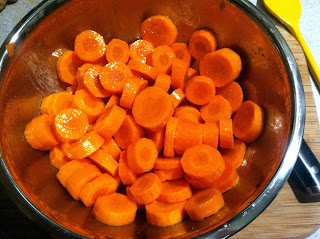
1. Wash carrots, then peel and cut into 1/4 inch rounds. Even though you’re peeling the skins, these still grew in the ground and are dirty. Peeling the skin is going to drag any debris from the carrot skin into the carrot itself unless you wash them beforehand.

2. Toss carrots with a glug of olive oil and sprinkle generously with kosher salt.  
3. Arrange in a single layer on a baking sheet, then broil on high until the brown and soften, flipping every five minutes or so. If the carrots get blackened edges a little, don’t worry – this actually adds a nice dimension to the soup.

2. In a smaller saucepan, bring vegetable stock to a boil, then add peeled ginger and thyme spring. Simmer 15 minutes (while the carrots are roasting).

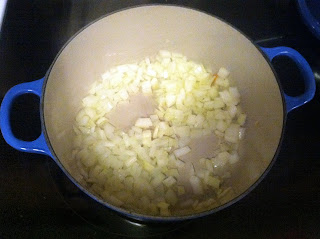
3. Meanwhile, in the pot you’re going to use for your soup (I use a Le Creuset Dutch Oven for this, and just about everything else – it’s borderline impossible to mess up cooking in these), “sweat” the onion in 1 T. olive oil and a pinch of kosher salt over medium-high heat until soft and translucent.  Add garlic and stir until fragrant (90 seconds or so), then add carrots.

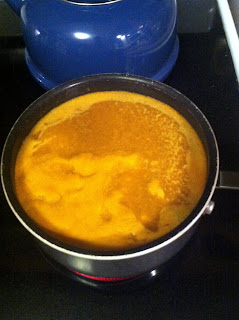
4. Remove the ginger and thyme from the vegetable stock and discard.  Add stock to the pot with the onion and carrot mixture. Bring to a boil and then simmer 5-10 minutes until the carrots are soft.
5. Using an immersion blender (this one looks fantastic) or a regular blender, puree the soup. If you use a regular blender, make sure your soup has cooled – if it’s hot, it could explode in the blender.

6. When soup is pureed, salt and pepper to taste. Garnish with thyme sprigs to make it look pretty. We had this soup, a roast chicken, and a salad with local greens for the first meal I cooked in over a week. So good.

So….this happened.

Those bones definitely aren’t where they’re supposed to be. Last week, Brad had a bad fall and shattered his fibula, broke his tibia, and fractured a couple bones in his left foot. Considering his fall, he is really lucky it wasn’t much worse, but it’s been a rough couple of days for us both. I had no idea that a break like this could involve so much. He’s in an external fixator until his swelling goes down enough for his next surgery to install plates/pins to stabilize his breaks, and is just uncomfortable, frustrated, and in a lot of pain. I have not been cooking – at all, and I’m really starting to miss it – but we’ve been having some great food thanks to my parents and my sister, who have brought us dinners from Casa BellaPoshAV, What the Fork, and Osaka. And, of course, Zummo’s, where I’ve gone for takeout lunch and coffees every single day. Brad and I have been really lucky to have amazing support from our friends and families during this – just want to say thank you, to all of you.

B, extremely happy to be going home from the hospital.

Cold Lemon Souffle with Homemade Lavender-Sage Whipped Cream

A note on this recipe: there is absolutely nothing good in this for you. It’s sugar. Heavy cream. Eggs. Gelatin.  No matter how hard you try, convincing yourself that the detoxifying benefits of the lemon juice and zest exist at all just isn’t going to happen. That said – it’s my mom’s recipe. My parents have been making this on occasion since I was a kid. It looks impressive, is outrageously delicious, and is a perfect light dessert to end any meal. We had this for dessert last night, and with the addition of my sister Collyn’s lavender whipped cream, it was completely worth the “nothing good to be found here!” knowledge of what went into it.

COLD LEMON SOUFFLE WITH HOMEMADE LAVENDER-SAGE WHIPPED CREAM (serves 6-8)
– 1 pack plain gelatin
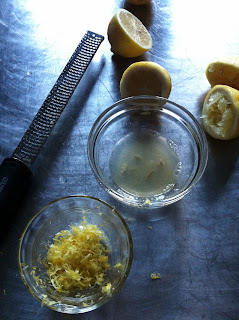
– 1/2 C. Lemon juice & 1 T. lemon zest
– 1/4 C. water
– 4 eggs – yolks and whites separated
– 2/3 C. sugar
– 1 C. heavy cream
– 1/4 tsp. vanilla
– 1/2 tsp. confectioner’s sugar

Lavender-Sage Whipped Cream:
– 1 C. heavy cream
– Lavender sprigs and Sage Leaves
– Confectioner’s sugar (1/3 c. or to taste)

1. In a saucepan, combine 1/4 C. water, 1 pack gelatin, and 1/2 C. lemon juice. Warm over low heat until clarified. Remove from heat and add zest. Cool before adding to the yolks.


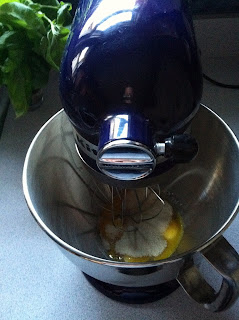
2. In a mixer (my KitchenAid Mixer with the whisk attachment is a lifesaver for all the mixing you’re about to do, but a hand mixer will work too), combing 4 egg yolks with 1/3 C. sugar. Mix until pale and thick.  Add cooled gelatin mix (if mix is warm, it could start to cook your eggs, which is obviously bad), transfer to another bowl, and set aside.


3. In the cleaned mixing bowl, whip eggs until foamy. Add 1/3 C. sugar a little at a time, and whip until glossy and thick.  Add some of the yolk mixture to the whites, then add all the whites to the yolks. Set aside and clean out that mixing bowl again.


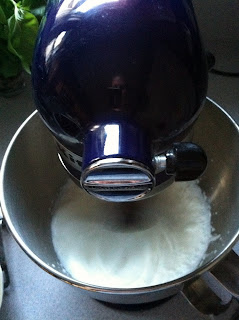
4. Whip the 1 C. heavy cream in the cleaned mixing bowl. Add 1/4 tsp. vanilla and 1/2 tsp. confectioner’s sugar. The cream will get stiff – this is perfect


5. Carefully fold the heavy cream into the lemon/egg mixture with a spatula. Refrigerate for at least an hour to set the souffle. 


Lavender Whipped Cream
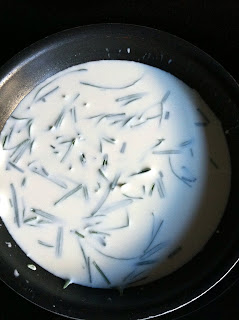
1. In a saucepan, combine heavy cream and chopped lavender and sage almost to a boil, then simmer. The heat will release the flavor in the lavender. Stir in confectioner’s sugar to taste – how this mix tastes now is how it’ll taste as whipped cream, so use that as your base.


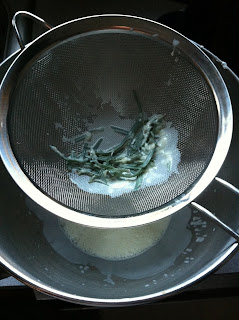
2. Strain the leaves from the cream. 


3. Allow cream to cool completely – refrigerate it even – it won’t whip if it’s heated.

4. Whip the cream mixture in a KitchenAid mixer or with a hand beater until the cream is still and peaks form.  Refrigerate until use, then use as a topping for the lemon souffle. This is also terrific over fruit or for that matter – just about anything else.


Roasted Chicken

Brad and I had our friend Bobby over for dinner last night for two reasons – 1. so I could teach Bobby how to make balloon animals, and 2. so Brad and I could ask Bobby to be the officiant at our wedding next September.  Brad and I met because of Bobby, who had organized the fundraiser at which Brad and I met for the first time. Bobby’s married a few couples already as an “ordained minister”, and Brad and I couldn’t think of anyone more perfect to marry us. He’s one of our favorite people, and we’re so grateful to have him be such a key part of our wedding.

For appetizers, we snacked on a whole round of Boursin and rice crackers, because that might be our favorite combination ever, and roasted grapes with thyme, which is one of the easiest/more interesting appetizers you could make. We had roasted butternut squash soup and a simple roast chicken for dinner, with a cold lemon souffle for dessert. Oh, and wine. Lots of wine.  Lots to celebrate!
Bobby left our house like this after dinner, and went to a local bar for a nightcap, where he  told me this look “went over like gangbusters” – obviously.

ROAST CHICKEN (serves 4)


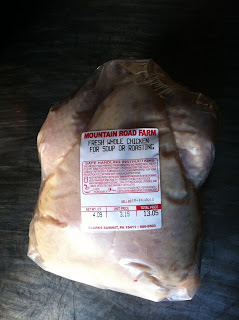
– 1 4-lb. chicken, giblets removed.

– Kosher salt & pepper

– Sage and Thyme leaves


1. Preheat oven to 450. 


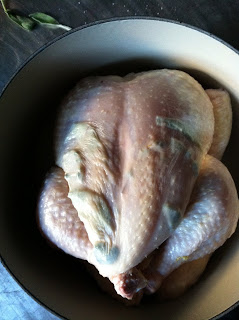
2. Remove the chicken’s giblets, then rinse off the chicken and thoroughly pat dry inside and out. The drier the chicken, the less steam, which means more dry heat and a crispier chicken. 


3. Truss the chicken. There are a number of ways to do this, probably the simplest being to just tie the legs together against the breast. This helps keep the chicken juicy, and also helps it roast evenly. It also makes me want to be a vegetarian, EVERY TIME, because handling a whole chicken just icks me out. I kind of have to hustle through these couple of steps.


4. Loosen the skin away from the breast meat with your fingers. Arrange thyme sprigs and sage leaves underneath the skin layer for a little extra flavor. This is optional, but I really like it.


5. Place the chicken in a dutch oven (Le Creuset is perfect), salt and pepper the bird. Kosher salt should be rained over the chicken liberally – maybe 1/2 a tablespoon, and the same for pepper. 
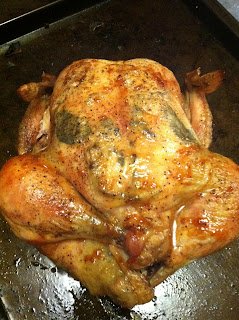
6. Roast the chicken for approx. 1 hour – no basting, just roasting. The skin should get crispy and golden. Before removing from the pan, baste with the juices, the transfer to a cutting board. Tent with foil, and let sit for 15 minutes before carving and serving.


Roasted Butternut Squash Soup


This roasted butternut squash soup just nails it. It’s basically pureed squash and chicken (or veggie) broth, some added vegetables, spices and a splash of heavy cream. I think it would be great for kids, or even baby food, minus the heavy cream and spices. That bit of info, for me however, is filed away under “for future reference”, at least for the time being. :]

ROASTED BUTTERNUT SQUASH SOUP (makes a giant pot of soup that freezes really well, too)

– 2 large butternut squash (squashes??)
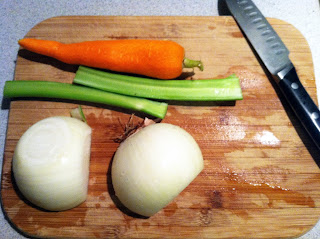
– 2 celery stalks, chopped
– 2 carrots, chopped
– 1 vidalia onion, diced
– 6 cups chicken broth (this will depend on the height of your squash, though. I’d buy 64 oz. of chicken broth just to be safe)
– 1 T. butter
– 1 T. EVOO
– Splash of heavy cream, or up to 1/4 c. to taste
– Kosher Salt
– White pepper (this blends into the soup nicely)
– Freshly grated nutmeg
– 8-10 sage leaves, chopped

1. Preheat oven to 400.

2. Pierce each squash with a fork or skewer a few times. Cut each squash in half, length-wise, and scoop out the seeds and stringy things at the bottom of the squash. Rub with a couple of drops of olive oil, then roast, cut-side down, for approx. 30 – 45 minutes. Set aside and allow to cool.


3. In your soup pot (I cannot say enough great things about Le Creuset ), heat 1 T butter and 1 T olive oil over medium high heat. Add chopped onion, celery, and carrot, saute for 10 minutes or until soft.  You want these to “sweat”, not brown, so make sure you give them some room, and salt them with some Kosher salt to draw out as much water as possible.

Look at this Farmers’ Market celery!!! Unbelievable.


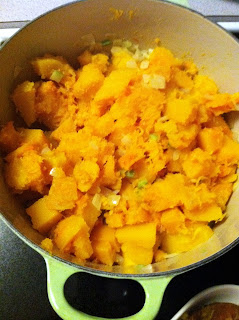
3. When squash is cool enough to handle, peel off the skin. This should come right off, but cut away anything that remains. Roughly chop the roasted squash into chunks.


4. Add squash to the onion/celery/carrot mixture. Add chopped sage and approx. 1 T. of Kosher salt. Add chicken (or vegetable) stock until it just covers the squash in the pot. 


5. Bring to a boil, cover, and reduce heat to low. Simmer for 45 minutes – 1 hour. 

6. After an hour, use an immersion blender to puree the soup into a creamy consistency. Breville makes great immersion blenders, and we are definitely registering for one, since the one I use (all the time) I won during a “Yankee Swap” at my very first job out of college at MSPCC.  If you don’t have an immersion blender, you can use a regular blender. Just make sure the soup is cool, because if it’s hot, it could explode in your blender (really).


7. Season to taste with nutmeg, white pepper, Kosher salt. Swirl in heavy cream for some richness.


— This soup will continue to blend the flavors, so when you think you’re “almost there” with the spices, STOP.  It’ll come together perfectly in a couple of hours!  You can even throw this together the night before, then reheat for dinner or lunch the next day to get that perfect flavor combination.