Portabello Mushroom “Pizzas”

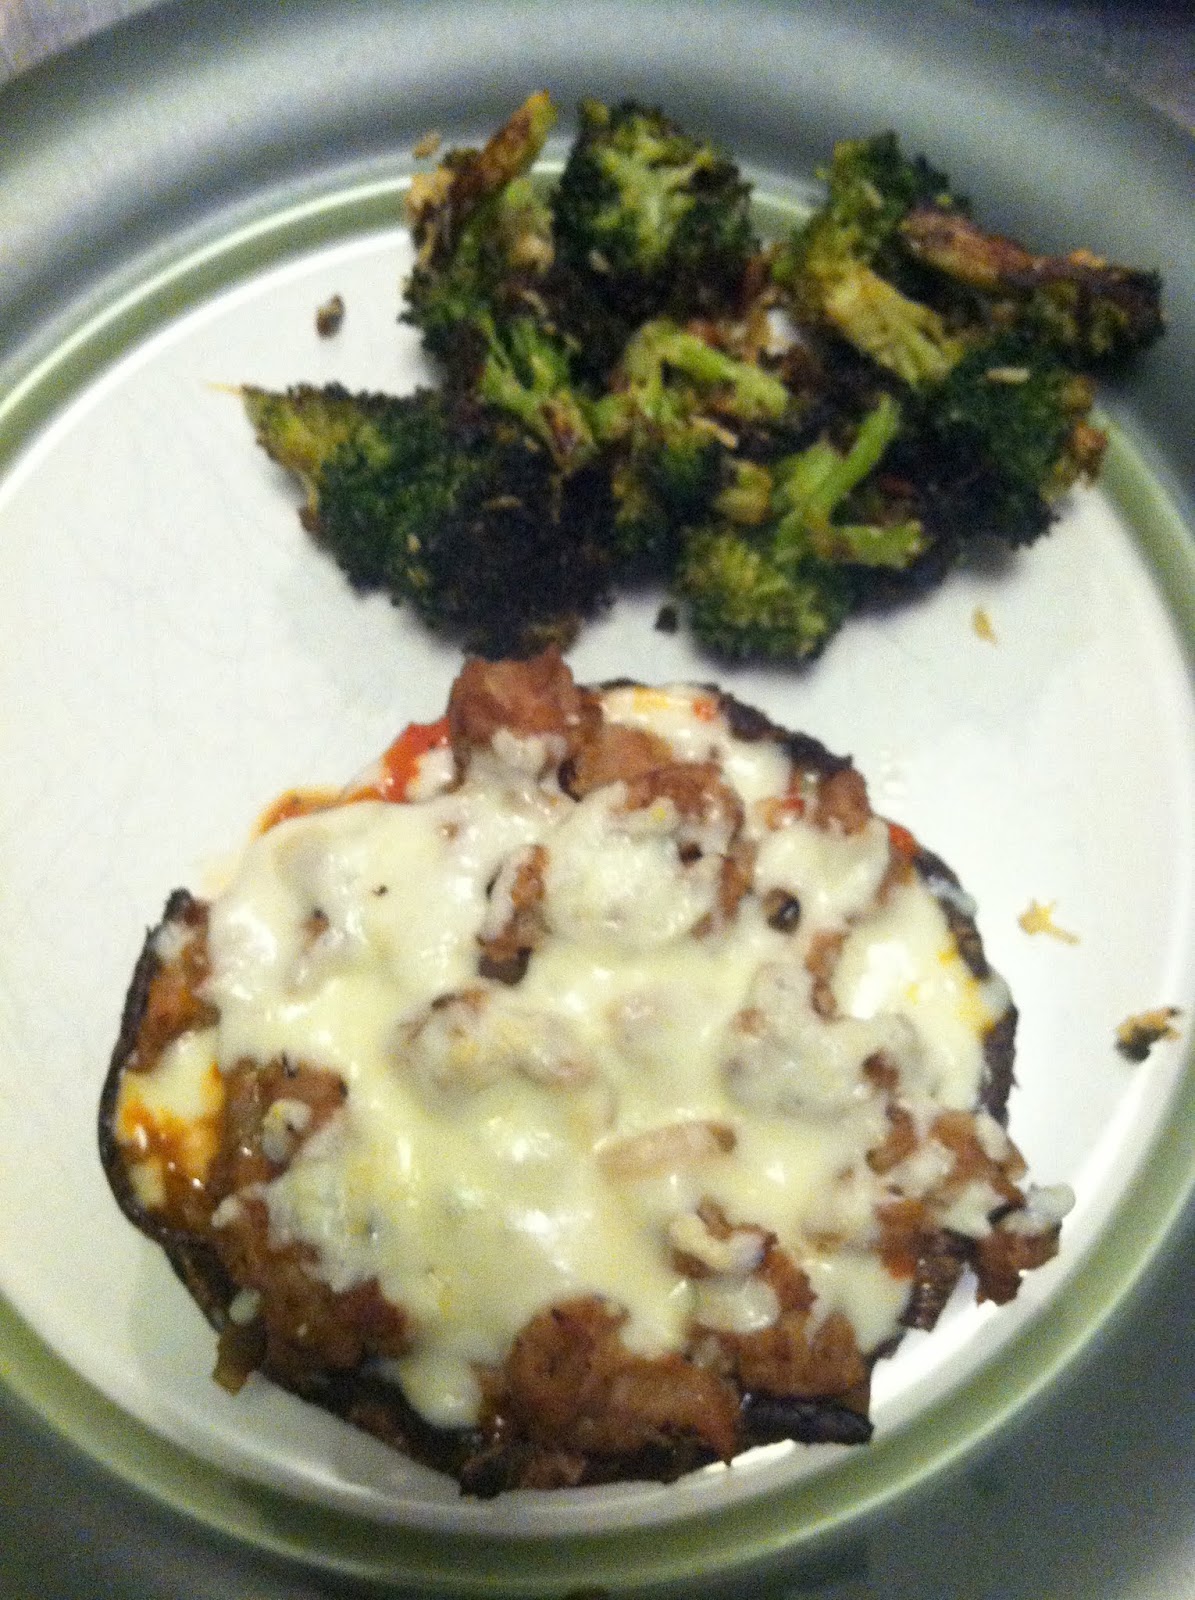
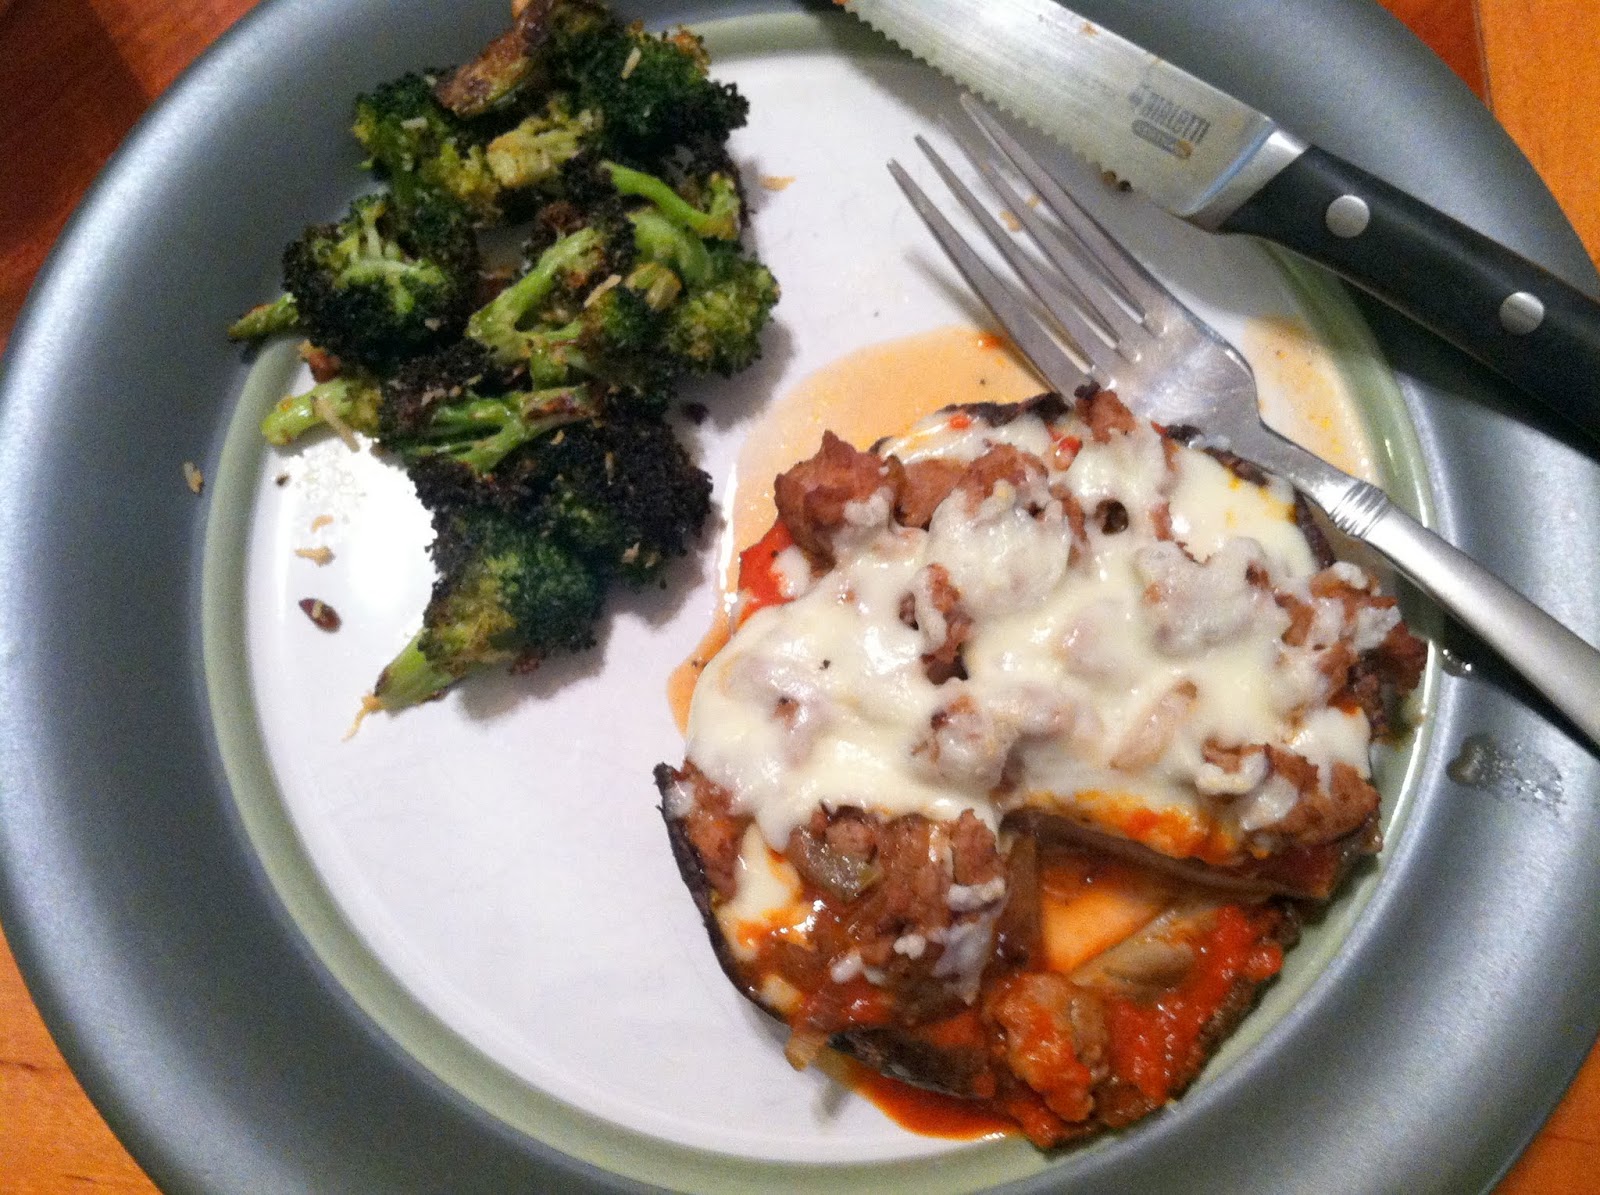
aka, “Brad’s first time cooking in 8 weeks”.  It was SO NICE to have him back in the kitchen!  We had to do a lot of maneuvering for him to get semi-comfortable, and he had to take a break halfway through, but overall he made one of the best versions yet of portabello mushroom “pizzas”.  These are mainly carb-free, super tasty, and pretty simple, too.  Portabello mushroom caps make a great alternative base for recipes in which you’d otherwise use something with carbs, like a crust.

PORTABELLO MUSHROOM “PIZZAS” – serves 2-5

– 5 portabello mushroom caps, rinsed and dried
– 1/4 c. EVOO
– 1/4 tsp. garlic powder
– 1/4 tsp. kosher salt
– 1/4 tsp. freshly ground black pepper
– 1 1/4 c. your favorite pasta sauce
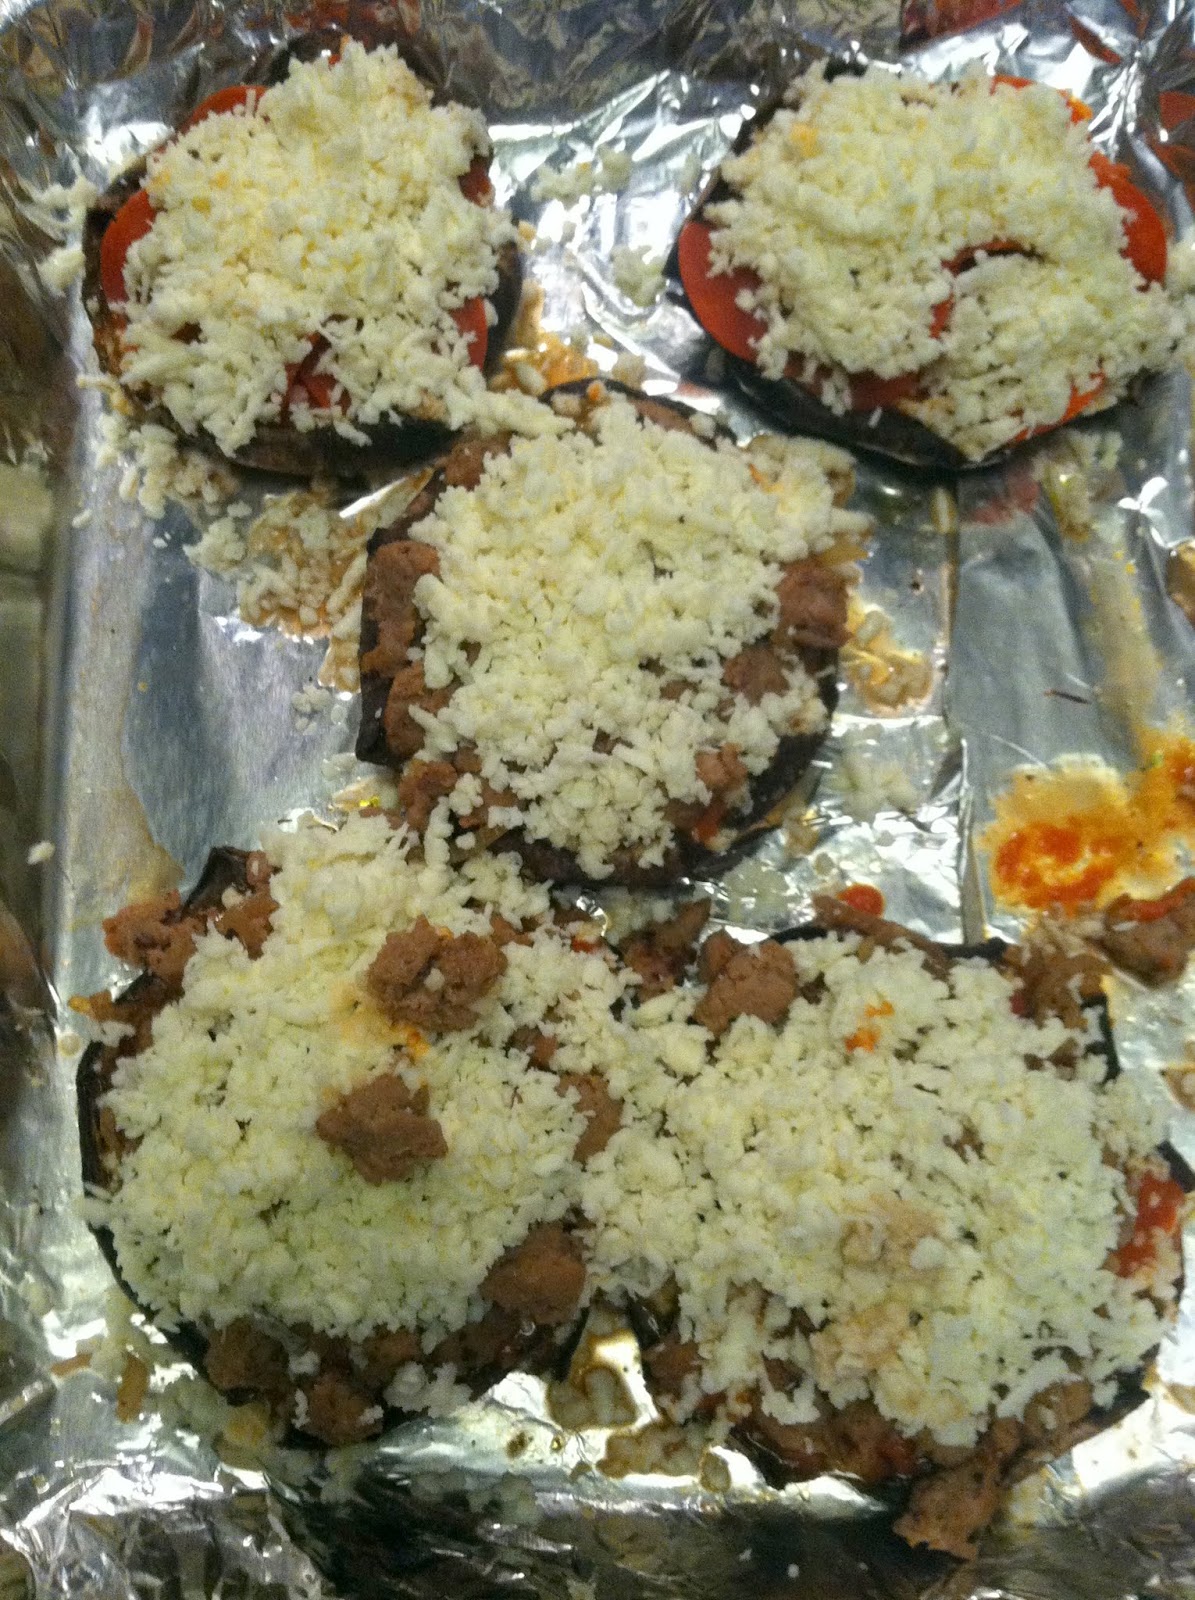
– 2 c. shredded mozzarella cheese
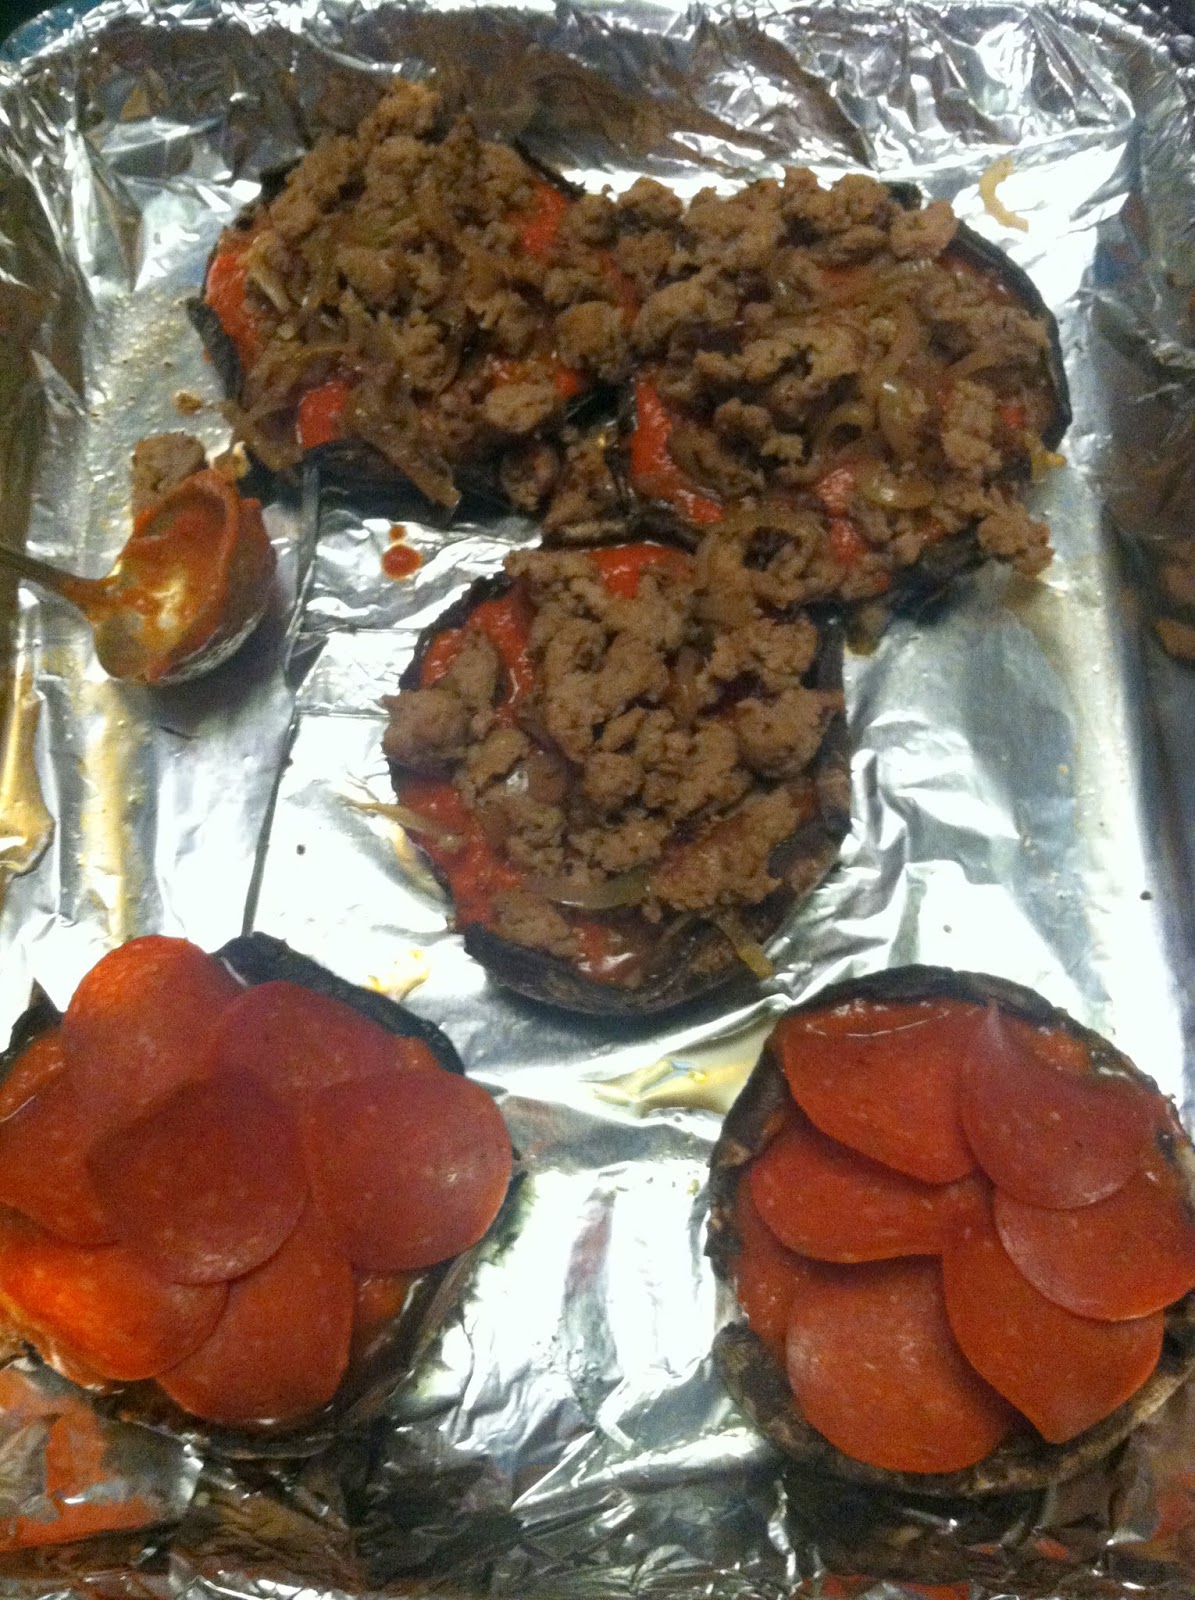
– toppings: cooked sausage, cooked turkey pepperoni, etc.

1. Preheat oven to 400.

2. Wash the mushroom caps and pat dry. The best way to clean them is to wet a paper towel and clean each mushroom cap individually.  That way, the mushrooms won’t retain the water they would if you cleaned them under a faucet.

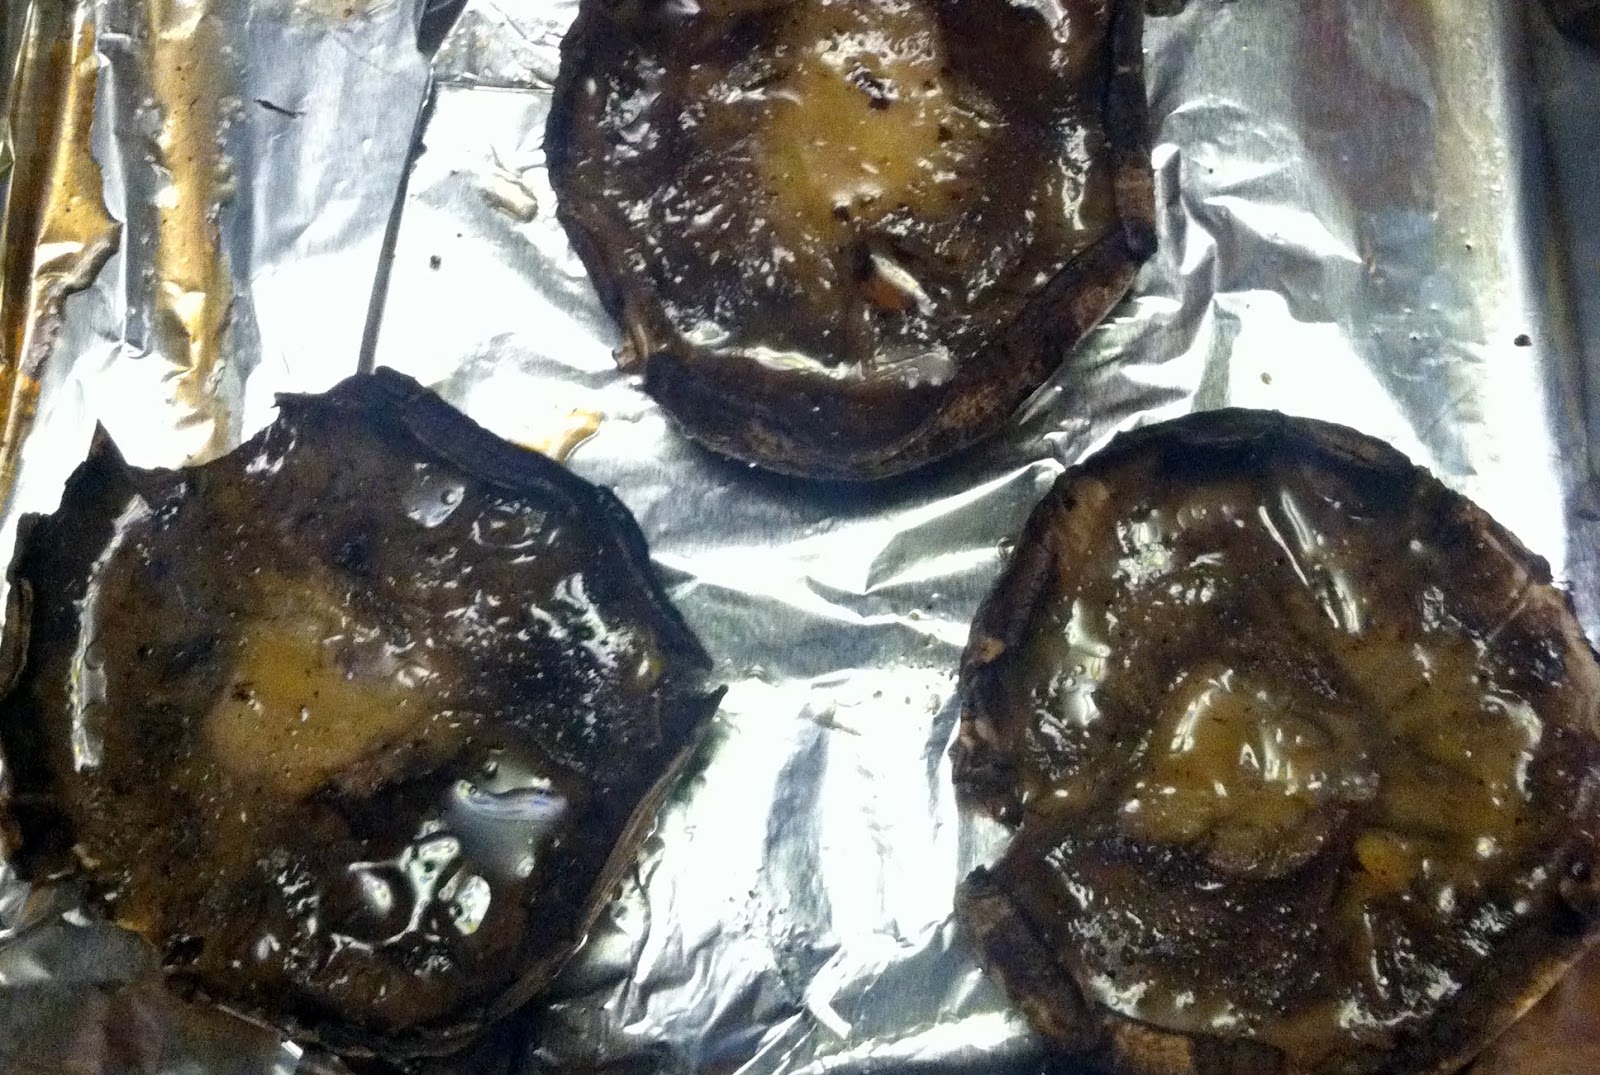
3. Place the washed mushroom caps on a baking sheet lined with foil, for easier cleanup. Combine the EVOO, garlic powder, salt and pepper in a small bowl, and brush the mixture all over the mushroom caps.

4. Bake the mushroom caps at 400 for approx. 5 minutes.

5. Remove from the oven, and add approx. 1/4 c. spaghetti sauce to each mushroom cap.  Top with cooked toppings – we used both cooked sausage and turkey pepperoni, and approx. 1/3 c. shredded cheese.


6. Bake at 400 for another 15 minutes or so, until cheese is melted and golden.

7. Serve on their own, or with a side like the Best Broccoli Ever.


Chicken. Noodle. Soup.

I first wrote this title as “Chicken Noodle Coup”, and almost kept the spelling error. This was one of the first things I ever learned how to “make”, and make is in quotes because it’s so delicious that it’s almost unfair how simple it is to throw together. It was my mom’s go-to recipe whenever my sister and I were sick growing up, and now it’s mine! This is everything you’d expect comfort food to be – healthy, simple, full of flavor, and it warms you so much that you can almost feel it fighting off your cold.  

I like a lot of noodles in mine, and I’ve found that egg noodles are the best, but if you add them directly to the soup as it’s cooking, they’ll continue to soak up the broth when the rest goes in the fridge.  So, either cut back on the amount of noodles you add, or cook them separately and add to the soup as you reheat it.

CHICKEN NOODLE SOUP (makes about 10 bowls)

– 1 lb. chicken breasts or chicken tenders, cubed
– 1 large vidalia onion, sliced into strips
– 3 carrots, cut into 1/4 inch slices
– 3 stalks celery, cut into 1/4 inch slices
– 1 tbsp. butter
– 6-8 cups mix of chicken & vegetable broth (48 – 64 ounces, depending on how much broth you like)
– egg noodles – I usually use about half a bag, but adjust this to your preference, too.
– 2 chicken bouillon cubes
– 1 tbsp of fresh-chopped dill (optional)
– Kosher salt and pepper to taste

1. Melt 1 tbsp. butter over medium-high heat in a soup pot or – as always, a trusty Le Creuset Dutch Oven. Slice the carrots and celery, and add them to the pot when the butter is melted, stirring occasionally (don’t let them brown.  A little kosher salt added to the veggies will help them “sweat” instead of brown).


2. When veggies have sweated a little, add the broth and the onions. Sweating the carrots and celery before adding the rest of the ingredients gives them a little head start, since they’re firmer than anything else that will be added to the soup.

3. Raise temperature to high and get the soup to boil, then cover and lower to a simmer.  Simmer soup for approx. 20 minutes to allow the flavors to mingle, then add the bouillon cubes. Stir well to break up the cubes and allow the flavors to release.  Add the dill, stir to combine.

4. Raise soup to medium heat again, and add the chopped chicken.  You’re basically poaching the chicken in the soup broth, so it will cook pretty quickly, approx. 6 minutes. Reduce heat to a simmer again.

5.  Add the noodles to the broth, stir, and allow to cook.

6. Season to taste, help yourself to a bowl, and feel better.
Soup the next day – you can see how the noodles really soak up the broth!


Best Broccoli Ever


This recipe was one of Brad’s best finds. He says he made it because of one specific line in the recipe he read online:  “This broccoli is better than a steak”.  It’s kind of unbelievable how roasting veggies makes them completely different, and broccoli is no exception. Add some lemon, parmesan cheese, and toasted pine nuts, and this side could stand on its own (although sometimes nothing can substitute for a steak). It’s delicious and looks like you put a lot of effort into it, but is quickly thrown together while you’re making an entree.

BEST BROCCOLI EVER (serves 4 or so – copied almost exactly from The Amateur Gourmet)

– 3 medium heads broccoli
– 2 tbsp toasted pine nuts
– 5 glugs EVOO
– 1/2 of 1 lemon (zest and juice)
– 1/4 C. freshly grated parmesan cheese
– 1 tbsp. julienned basil
– 3 garlic cloves, sliced

1. Heat the oven to 425.

2. Cut broccoli heads into medium size florets, wash and dry thoroughly. 

3. Toss broccoli florets and sliced garlic cloves with 4 of the 5 glugs of EVOO, and kosher salt and pepper (approx. 1 tsp. of each).  Arrange in a single layer on a cookie sheet and roast in the oven for 20 – 25 minutes, or until some edges are brown.
  

 4. Meanwhile, toast the pine nuts (if using) and set aside.

5. When broccoli is roasted, remove from oven, zest the lemon half over the broccoli, then squeeze the juice of the lemon over it as well.  Add toasted pine nuts, parm cheese, basil, and another glug of olive oil, and stir to combine.


6. Serve and enjoy – we had this alongside portabella mushroom “pizzas” for a healthy, carb-free, and delicious dinner.

French Onion Chicken


I’ve had an aversion to cooking with chicken thighs since a recipe gone wrong a couple of years ago. When I read about this recipe, though – chicken thighs spiked with dijon mustard, mixed with deeply caramelized onions and topped with a bubbling gruyere – I figured it was time to put them back into the mix. This recipe ended up being one of the tastiest, most deliciously reheated dinners (and lunches) we’ve had in a while.

FRENCH ONION CHICKEN (serves approx. 4)

– 2 large vidalia onions, sliced into thin half-rounds
– 2 lbs. boneless skinless chicken thighs
– 1/2 c. grated Gruyere
– 1 tbsp. butter
– 1 tbsp. EVOO
– 2 garlic cloves, sliced
– 1 tbsp. chopped fresh rosemary
– 1 & 1/2 c. beef broth
– 1/2 tbsp. balsamic vinegar
– 1 tbsp. dijon mustard
– Kosher salt and pepper to taste

1. Caramelize your onions. This, if done properly, will take upwards of 45 minutes. Slate had a cute article about browning your onions a couple of months ago: Why Recipe Writers Lie About How Long It Takes To Caramelize Onions, and you can cut down the time on these if you’re in a hurry, but if you can, try to take the full 45 minutes to caramelize the onions.  You can even do this a day or 2 ahead, and then reheat them.


2. Melt the butter and olive oil in a dutch oven over medium heat, then add the onions and a sprinkling of salt and pepper. Stir, stirring occasionally, for up to 45 minutes.

3. When onions are a rich golden brown color, add the sliced garlic and chopped rosemary, then stir to combine.


4. Add 1 C. beef broth slowly, stirring the pan to scrape up any bits that are stuck to the bottom. Turn heat down to a simmer and let stand for 5 minutes, or until slightly reduced.  Take onions off the heat and set aside.

5. While the onions are caramelizing, heat another pan over medium-high heat. Pat chicken thighs dry and season with kosher salt and pepper. Add chicken to the pan and sear to brown the chicken, approx. 3 minutes on each side. When browned, remove from pan and set aside.

6. Add the remaining 1/2 C. beef broth the pan that just held the chicken.  Scrape up any browned bits on the bottom, then whisk in the balsamic vinegar and dijon mustard. Simmer for approx. 5 minutes or until reduced.
6. Heat oven to 325.

7. Put the browned chicken thighs over the onions in the dutch oven. Pour the beef broth/vinegar/dijon mixture over this, then place a lid on the dutch oven and bake at 325 for 30 minutes.


8. After 30 minutes, remove chicken from the oven, and turn the oven to broil.  Sprinkle gruyere cheese over the dish, then return to the oven and broil for a few minutes, until the cheese is melted and bubbly.
Chicken topped with gruyere, before melting it.
We thought this was fantastic – it was all I could do not to drink the leftover sauce. Completely delicious and definitely added to the rotation!  I hope you enjoy it as much as we did.


36 Years

Happy 36th Anniversary to my Mom and Dad, who are my favorite love story.  I’m so grateful for the life, the love, and the opportunities you’ve created for Colly and me.  
We love you!


Zucchini, Shallot, & Chicken Sausage “Pie” – No Crust


Sometimes I wish zucchini season would last all year long. There are so many things you can use it as a base for – it’s one of my most-used ingredients.

This zucchini “pie” has a base of shredded and drained zucchini, shallots – which soften and release a lovely little flavor during cooking – and cooked chicken sausage. I added some wilted spinach and a combo of mozzarella and feta to this, then topped it with a really thin whole wheat mixture to bind it a little bit. It cooks well, keeps well, and is incredibly filling. You can opt out of the chicken sausage if you want to keep this completely vegetarian – it’s just as good.

ZUCCHINI, SHALLOT, & CHICKEN SAUSAGE “PIE” (adapted from Skinny Taste)
– 2 medium zucchini, washed and shredded. Save the ends and slice about 20 very thin rounds to use as a base layer.
– 2/3 c. shallots, sliced thinly
– 1 c. chicken sausage, uncooked
– 1 c. baby spinach leaves
– 1/2 c. shredded mozzarella
– 1/4 c. crumbled feta
– 2/3 c. whole wheat pastry flour
– 1 tsp. baking powder
– 2/3 c. milk
– 1 tsp. olive oil
– 2 large eggs – 1 white & yolk, 1 white
– 1/2 tsp. kosher salt

1. Preheat oven to 400.

2. Shred the zucchini, and drain it really well. I’ve found the best way to do this is to really wring it out in cheesecloth, which can be found everywhere from grocery stores to Bed, Bath, & Beyond.  Make sure you get as much water out as possible, so the zucchini pie won’t be a zucchini mess. Add drained zucchini to a bowl. 


3. Put the zucchini rounds on a baking sheet over a paper towel. Sprinkle with kosher salt, let sit for ten minutes, and then flip the rounds, sprinkle with salt again, and let sit for another 10 minutes. This will extract the water from the zucchini. After salting both sides, rinse zucchini rounds and dry well.


4. Meanwhile, brown sausage in a pan. When cooked, add spinach, remove from heat, and combine until spinach is wilted. Let cool a bit.

5. Chop the shallots, shred the mozzarella, and add to the shredded zucchini.  Add feta, then add sausage/spinach mixture. Mix well to combine.


6. Whisk together flour and baking powder in a separate bowl. Add milk, olive oil, salt, & eggs to this mixture, and combine. It will be pretty thin – this is good.

7. Spray a pie pan with cooking spray or olive oil.  Make a layer of the zucchini rounds, overlapping each other, for your zucchini pie base.


8. Add the zucchini/shallot/sausage/cheese mixture and spread evenly into the pan.


9. Pour the “batter” mixture evenly over the zucchini mixture.  You can sort of bang the edges or bottom of the pie pan to get the batter into the crevices of the pie, so it will bind it more.

topped with the batter & dusting of parm, right before going into the oven

10. Top with a dusting of freshly grated parmesan cheese, and bake for approx. 30 – 35 minutes, or until a knife can be inserted and removed cleanly from the center of the pie.  Let stand for 15 minutes, then slice and serve. 


Healthy Pumpkin Muffins with Walnuts & Chocolate Chips or Raisins


October and November are the 2 months out of the year that I cook with pumpkin at all. Canned pumpkin pops up (and disappears quickly) during this time, and while I know there’s a lot you can make with it, pumpkin muffins are my go-to for fall.

Pumpkin is loaded with fiber, and walnuts (and dark chocolate!) have heart-healthy fats and benefits. Whole wheat flour keep these muffins on the “good for you” side of things, and while there’s a cup of (organic) sugar in this recipe, there isn’t any oil or “traditional” baking fats. These pumpkin muffins stay moist and flavorful due to the pumpkin puree and greek honey yogurt, and they’re delicious. I made 6 large pumpkin-walnut-chocolate chip muffins and 6 large pumpkin-walnut raisin muffins by splitting the batter at the very end and mixing in the raisins and chocolate chips separately. This is the second batch I’ve made this week – they go fast!

HEALTHY PUMPKIN MUFFINS WITH WALNUTS & CHOCOLATE CHIPS OR RAISINS (makes 12 large muffins)
– 1 1/3 c. Libby’s pumpkin puree, or similar. Make sure you get pureed pumpkin, not pumpkin pie mix.
– 2 egg whites
– 1/2 c. greek honey yogurt (Noosa, if you can find it, because it’s the best greek yogurt on the market)
– 1 c. sugar – organic, if you can find it
– 1/2 tsp. pure vanilla extract
– 1 1/2 c. whole wheat pastry flour, or all purpose flour
– 1 tsp. ground cinnamon
– 1/2 tsp. ground ginger
– 1/2 tsp. ground nutmeg
– 3/4 tsp. salt
– 1/2 tsp. baking soda
– 1/2 c. chopped walnuts (optional)
– 1/4 c. chocolate chips (optional)
– 1/4 c. raisins (optional)

1. Preheat the oven to 350.

2. In a large bowl, combine the pumpkin, egg whites, honey yogurt, sugar, and vanilla. Stir with a whisk to combine.


3. In a separate bowl, combine the flour, cinnamon, ginger, nutmeg, salt, baking soda, and whisk to combine.


4. Add the flour mixture to the pumpkin mixture a little at a time, stirring until just combined. Add walnuts (if using) and fold into the mixture.


5. At this point, either divide the batter & walnut mixture into two bowls, and add 1/4 c. of chocolate chips to one bowl, and 1/4 c. of raisins to the other bowl to make 2 different kinds of muffins, or keep the batter mixture in one bowl and just add 1/2 c. chocolate chips or 1/2 c. raisins to the mixture. Combine, being careful not to overmix.

6. Spray a muffin tin with cooking spray, and spoon equal amounts of the batter into the muffin tins.


7. Bake for 20 – 25 minutes or until a knife can be inserted and removed cleanly. Don’t overbake, or muffins will get hard.  Let cool and enjoy.


Roasted Red Beet, White Bean and Sage “Hummus”


On our way up to Good Commons, one of the snacks they stocked “The Good Bus” with was an incredibly tasty beet and white bean dip. They served it with parsnip sticks, which were crunchy and a little spicy, but I was so surprised by how good this dip was that I knew I had to try and copy it when I got home.

I’ve really tried to incorporate beets into my diet – especially after reading about how beet juice was making the rounds in this summer’s Olympic Village as a natural performance enhancer – but sometimes I just can’t get past the “earthy” (read: dirty) taste they can have.  Roasting them makes them a little sweeter, and the addition of sage lightens the whole dip. I tried to copy this completely by serving it with the parsnip “sticks”, but we went back to old faithful, the pretzel chip.  Celery would be really nice with this too. If you have kids, I’m sure they’d go crazy over the fact that this dip is pink, since it was a cool little detail even for the over 30 crowd (ahem).

ROASTED BEET, WHITE BEAN, AND SAGE “HUMMUS” (adapted from Weelicious)
– 1 small beet, cleaned but unpeeled
– 2 cloves garlic, unpeeled
– 1 15 oz. can white beans, rinsed and drained
– 10 fresh sage leaves, chopped
– 1 tbsp. lemon
– 1/4 c. EVOO

1. Heat your oven to 400.

2. Place washed beet and garlic cloves in a little pouch of aluminum foil.  You want to make sure it’s tightly closed, but also has some space so that air can circulate and the flavors can roast together. Bake for approx. 45 minutes.

3. Remove the pouch from the oven – carefully, some of the beet juice spilled out of mine and it was a MESS – and remove the skin from the beet. Again, beets are messy and will stain just about everything, including your hands.  Either wear disposable gloves when peeling the skin (which should slide right off after the beet is roasted) or use a paper towel to kind of scrub it off. Chop beet roughly, and add to a larger bowl.


4. Remove the skin from the garlic cloves and toss into the bowl with the beets. Add chopped sage, lemon juice, and olive oil, then put the whole mixture into a food processor.


5. Combine in the food processor until smooth. Add kosher salt to taste, then serve “hummus” with celery, carrots, pretzel chips, or parsnip sticks.

Sorry, parsnips. You’re pretty. I tried.


Vermont Yoga Retreat


When Regina and I signed up for a yoga retreat in Vermont a couple of weeks ago, I had no idea that it would come as such a perfect time. Dealing with Brad’s injuries and care these last couple of weeks has been really stressful for him and for me, and I think we both needed some space. Getting to go away to practice yoga 3 times a day, hike the Green Mountains of Vermont, have an incredible private chef cook organic food for us, and be surrounded by the yoga community that’s at the core of Balance Yoga was everything I needed.


Good Commons – a totally charming 1800s home completely revamped into a retreat space – was our spot for the weekend. Tescha, the proprietress, is an adorable, warm woman who definitely surrounds herself with similar people. From the time we on “The Good Bus” picked up our chef, Martin, on the way up to Vermont, we knew we were in for a wonderful weekend.
Martin, Tescha, and Rosie (our masseuse!)


The next couple of days went like this: yoga, gourmet breakfast, yoga, gourmet lunch, yoga, gourmet dinner, glass of wine, bedtime.  Add a day trip to Woodstock for an afternoon of shopping, a hike one afternoon, some hot tub time, an awesome massage, and you have our Thursday – Sunday.  It was fantastic.
The kitchen prepped for Martin with a stock of local, organic food

 We were all so into what Martin was cooking for us, and how tasty it all was! With the exception of one dinner (a fantastic chicken and dumplings stew) it was 100% vegetarian, and you hardly even noticed that the meals didn’t have meat. 

 Vermont was beautiful – so clean and chill and easy. My high school boyfriend Nash went to college at UVM, so I spent some time in Burlington our freshman year, but aside from a skiing trip or two to Stowe while at BC, I don’t think I’ve been to Vermont since college. I have a new appreciation for that kind of space after living in Colorado, though. Similarly minded people who care about their community and their world, who try to practice healthy living through organic choices (in both consumption and decisions), are really inspiring to me. Scranton is an amazing community itself, and I love it here, but I sometimes really appreciate the – should I say – hippie kind of vibe that comes along with that whole “we are a family” thing in Colorado and VT.  I’ve been really fortunate to live and work in a bunch of places throughout this country, and I feel incredibly lucky to have gained the experience that came along with following my wanderlust through my 20s.  NEPA has my heart, but some other places in this beautiful country really speak to my spirit.

bloody mary on a Saturday afternoon


Did I mention that Martin is a nationally acclaimed pastry chef? #omg

A word about yoga. I remember when Madonna came out with her “Ray of Light” album, and the insanely sculpted arms that she had on that tour. When she attributed all that definition to yoga, I couldn’t believe it. Wasn’t yoga just stretching? At the time, my sophomore year of college, yoga was nothing more to me than a class my Seattle-raised boyfriend Kyle liked to take at our gym at Boston College (which I found to be equal parts sexy and weird, if I’m being honest). But Madonna’s arms inspired me. Just like Madge, I would try this yoga thing. 

What followed was my introduction to a practice that has taught me about recognizing and conquering limitations (both physically and mentally), learning to quiet my mind, being fully in the present moment, and making me feel equally strong and graceful. I love running, and totally get how 5 miles makes you feel incredible, but an hour class of yoga just does something different for me. Four days of classes were everything I needed and more. I came back rested, rejuvenated, centered.

Good Commons does more than just yoga retreats – check them out here if you need your own weekend away: http://www.goodcommons.com/ 

And locally, for yoga, Balance Yoga is amazing, and they share some instructors with Mission Yoga  here in Scranton. Jennifer Ciarimboli at Balance put together this retreat, but both studios are incredible for their classes and their community. 

Baked Kale Chips


Kale packs a ton of vitamins into your diet, and on top of that, it contains antioxidants, anti-imflammatory nutrients, and anti-cancer nutrients. There is a ton of kale available at the farmers’ market right now, so I decided to get Brad to try kale chips as an alternative to the bag of pretzel chips we eat on a weekly basis. These kale “chips” look kind of unusual, but are really delicious, healthy, and a great alternative snack. They’ll keep for a couple of days in an airtight container, but odds are they’ll be gone before then!

BAKED KALE CHIPS
– 1 head of kale, “ribs” removed, torn into chip-size pieces
– olive oil (2 tbsp, approx.)
– heavy pinch kosher salt, or Herbamare, or garlic powder

1. Preheat oven to 300.

2. Thoroughly wash the kale, then remove “ribs” and tear into chip-size pieces.
gorgeous kale from the farmers’ market!


3. In a bowl, toss kale with 2 glugs olive oil, massaging onto the kale to make sure each piece is coated. Add seasonings (kosher salt, herbamare, garlic powder, etc.). The flavors will concentrate somewhat when you bake the chips, so add a little less than what you otherwise would.


4. Spread kale chips into a single layer on a parchment paper-lined baking sheet.  Bake at 300 for 20 minutes. I’ve read about kale chips being bitter, but I think the key is not to overcook them – like, at all. 20 minutes at 300 will work for most ovens.


5. Let cool and enjoy!