Kale, Carrot, and White Bean Blend


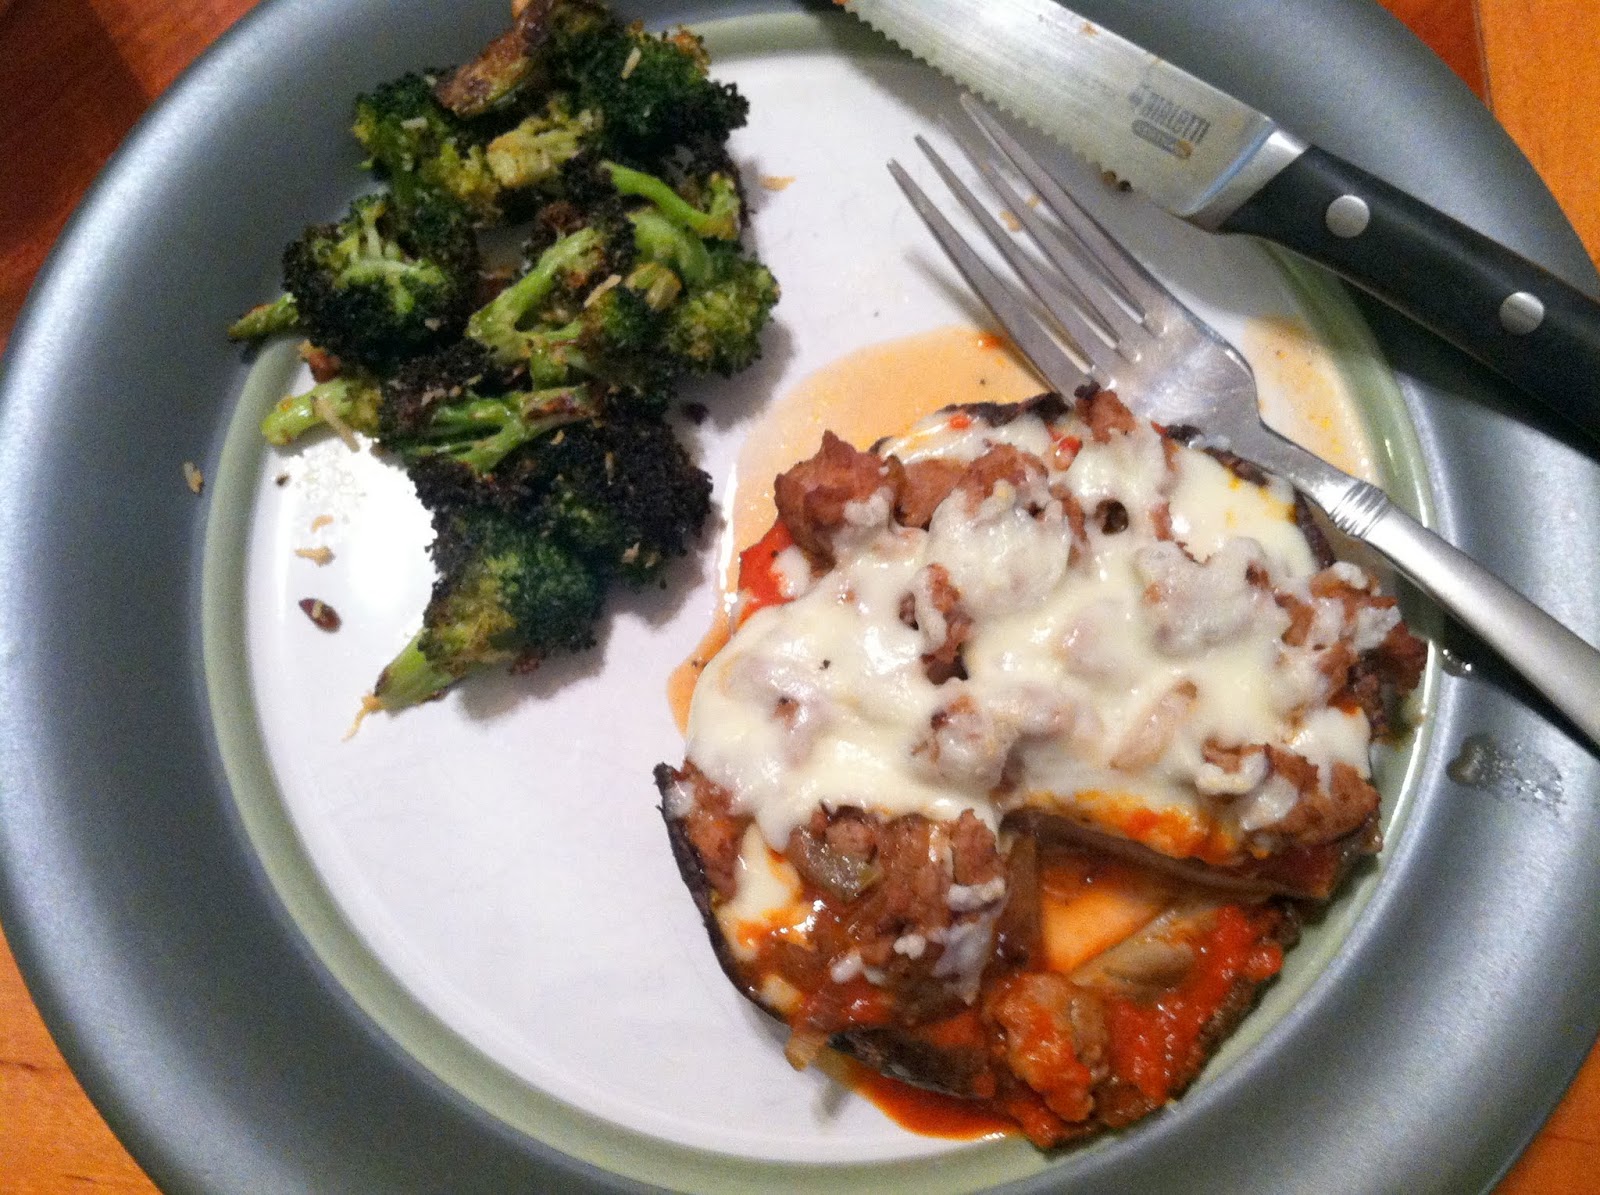
I had a sleepover at my sister’s the other night, and she brought out this deliciously filling “snack” that could have been dinner if it weren’t for the Grotto pizza we were already sharing. This is one of those super easy recipes that you can just throw together with ingredients you already have, and in no time at all you have a hearty, healthy dish (to go with the pizza that you’re eating).

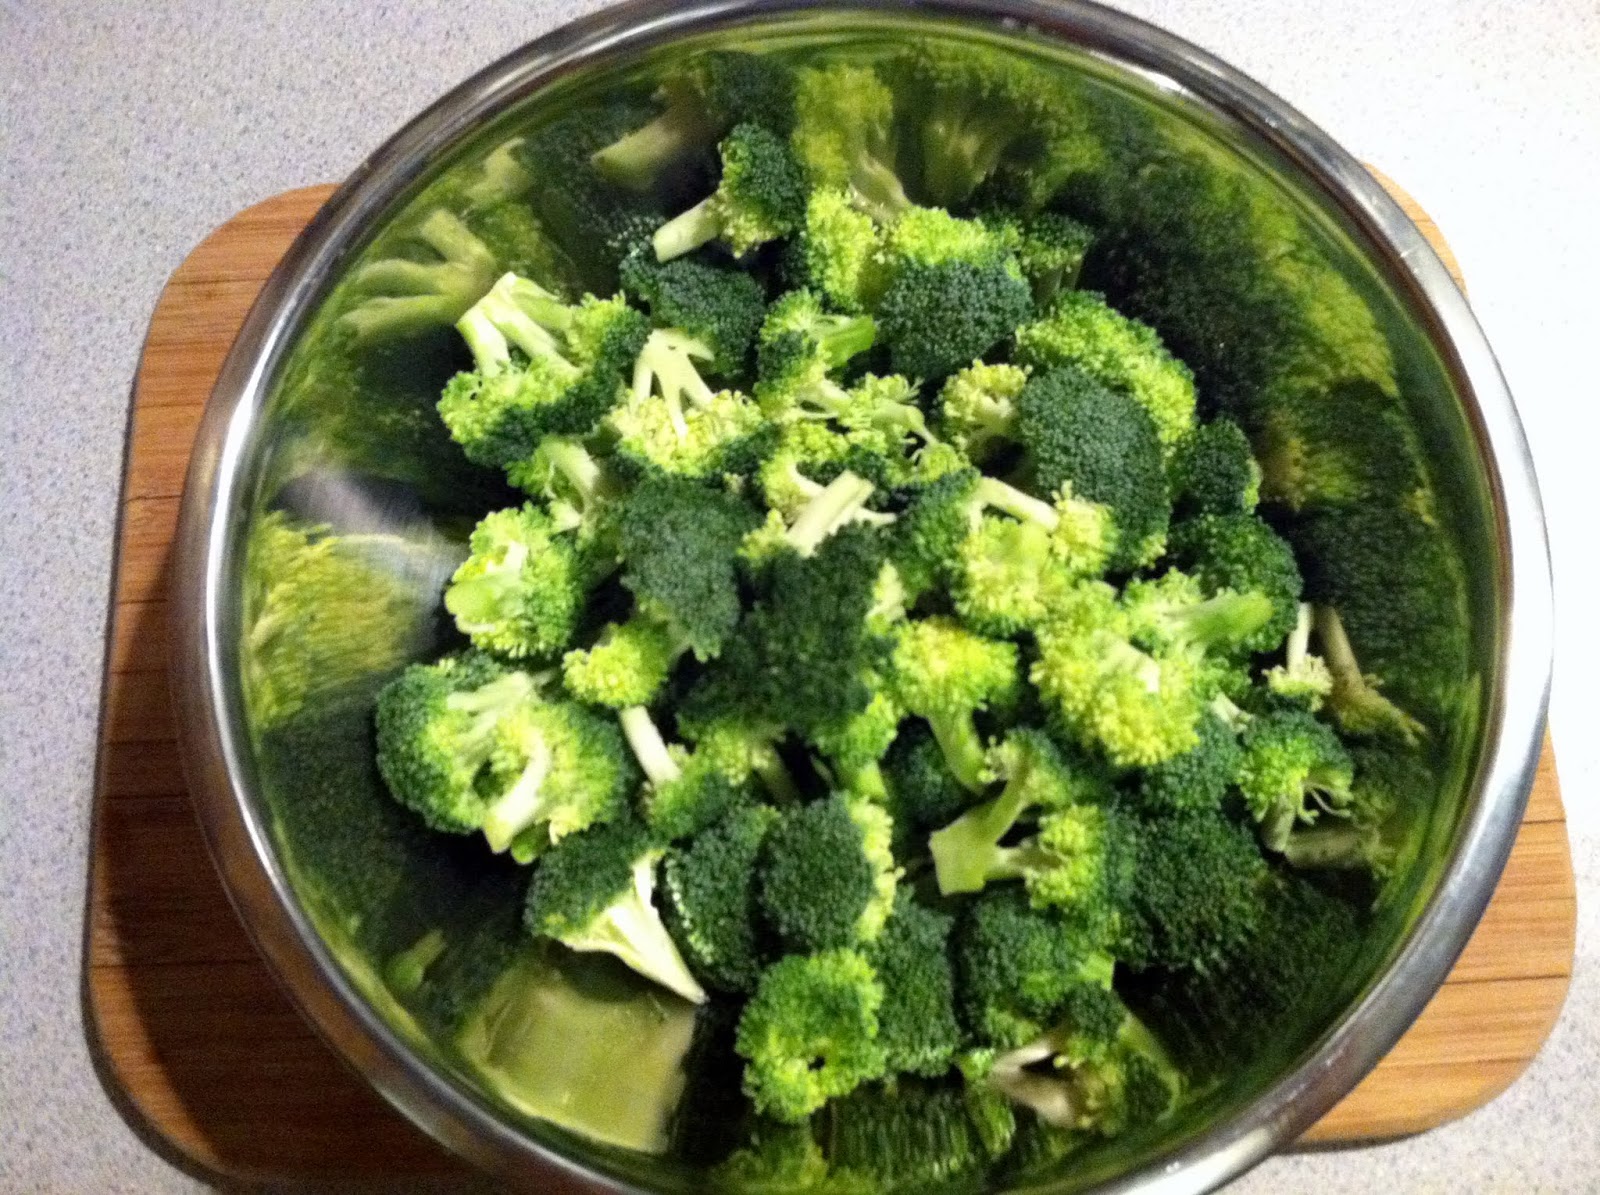
KALE, CARROT, AND WHITE BEAN BLEND (serves 4 as a side or 2 as a main dish)

– 1/2 a bunch of kale, “ribs” removed, washed and roughly chopped
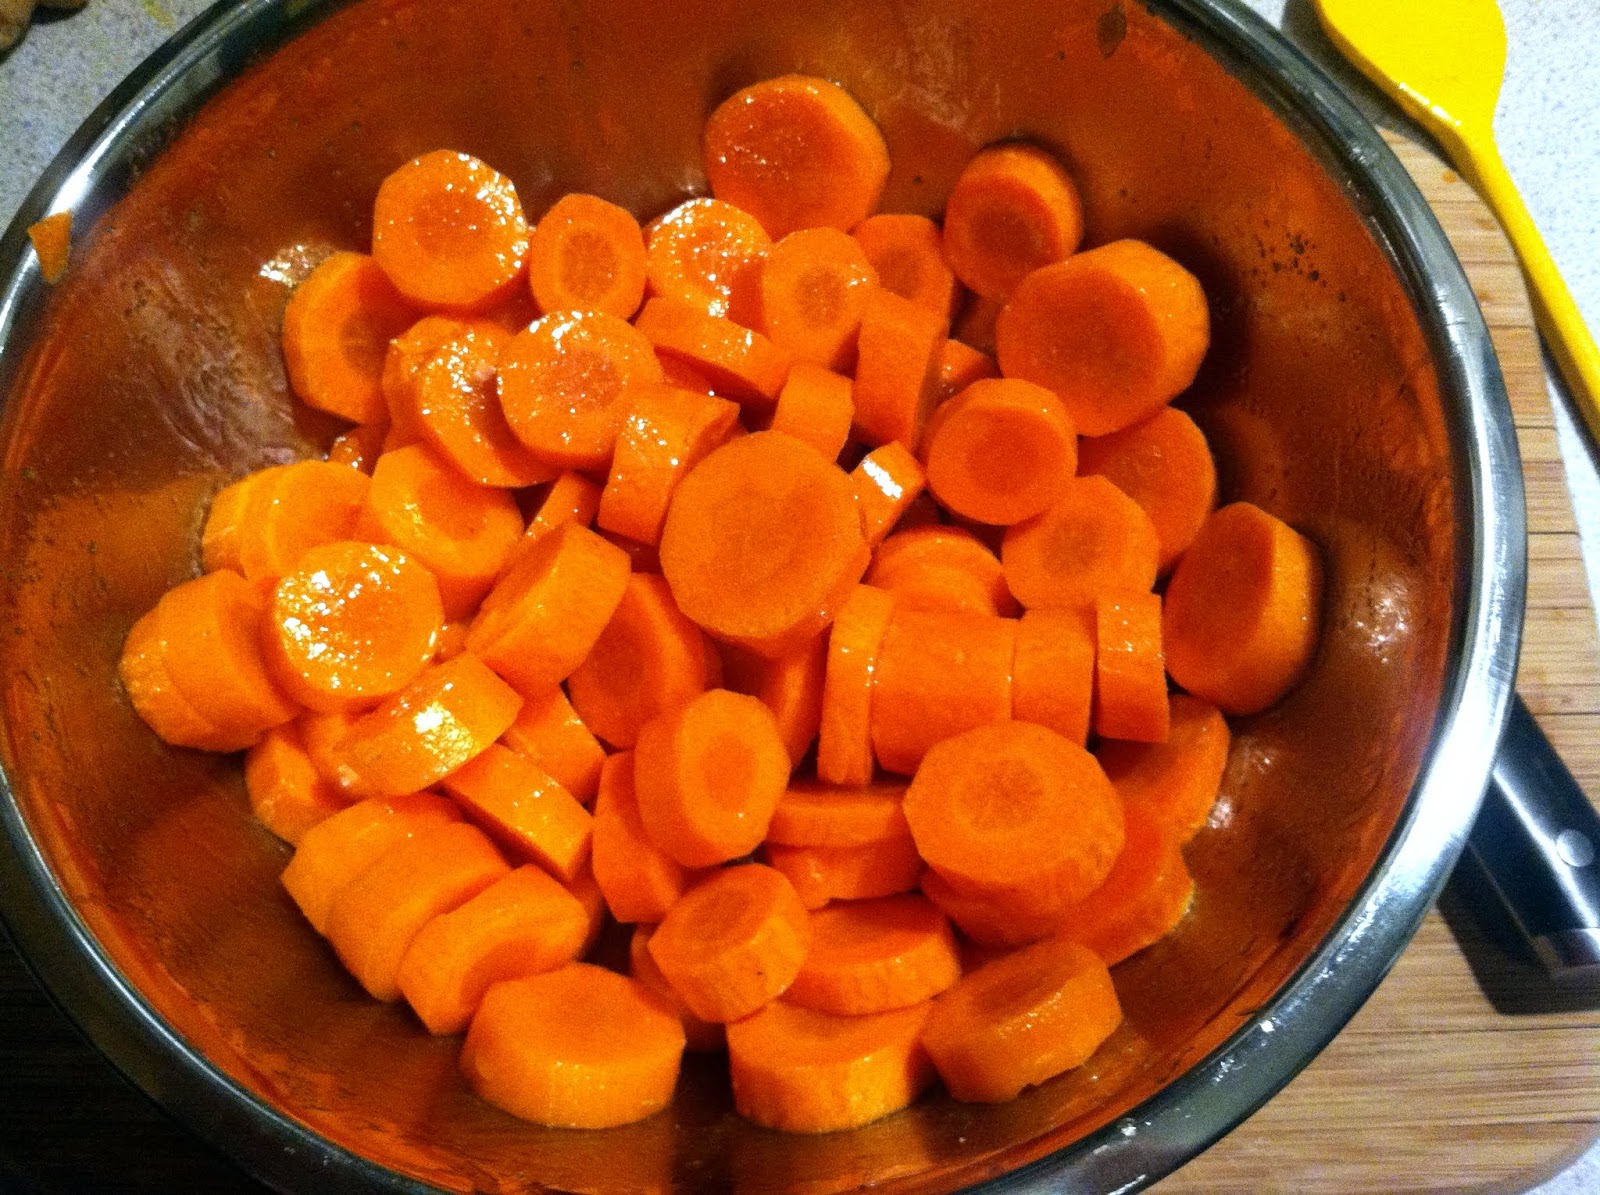
– 3 carrots, peeled and sliced into 1/8 inch rounds
– 1 can white beans, drained and rinsed
– 2 cloves garlic, chopped
– 1 tbsp. EVOO, 1 tsp. butter

1. Wash your kale and carrots. Even though you’re going to peel the carrots, you should wash them anyway. Any dirt on the skin will get dragged into the carrot itself when you peel them unless they’re clean.

2. Remove the “ribs” from the kale, and roughly chop.

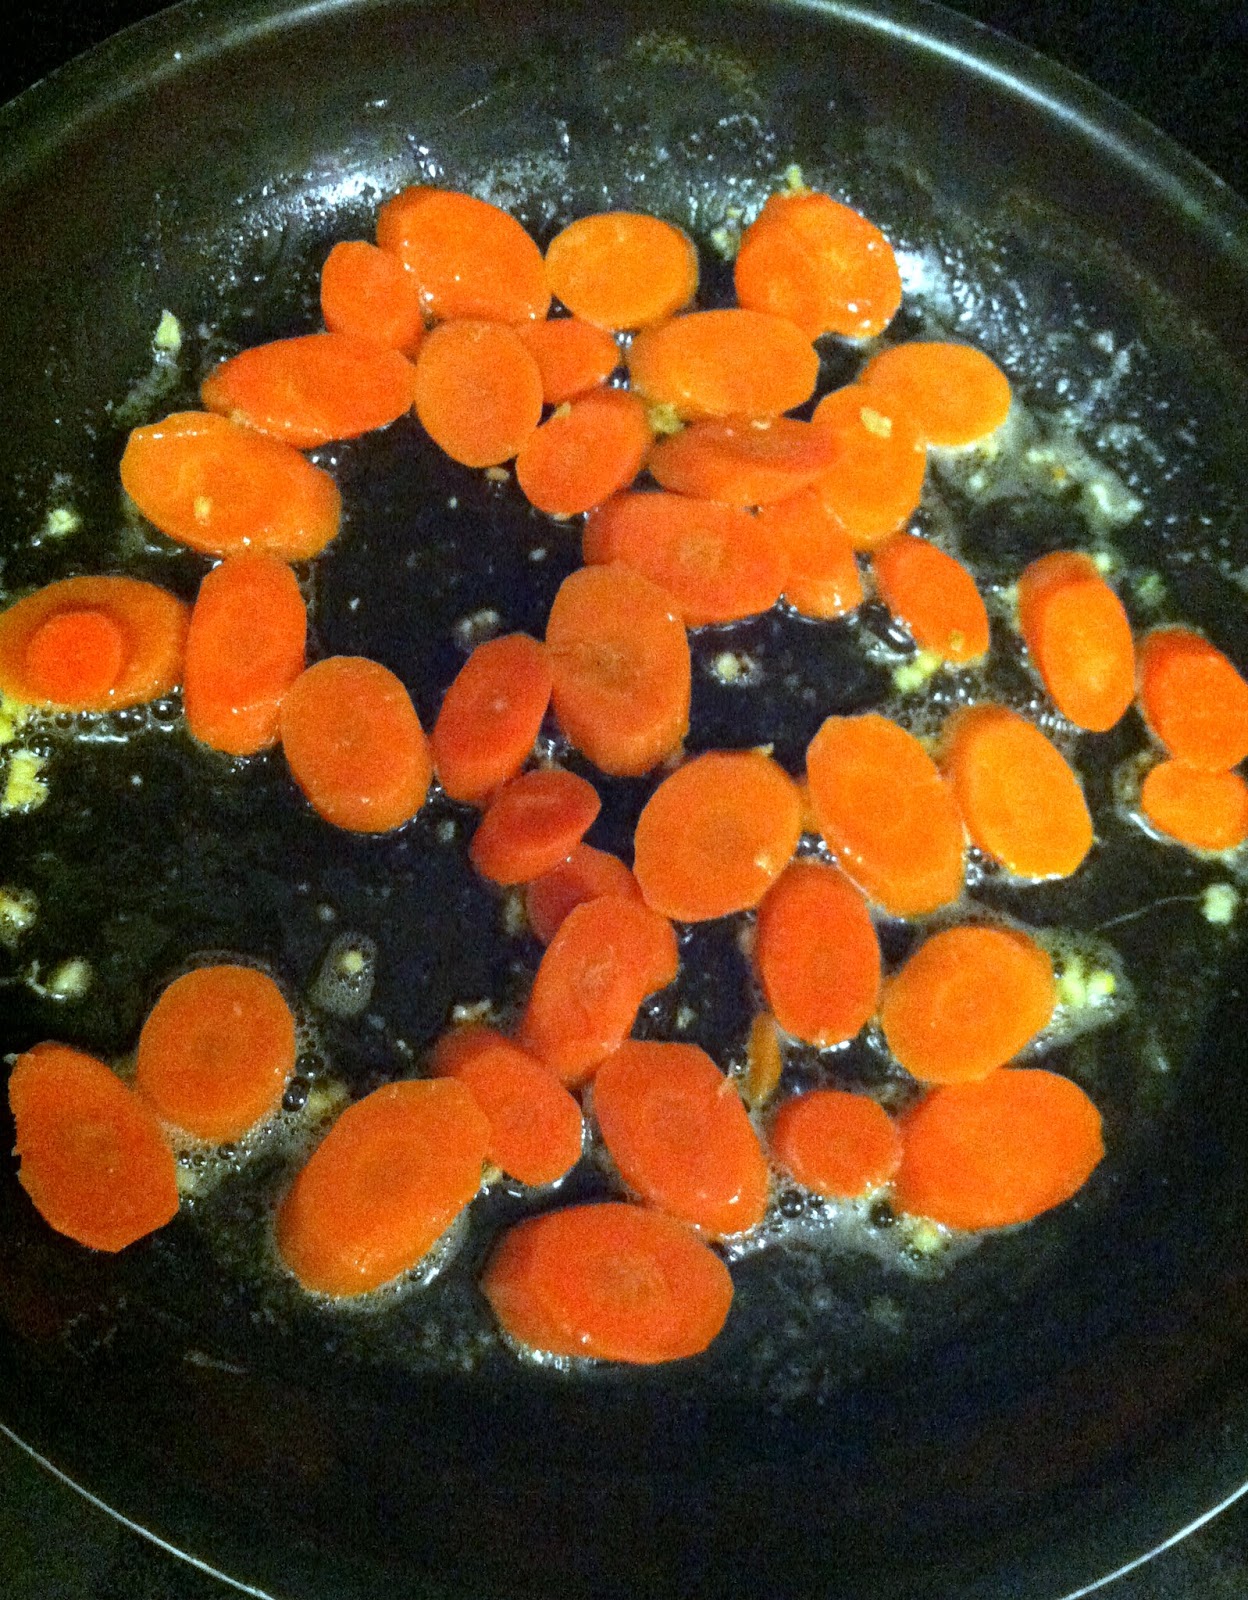
3. Cut the peeled carrots into 1/8 inch rounds.

4. In a large saucepan, bring enough water to cover the carrots to a boil. Add the sliced carrots and boil until just tender (approx. 5 minutes). Drain the carrots and return the saucepan to the burner, now lowered to medium heat.

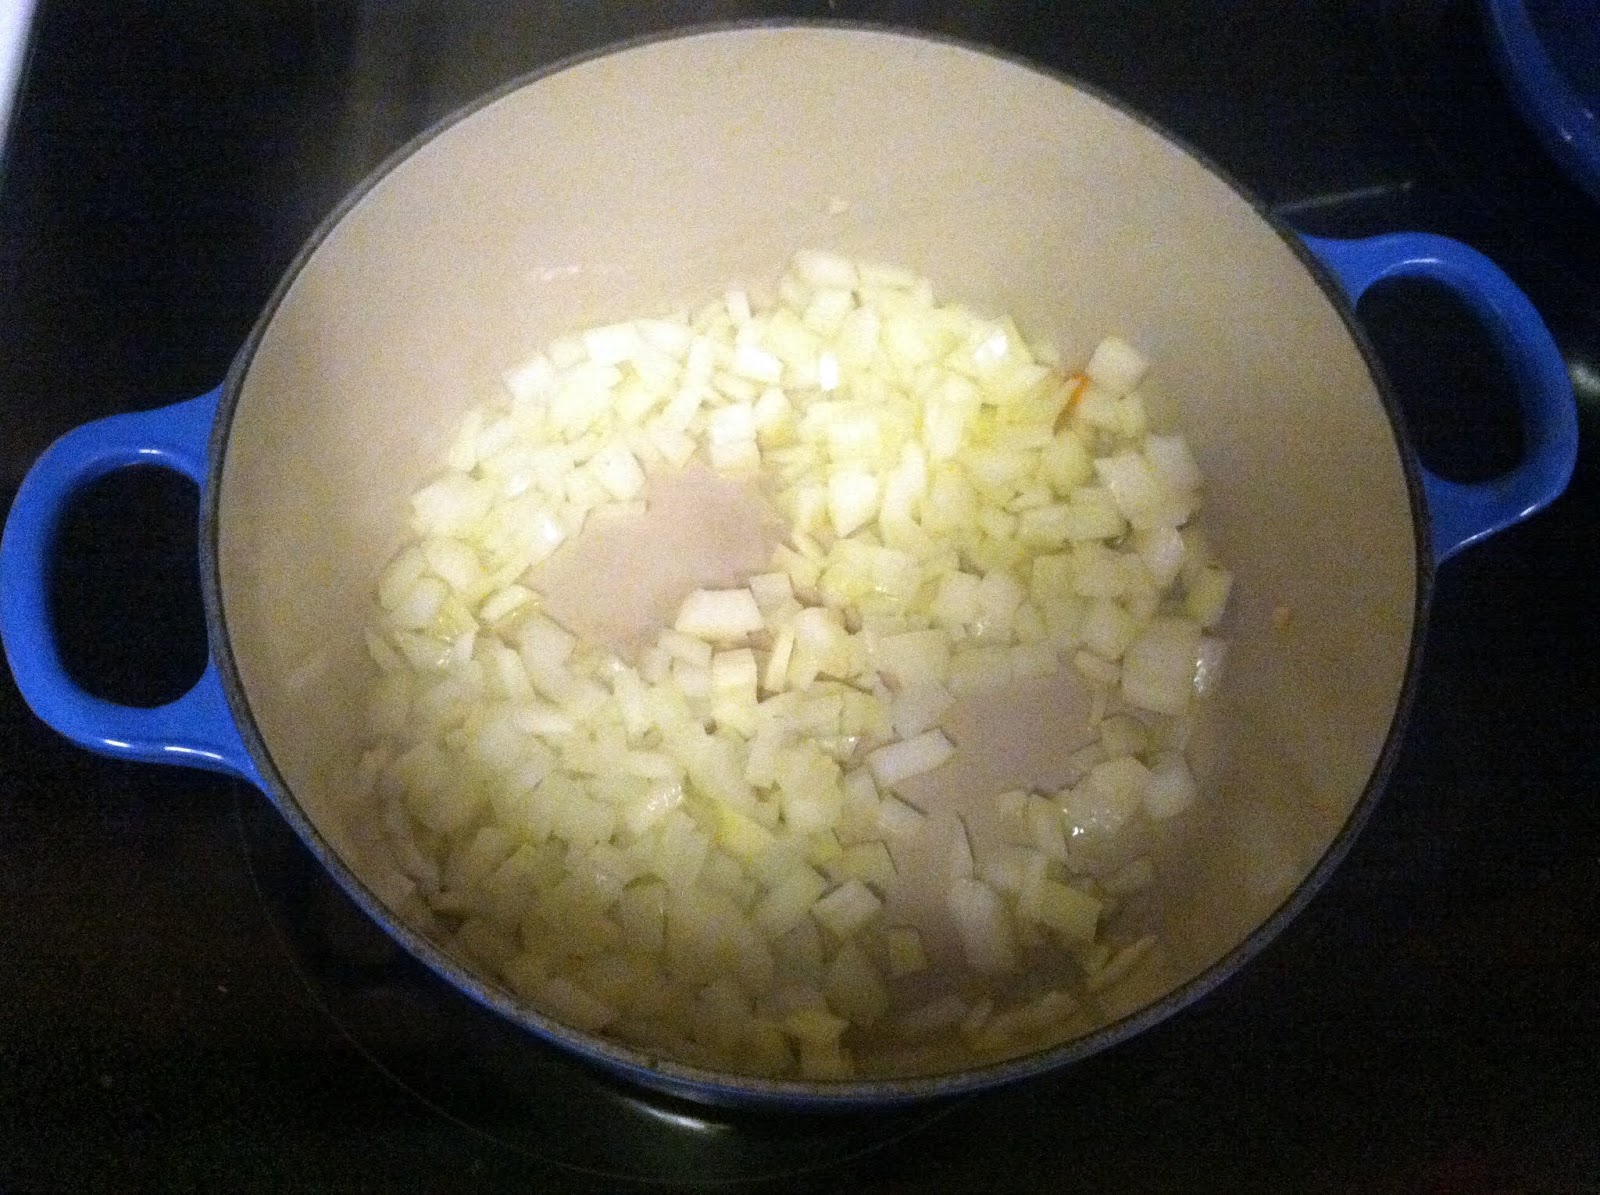
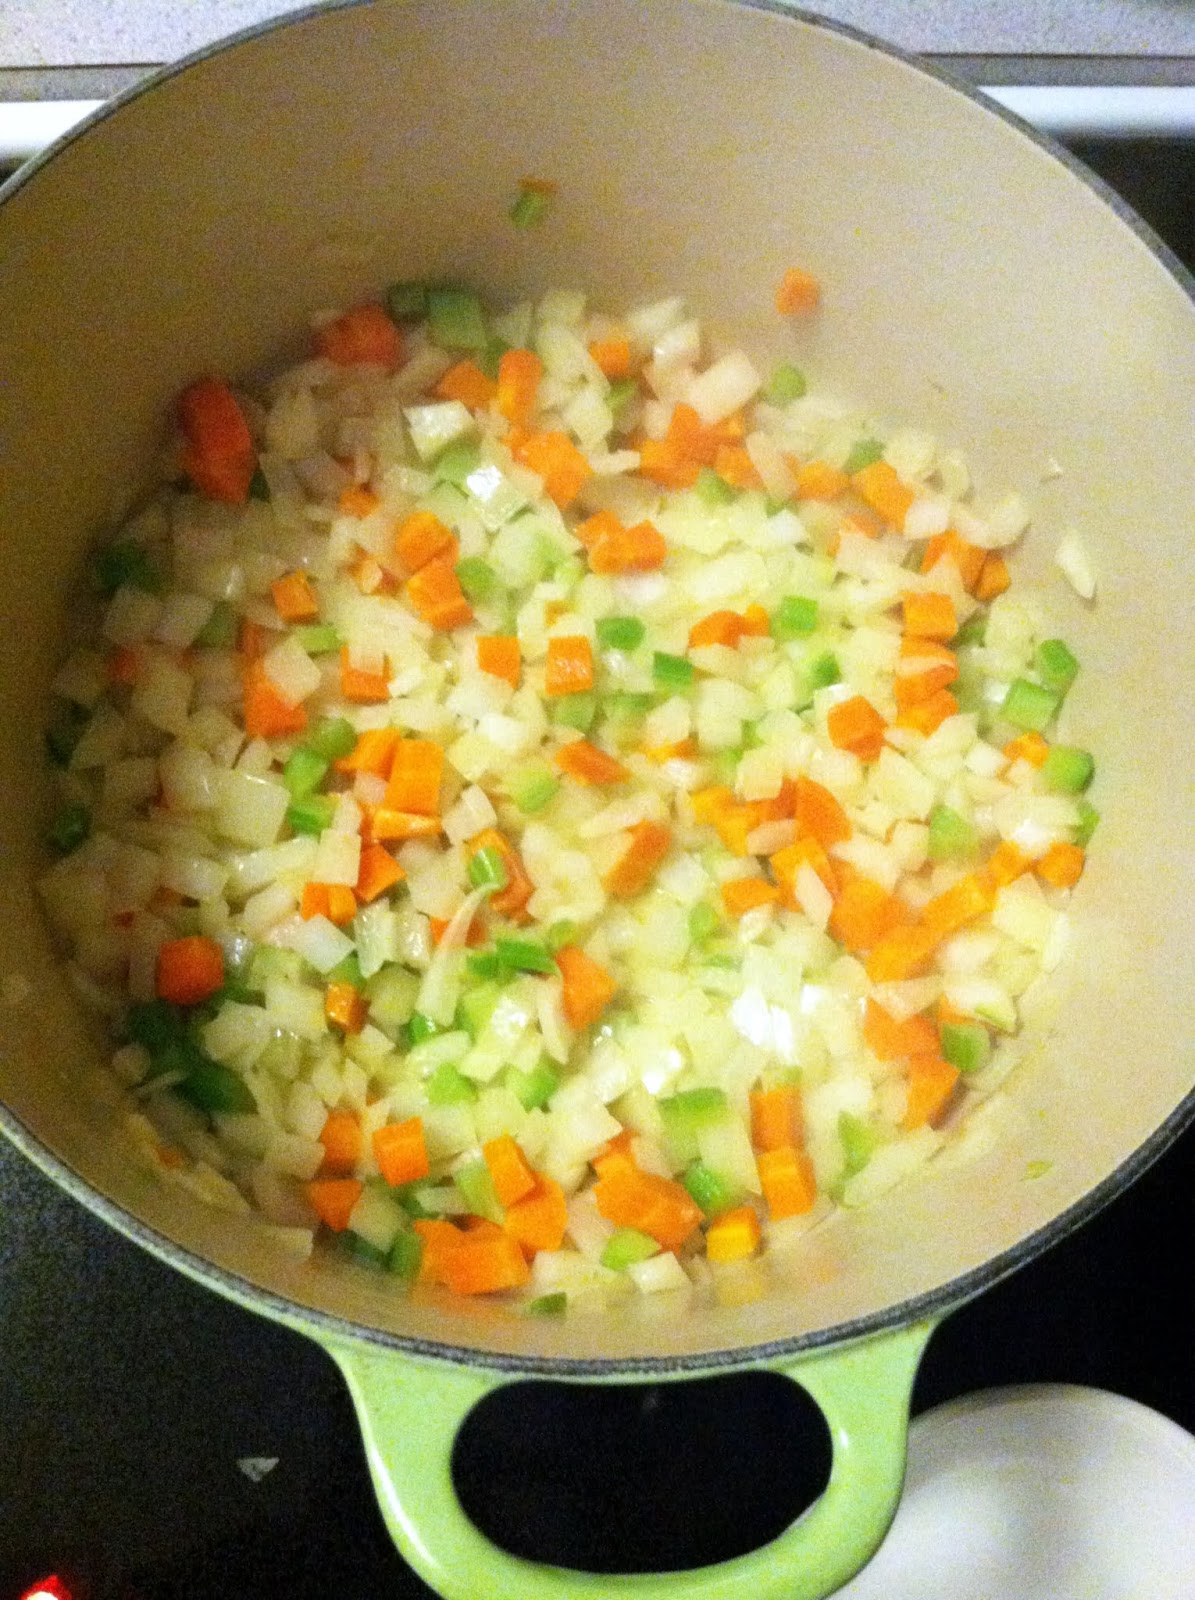
5. Add 1 tbsp EVOO and a smidge of butter to the saucepan and, when hot, add the garlic and stir until fragrant – appox. 90 seconds.

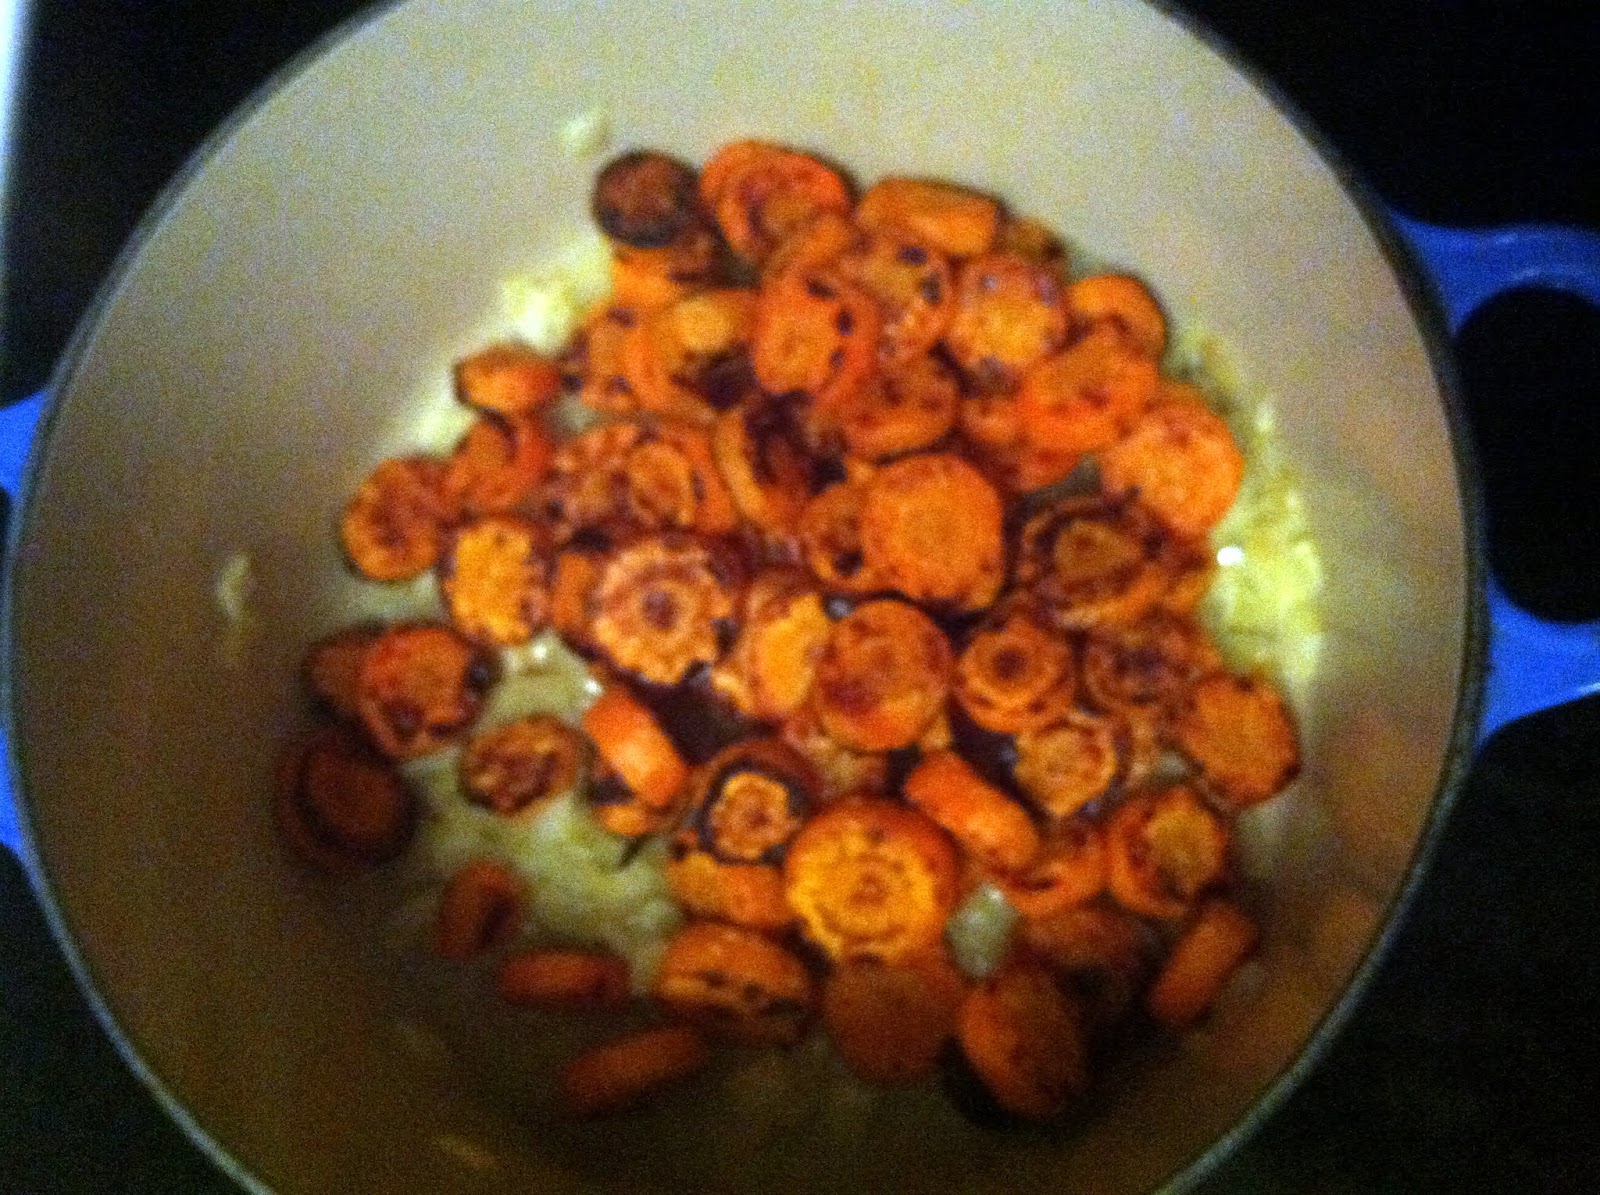
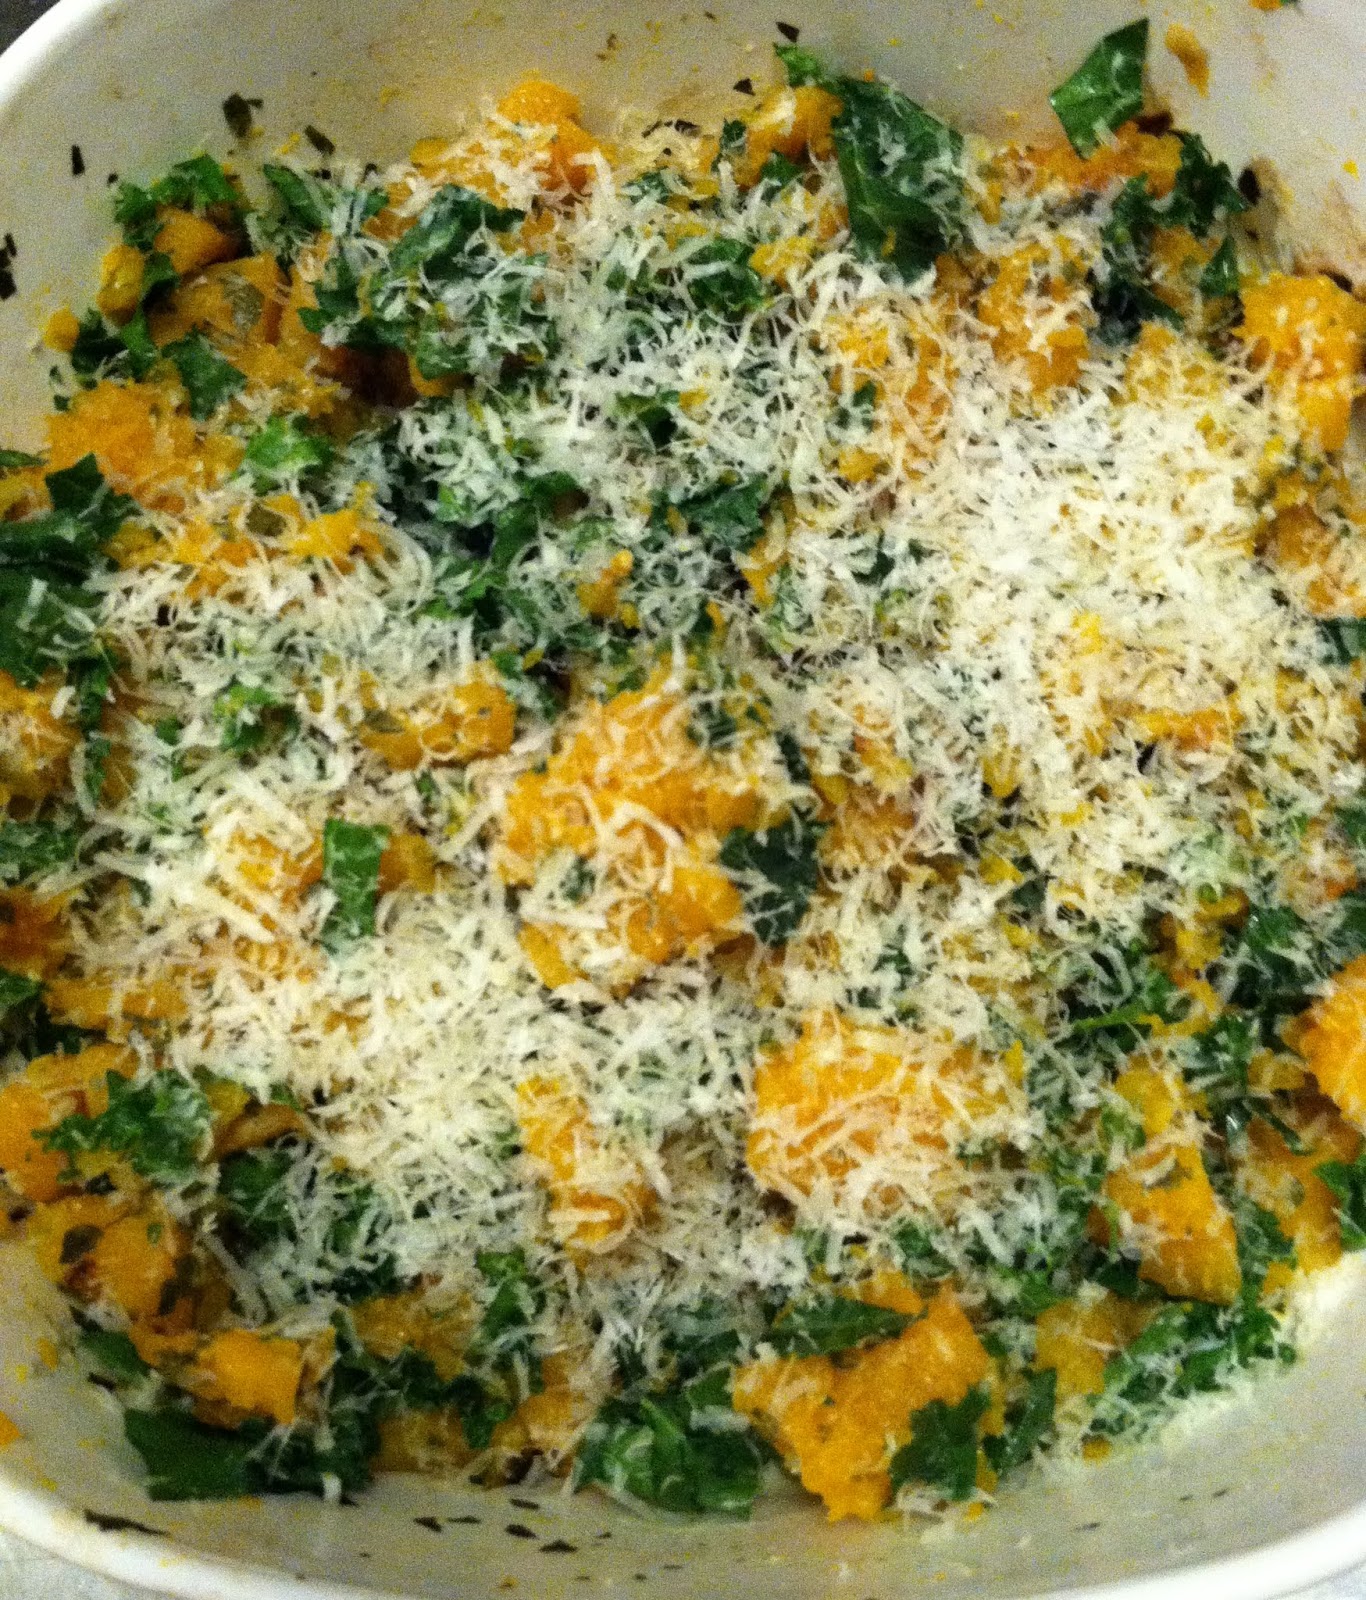
6. Add carrots to the pan and stir to cover with the EVOO/butter/garlic mixture.  Then add the chopped kale, and stir together with the carrots until slightly wilted.
 
7. Finally, add the can of rinsed and drained white beans, and combine with the kale and carrots until beans are warmed through.  Both the kale and carrots will continue to soften during this time, so make sure the kale isn’t too wilted in the step above.

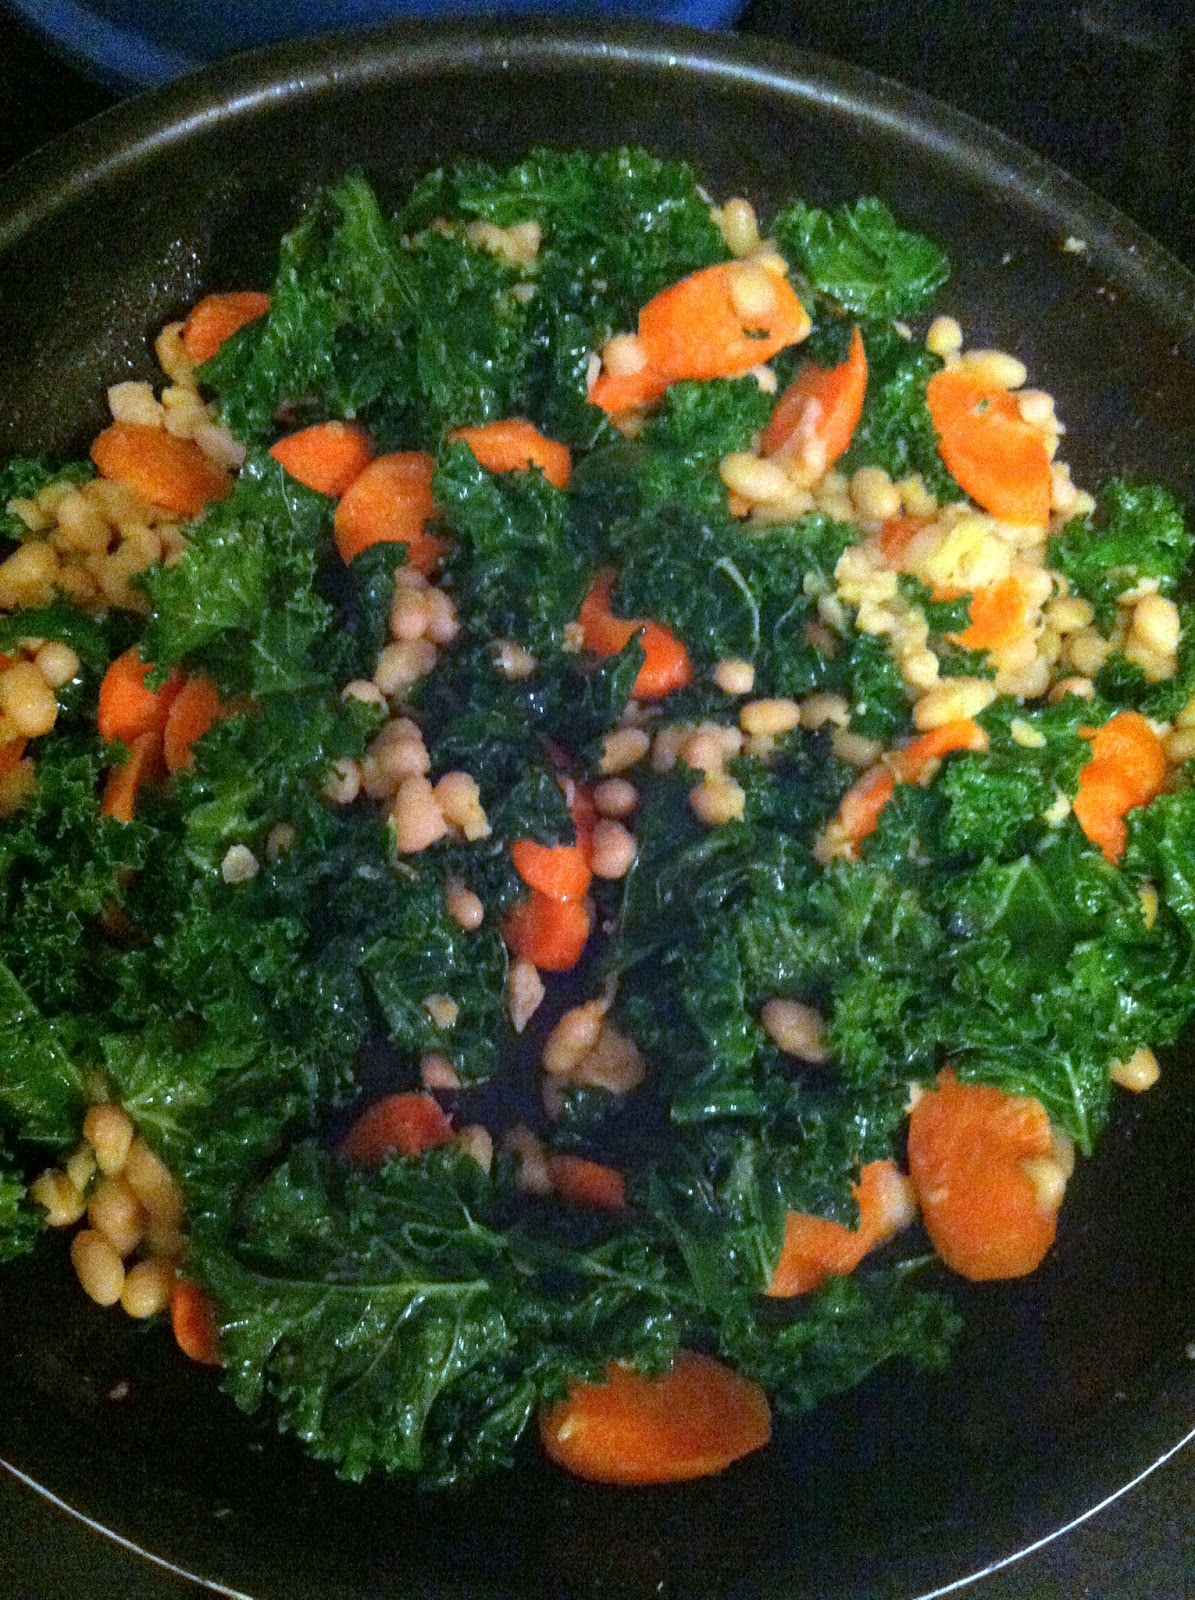
8. Add seasonings if necessary – kosher salt, freshly ground pepper, garlic powder – to taste and serve warm. This is even good cold as leftovers the next day.

— Happy 64th birthday to my mom, who would love this recipe! xoxoxo

Portabello Mushroom “Pizzas”

aka, “Brad’s first time cooking in 8 weeks”.  It was SO NICE to have him back in the kitchen!  We had to do a lot of maneuvering for him to get semi-comfortable, and he had to take a break halfway through, but overall he made one of the best versions yet of portabello mushroom “pizzas”.  These are mainly carb-free, super tasty, and pretty simple, too.  Portabello mushroom caps make a great alternative base for recipes in which you’d otherwise use something with carbs, like a crust.

PORTABELLO MUSHROOM “PIZZAS” – serves 2-5

– 5 portabello mushroom caps, rinsed and dried
– 1/4 c. EVOO
– 1/4 tsp. garlic powder
– 1/4 tsp. kosher salt
– 1/4 tsp. freshly ground black pepper
– 1 1/4 c. your favorite pasta sauce
– 2 c. shredded mozzarella cheese
– toppings: cooked sausage, cooked turkey pepperoni, etc.

1. Preheat oven to 400.

2. Wash the mushroom caps and pat dry. The best way to clean them is to wet a paper towel and clean each mushroom cap individually.  That way, the mushrooms won’t retain the water they would if you cleaned them under a faucet.

3. Place the washed mushroom caps on a baking sheet lined with foil, for easier cleanup. Combine the EVOO, garlic powder, salt and pepper in a small bowl, and brush the mixture all over the mushroom caps.

4. Bake the mushroom caps at 400 for approx. 5 minutes.

5. Remove from the oven, and add approx. 1/4 c. spaghetti sauce to each mushroom cap.  Top with cooked toppings – we used both cooked sausage and turkey pepperoni, and approx. 1/3 c. shredded cheese.


6. Bake at 400 for another 15 minutes or so, until cheese is melted and golden.

7. Serve on their own, or with a side like the Best Broccoli Ever.


Best Broccoli Ever


This recipe was one of Brad’s best finds. He says he made it because of one specific line in the recipe he read online:  “This broccoli is better than a steak”.  It’s kind of unbelievable how roasting veggies makes them completely different, and broccoli is no exception. Add some lemon, parmesan cheese, and toasted pine nuts, and this side could stand on its own (although sometimes nothing can substitute for a steak). It’s delicious and looks like you put a lot of effort into it, but is quickly thrown together while you’re making an entree.

BEST BROCCOLI EVER (serves 4 or so – copied almost exactly from The Amateur Gourmet)

– 3 medium heads broccoli
– 2 tbsp toasted pine nuts
– 5 glugs EVOO
– 1/2 of 1 lemon (zest and juice)
– 1/4 C. freshly grated parmesan cheese
– 1 tbsp. julienned basil
– 3 garlic cloves, sliced

1. Heat the oven to 425.

2. Cut broccoli heads into medium size florets, wash and dry thoroughly. 

3. Toss broccoli florets and sliced garlic cloves with 4 of the 5 glugs of EVOO, and kosher salt and pepper (approx. 1 tsp. of each).  Arrange in a single layer on a cookie sheet and roast in the oven for 20 – 25 minutes, or until some edges are brown.
  

 4. Meanwhile, toast the pine nuts (if using) and set aside.

5. When broccoli is roasted, remove from oven, zest the lemon half over the broccoli, then squeeze the juice of the lemon over it as well.  Add toasted pine nuts, parm cheese, basil, and another glug of olive oil, and stir to combine.


6. Serve and enjoy – we had this alongside portabella mushroom “pizzas” for a healthy, carb-free, and delicious dinner.

Roasted Red Beet, White Bean and Sage “Hummus”


On our way up to Good Commons, one of the snacks they stocked “The Good Bus” with was an incredibly tasty beet and white bean dip. They served it with parsnip sticks, which were crunchy and a little spicy, but I was so surprised by how good this dip was that I knew I had to try and copy it when I got home.

I’ve really tried to incorporate beets into my diet – especially after reading about how beet juice was making the rounds in this summer’s Olympic Village as a natural performance enhancer – but sometimes I just can’t get past the “earthy” (read: dirty) taste they can have.  Roasting them makes them a little sweeter, and the addition of sage lightens the whole dip. I tried to copy this completely by serving it with the parsnip “sticks”, but we went back to old faithful, the pretzel chip.  Celery would be really nice with this too. If you have kids, I’m sure they’d go crazy over the fact that this dip is pink, since it was a cool little detail even for the over 30 crowd (ahem).

ROASTED BEET, WHITE BEAN, AND SAGE “HUMMUS” (adapted from Weelicious)
– 1 small beet, cleaned but unpeeled
– 2 cloves garlic, unpeeled
– 1 15 oz. can white beans, rinsed and drained
– 10 fresh sage leaves, chopped
– 1 tbsp. lemon
– 1/4 c. EVOO

1. Heat your oven to 400.

2. Place washed beet and garlic cloves in a little pouch of aluminum foil.  You want to make sure it’s tightly closed, but also has some space so that air can circulate and the flavors can roast together. Bake for approx. 45 minutes.

3. Remove the pouch from the oven – carefully, some of the beet juice spilled out of mine and it was a MESS – and remove the skin from the beet. Again, beets are messy and will stain just about everything, including your hands.  Either wear disposable gloves when peeling the skin (which should slide right off after the beet is roasted) or use a paper towel to kind of scrub it off. Chop beet roughly, and add to a larger bowl.


4. Remove the skin from the garlic cloves and toss into the bowl with the beets. Add chopped sage, lemon juice, and olive oil, then put the whole mixture into a food processor.


5. Combine in the food processor until smooth. Add kosher salt to taste, then serve “hummus” with celery, carrots, pretzel chips, or parsnip sticks.

Sorry, parsnips. You’re pretty. I tried.


Fish En Papillote (“Fish in Parchment Paper”)


This has got to be one of the simplest, healthiest, most delicious things I make. It’s pretty. It has a great presentation. There is next to zero cleanup, and it’s about as “clean” as you can get as far as recipes are concerned. Basically, you pick your veggies and fish, pick your herbs & other flavorings, pack it all up in a cute little parchment paper pouch, and then throw them in the oven. The fish and flavorings will steam and cook all together, blending flavors and creating an incredibly tasty dinner. Best of all – this can be ready start to finish in 30 minutes, which makes it a perfect weeknight meal, but it looks so nice that it could be served at dinner parties. 

FISH EN PAPILOTTE (serves as many people as you need it to) 
– 6 oz. of fish per person (any kind – I used cod here, but flounder, tilapia, monkfish, sea bass, salmon, etc. would work. You get the picture.) 
– Veggies. I would julienne squash, carrots, peppers. You can half cherry tomatoes. Cut onions or shallots into thin strips, cut baby potatoes into thin rounds. I used baby bok choy this time, and just put a couple of leaves into each packet, which was also really nice. 
– Herbs. Thyme is fantastic, savory is a bit stronger but also nice. Fresh is best, but if you add dried, add about half of what you would with fresh herbs. 
– Flavors. Thin rounds of lemon to top, a splash of white wine, super thin shavings of butter, etc. 
– Kosher salt and pepper to taste

1. Heat oven to 375. 

2. Prep whatever veggies you’ve decided to use.

lemon sliced into thin rounds, baby bok choy, halved cherry tomatoes, julienned zucchini, shallot cut into thin rounds

3. Cut a heart (like you did in grade school – half a heart on folded paper, then unfold) in parchment paper. Spritz one side with olive oil.


4. Add veggies to the side of the parchment paper with olive oil. Top with the fish, then lemons/butter/”flavors”. Top with salt & pepper.


5. Fold the other half of the “heart” over the fish & veggie combo. Working from the top, crimp the paper over itself into little pleats so it forms a little pouch. Make sure it’s a bit loose in the middle, so steam can circulate and cook the fish and veggies inside.


6. Put pouches on a baking sheet to catch any juices that spill, then bake for 20 minutes or so, or until fish is flaky and cooked through.  The parchment paper will puff a bit, and get golden brown in spots.


7. Serve pouches on individual plates. You can either cut into the top part of the pouch to eat directly from there, or you can open the entire pouch to empty the contents on the plate. The juices (and flavors) will stay concentrated a little more if you do it the first way, but either way, it’s a delicious dinner that I hope you enjoy as much as we do!

Tuna Chickpea Salad with Cucumber and Red Onion – No Mayo

Canned tuna can be so much more than something that’s mixed with mayo, onion, and celery, and served on a sandwich. Mayonnaise kind of skeeves me out, but I get that it’s unavoidable sometimes. This tuna salad, however, substitutes mayo with an olive oil-lemon vinaigrette, adds chickpeas, and some teeny tiny pieces of red onion and english cucumber. It’s fresh, light, and healthy – and actually keeps really well for up to 2 days – I think it’s a perfect lunch.

TUNA CHICKPEA SALAD WITH CUCUMBER AND RED ONION
– 2 cans tuna (a note about this – I know canned tuna can be loaded with mercury. If you can find it, Wild Planet has incredible canned, sushi-grade and wild-caught tuna)
– 1/2 english cucumber, diced into tiny pieces
– 1/4 red onion, diced into tiny pieces
– 1 can chickpeas, drained and rinsed
– handful of parsley, chopped
– Kosher Salt & Pepper to taste
For Dressing:
– Juice of 1/2 lemon
– 2 tbsp. EVOO
– Kosher salt (or Herbamare for a little extra boost of vegetables and minerals) and freshly ground black pepper to taste


1. In a medium size bowl, combine chickpeas, tuna, and parsley.

2. Finely chop the cucumber and red onion. The tiny size of these pieces really “makes” this salad – the overall taste is just different, somehow, from a salad that would have larger chunks of cucumber and red onion. 


Remove the middle “seeded” part of the cucumber (even though english cucumbers are seedless) to get a little more color from the dark green skin of the cucumber.


3. Add cucumber and red onion to chickpea/tuna/parsley mix.

4. Combine dressing ingredients, adjust seasonings to taste.

5. Pour dressing over tuna/chickpea/cucumber/red onion mixture. Stir well to combine. If tuna seems a little dry, add more olive oil and/or lemon juice to taste. Serve by itself or in a wrap with some lettuce.


Roasted Carrot Soup With Thyme and Ginger (aka, “Finally Went to the Farmers Market”)

I finally got out today to go grocery shopping, so we can stop the whole “eating every meal as take-out” thing we’ve been doing. And we’re starting small. This roasted carrot soup is one of the simplest, most surprisingly delicious things I make. The roasted carrots get sweeter, and give the soup this depth of flavor that’s incredible. Since there are only 6 ingredients in this, make sure you get the best quality available – locally grown carrots, a good organic vegetable stock (I use either Pacific or Imagine broths, which are both amazing), etc. This soup tastes so flavorful and rich, you won’t believe so little went into it.

ROASTED CARROT SOUP WITH THYME AND GINGER (recipe source: Food52)
– 8 carrots
– 1/2 vidalia onion, chopped
– 6 cups vegetable stock (8 oz. = 1 cup, so 48oz.)
– 1 piece ginger, peeled, approx. 1 inch long
– Couple sprigs of thyme
– 2 garlic cloves, chopped
– Kosher Salt & freshly ground black pepper to taste
– EVOO

1. Wash carrots, then peel and cut into 1/4 inch rounds. Even though you’re peeling the skins, these still grew in the ground and are dirty. Peeling the skin is going to drag any debris from the carrot skin into the carrot itself unless you wash them beforehand.

2. Toss carrots with a glug of olive oil and sprinkle generously with kosher salt.  
3. Arrange in a single layer on a baking sheet, then broil on high until the brown and soften, flipping every five minutes or so. If the carrots get blackened edges a little, don’t worry – this actually adds a nice dimension to the soup.

2. In a smaller saucepan, bring vegetable stock to a boil, then add peeled ginger and thyme spring. Simmer 15 minutes (while the carrots are roasting).

3. Meanwhile, in the pot you’re going to use for your soup (I use a Le Creuset Dutch Oven for this, and just about everything else – it’s borderline impossible to mess up cooking in these), “sweat” the onion in 1 T. olive oil and a pinch of kosher salt over medium-high heat until soft and translucent.  Add garlic and stir until fragrant (90 seconds or so), then add carrots.

4. Remove the ginger and thyme from the vegetable stock and discard.  Add stock to the pot with the onion and carrot mixture. Bring to a boil and then simmer 5-10 minutes until the carrots are soft.
5. Using an immersion blender (this one looks fantastic) or a regular blender, puree the soup. If you use a regular blender, make sure your soup has cooled – if it’s hot, it could explode in the blender.

6. When soup is pureed, salt and pepper to taste. Garnish with thyme sprigs to make it look pretty. We had this soup, a roast chicken, and a salad with local greens for the first meal I cooked in over a week. So good.

Roasted Butternut Squash Soup


This roasted butternut squash soup just nails it. It’s basically pureed squash and chicken (or veggie) broth, some added vegetables, spices and a splash of heavy cream. I think it would be great for kids, or even baby food, minus the heavy cream and spices. That bit of info, for me however, is filed away under “for future reference”, at least for the time being. :]

ROASTED BUTTERNUT SQUASH SOUP (makes a giant pot of soup that freezes really well, too)

– 2 large butternut squash (squashes??)
– 2 celery stalks, chopped
– 2 carrots, chopped
– 1 vidalia onion, diced
– 6 cups chicken broth (this will depend on the height of your squash, though. I’d buy 64 oz. of chicken broth just to be safe)
– 1 T. butter
– 1 T. EVOO
– Splash of heavy cream, or up to 1/4 c. to taste
– Kosher Salt
– White pepper (this blends into the soup nicely)
– Freshly grated nutmeg
– 8-10 sage leaves, chopped

1. Preheat oven to 400.

2. Pierce each squash with a fork or skewer a few times. Cut each squash in half, length-wise, and scoop out the seeds and stringy things at the bottom of the squash. Rub with a couple of drops of olive oil, then roast, cut-side down, for approx. 30 – 45 minutes. Set aside and allow to cool.


3. In your soup pot (I cannot say enough great things about Le Creuset ), heat 1 T butter and 1 T olive oil over medium high heat. Add chopped onion, celery, and carrot, saute for 10 minutes or until soft.  You want these to “sweat”, not brown, so make sure you give them some room, and salt them with some Kosher salt to draw out as much water as possible.

Look at this Farmers’ Market celery!!! Unbelievable.


3. When squash is cool enough to handle, peel off the skin. This should come right off, but cut away anything that remains. Roughly chop the roasted squash into chunks.


4. Add squash to the onion/celery/carrot mixture. Add chopped sage and approx. 1 T. of Kosher salt. Add chicken (or vegetable) stock until it just covers the squash in the pot. 


5. Bring to a boil, cover, and reduce heat to low. Simmer for 45 minutes – 1 hour. 

6. After an hour, use an immersion blender to puree the soup into a creamy consistency. Breville makes great immersion blenders, and we are definitely registering for one, since the one I use (all the time) I won during a “Yankee Swap” at my very first job out of college at MSPCC.  If you don’t have an immersion blender, you can use a regular blender. Just make sure the soup is cool, because if it’s hot, it could explode in your blender (really).


7. Season to taste with nutmeg, white pepper, Kosher salt. Swirl in heavy cream for some richness.


— This soup will continue to blend the flavors, so when you think you’re “almost there” with the spices, STOP.  It’ll come together perfectly in a couple of hours!  You can even throw this together the night before, then reheat for dinner or lunch the next day to get that perfect flavor combination.

Roasted Butternut Squash and Kale “Au Gratin”

It’s butternut squash season!!  I look forward to this every year. Butternut squash is the basis for some of my favorite fall recipes, from soup to sides to main dishes. This side is savory due to the roasted squash and a light dusting of parmesan cheese, and has an added punch of health benefits with the addition of the kale. I could have eaten this on its own instead of as a side. It was great.

ROASTED BUTTERNUT SQUASH & KALE “AU GRATIN” (serves approx. 4)

– 1 large butternut squash, roasted and cubed
– 2 cups kale, de-stemmed and chopped
– 2 cloves garlic, diced
– Freshly grated parmesan, approx. 1/4 cup

1. Cut the butternut squash in half. I’ve learned that the easiest way to do this is to poke a couple of holes in the squash while it’s still whole, and throw it in the oven at 400 for maybe 15 minutes.  It should soften enough in that time that you can cut it in half, lengthwise, without feeling like you’re going to cut off your fingers accidentally.


2. Scoop out the seeds and stringy stuff at the bottom of the squash. Rub each half with a little olive oil, and place cut-side down on the baking sheet. Roast for approx. 30 – 45 minutes (depending on the size of the squash). Peel and cube squash – it should still be a little firm, but if not, don’t worry about it too much. Lower oven temp to 350.

3. In a saute pan, heat 1 tbsp olive oil, and add chopped garlic. Stir until fragrant, approx. 90 seconds. Add chopped kale and stir to combine until wilted. Set aside.

4. Lightly mist a baking pan with olive oil, then add kale/garlic mixture and cubed squash. Stir to combine, then top with the grated parmesan cheese. Bake at 350 for approx. 10 minutes, or until cheese is melted.


Zucchini Parmesan

Zucchini season is winding down, so in one of my last zucchini-based recipes of the season, I tried this delicious looking zucchini parm. I don’t know if this necessarily falls under the category of “healthy”, considering the cheese and the sauce, but the coating on the zucchini is nice and light, and this could really be served as a meal instead of a side. We loved it.

ZUCCHINI PARMESAN (serves 4-6 as a side)

– 3 large zucchini, washed and cut into 1/4 inch rounds (leave skin on), or cut into strips. Strips might actually be really nice to make this more of a “lasagna”.
– Sauce, approx. 2 cups
– Mozzarella, approx. 1 & 1/2 cups
– Freshly grated Parmesan, approx. 1/4 cup
– Olive Oil
– Breadcrumbs, 2 cups
– Freshly grated Parmesan – 1/4 cup (added to breadcrumb mixture)
– Kosher Salt
– Extra Virgin Olive Oil

1. Preheat oven to 375.

2. Cut zucchini into rounds or strips, and place on a cooling rack over a paper towel. Sprinkle liberally with kosher salt. This draws out the water from the zucchini, so that it bakes a little more crispy, a little less soggy.


3. Look at all the water that’s coming out of these!! Would you ever think?  After about 20 minutes, flip the zucchini rounds/strips, salt the other side, and let sit for another 20 minutes to fully extract as much water as possible. Then, rinse them in a colander and lay them in one layer to dry.


4. When dry, toss zucchini in a bowl with 1-2 tablespoons olive oil. 

5. In a different bowl, combine breadcrumbs and parmesan. Lightly spray a baking sheet with olive oil (Pam makes a decent organic olive oil spray that I use for things like this).

6. Gently press the zucchini rounds/strips into the breadcrumb/parmesan mixture. Arrange on the baking sheet. Bake at 375 for approx. 30 minutes, flipping once halfway, until golden brown-ish.
7. Break out your lasagna pan, or just a deeper baking dish. Put a thin coating of sauce over the bottom of the dish, and then place your first layer of zucchini rounds/strips on top of that, overlapping as needed. Top with shredded mozzarella and parmesan.


8. Repeat this sequence – sauce, zucchini, mozz/parm, until you’re out of zucchini. Top with a bit of sauce and the last of your shredded cheese, then bake at 375 for approx. 30 minutes, or until sauce is bubbling and cheese is melted.

9. Remove from oven, let cool a bit, then use a spatula to cut into portions. This actually – surprisingly – reheated remarkably well the next day. The crispier the zucchini, the better!