Creamy Avocado Dressing – No Olive Oil or Dairy!


This dressing was a happy accident.  Dinner was almost ready one night, and I realized we didn’t have any olive oil left to make a salad dressing.  So I searched the internet and found a couple basic recipes, combined a few of them, and came up with this.  It’s fantastic.  It’s like a salad on top of a salad, is one of the healthiest, most refreshing dressings I’ve ever put together, and will keep a couple of days, too.  We ended up using it for a dipping sauce for mexican summer rolls for dinner the next day. I really can’t express just how much I love avocados and how they seem to make just about every recipe better.

CREAMY AVOCADO DRESSING (serves 4-6)
– 1 avocado, cut into chunks
– 1/2 english cucumber, chopped
– 1/4 C. cilantro, chopped
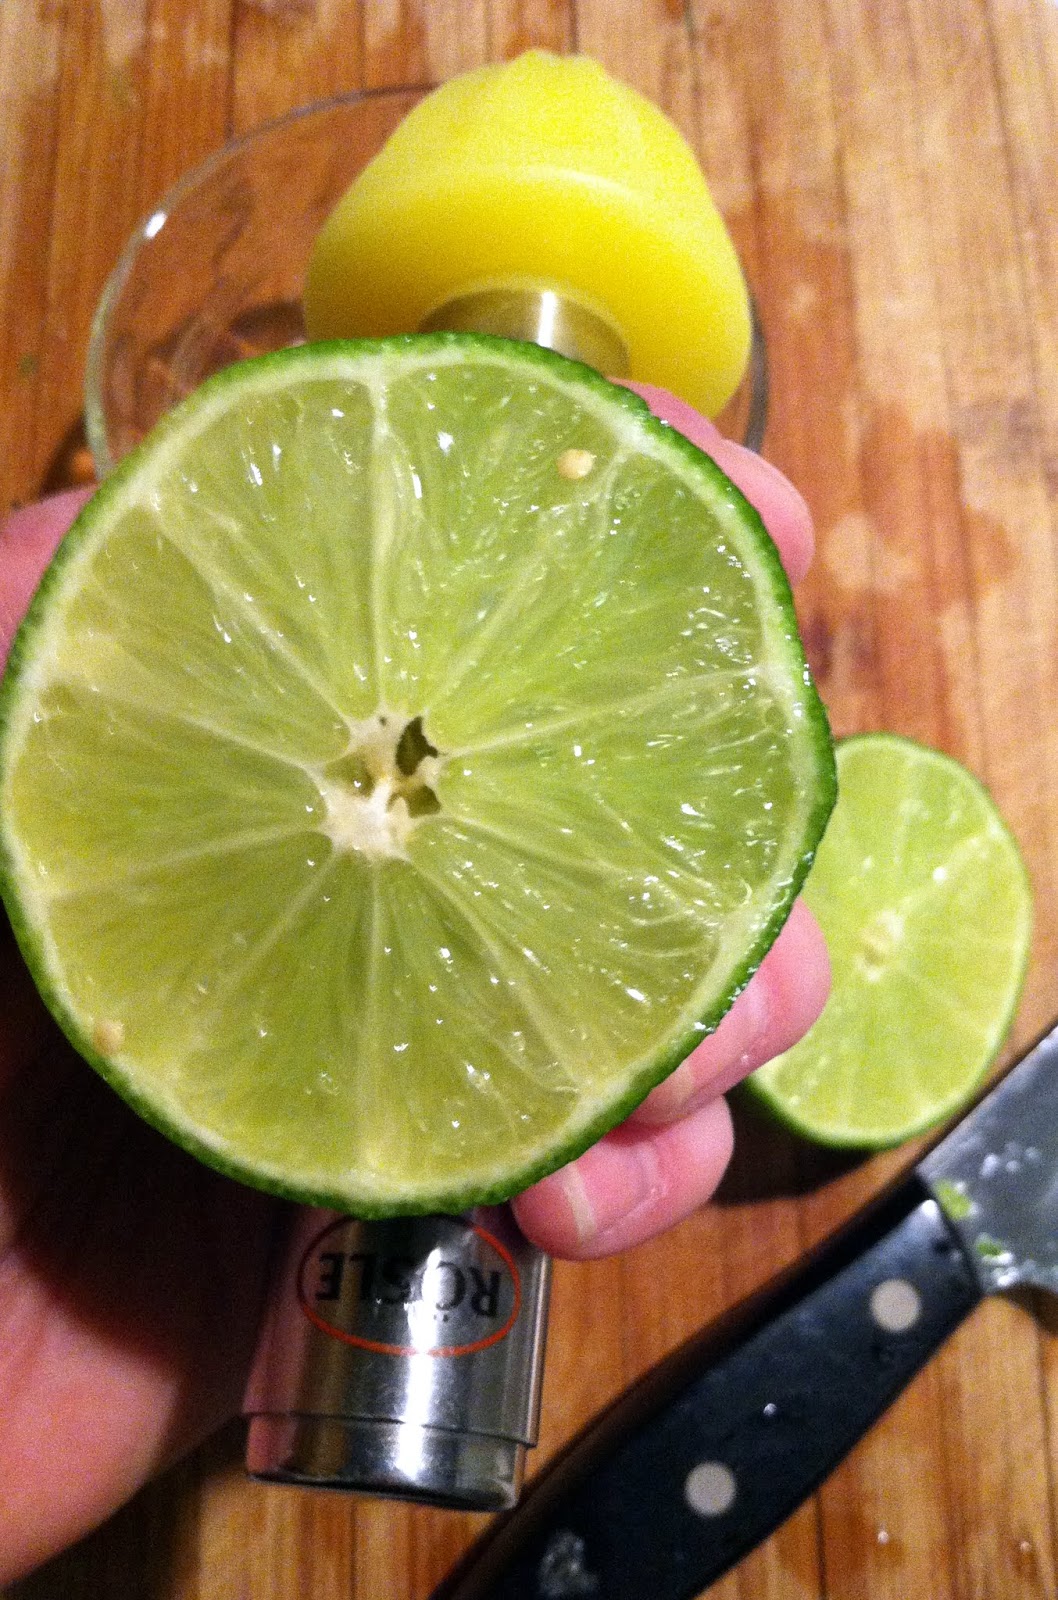
– juice of 1/2 lime
– zest of 1/2 lime
– juice of 1/2 lemon
– 1/4 C. water
– kosher salt to taste

1. Cut up the avocado, english cucumber, cilantro, and put into a Food Processor.  Add the lemon & lime juice, lime zest, water, & 1/2 tsp. kosher salt to start.


2. Blend everything really, really well.  Taste, then add more juice, water, salt, etc. to taste.

3. Serve on top of a nice green salad, use as a dipping sauce, etc.  This is a great way to sneak in an extra serving of veggies, too.

Roasted Asparagus with Lemon

Is there any vegetable that roasting won’t make delicious?? Asparagus is great, but roasting it and adding a bit of lemon takes it to a whole other level. This is one of the quickest, tastiest side dishes you can make.  I would eat this for a snack.

ROASTED ASPARAGUS WITH LEMON (serves 2-4) 
– 1 lb. asparagus, ends trimmed – get thicker spears, if you can – these will hold up better during roasting
– zest of 1 lemon
– 1 tsp. kosher salt, or more to taste (kosher is best here, or any other larger-grain salt)
– couple of grinds fresh black pepper
– 2 tbsp. EVOO
– squeeze of lemon juice, for topping

1. Preheat oven to 425.

2. Trim the asparagus – you can kind of just bend them towards the bottom, and the “woodsy” part should snap off naturally.

3. In a large ziplock bag, combine the EVOO, lemon zest, and half of the salt & pepper.

4. Add asparagus spears to the bag, zip it, and roll the spears around inside the bag so they get covered with everything.

5. Add asparagus to a roasting pan in a single layer.  Top with the remaining kosher salt & pepper.

6. Roast for approx. 10 minutes, shaking the pan about halfway through to get them to roll around a bit and get all sides cooking.
7. Remove from the oven, squeeze a little lemon over them, and serve.

— Also, check out what some of my girlfriends and I did last night!  Indigo dyeing!!!  This was so much fun, and we got pretty creative, and I felt like I was back in summer camp, which was awesome.  There are some seriously talented people out there who do this “Shibori dyeing” (to clarify, we are not those people) – check out this blog for a little tutorial:  http://honestlywtf.com/diy/shibori-diy/  
After you dip these, even though the end color is indigo, the pieces come out kind of an acid green. So weird.
Some of our masterpieces!!  This was such a fun, and funny, craft project. Definitely worth the blue-stained fingernails today!

Avocado & Tomato Salad with Lemon Olive Oil

Ohhh, this is just the best thing ever.  There are 5 main ingredients in this recipe, and they all combine to create one of the most delicious salads I’ve ever had.  The creaminess of a whole avocado together with toasted, super thin slices of almonds is insanely good on its own.  Combine that with the peppery-ness of some arugula, the freshness of plum tomatoes, and a little dusting of parmesan cheese, dress it with a really simple lemon olive oil, good grief.  This seems like a really indulgent little lunch, but it’s so healthy, and pretty, too. The next time we have people over for dinner, I think I’m going to make a platter of this for the salad course. Any takers?

AVOCADO & TOMATO SALAD WITH ARUGULA, TOASTED ALMONDS, & LEMON OLIVE OIL (serves 1)
– 1 ripe avocado, halved
– 1.5 plum tomatoes, cut into quarters (discard the middle part with the seeds)
– handful arugula leaves, or mixed greens
– handful thinly sliced almonds (you can find a bag of these in most grocery stores), toasted
– parmesan cheese, for topping
– juice of half a lemon
– 2 tbsp. EVOO
– good-quality salt, for topping

1. In a small pan, toast the almonds over medium heat, shaking the pan frequently so they don’t burn.  They should toast up pretty quickly – maybe only 2-3 minutes.  Remove pan from the heat and set aside. 


2. Cut the avocado in half – run a knife through it, twist it open, then carefully whack the avocado pit with the knife blade and remove it. Then, run your knife around the perimeter of the avocado halves, and carefully squeeze out each avocado half.


3. Arrange arugula leaves in the center of a plate, then place the avocado halves on either side.  Add sliced tomatoes.


4. Combine the lemon juice and EVOO, stir to combine.  Drizzle over the avocado/tomato/arugula.


5. Top with the toasted almond slices, dust with a little parmesan cheese, then add a pinch of really good quality salt crystals over everything to bring it all together. 

I’m going to go make another one of these right now.  So good!

Tomatillo Salsa

Tomatillos have to be one of the cutest foods out there.  They come in their own little leaf packaging, they’re a bright green which would be fabulous in a wedding color palette, and they’re perfectly, adorably, palm-sized. They also have a really unique flavor – kind of tart, kind of tangy – and are a great, fresh base for an incredibly flavorful salsa.  I used this as a topping to the fish tacos I made a couple of days ago, and it was terrific.

TOMATILLO SALSA (serves 4)
– 4-5 tomatillos, seeded and diced (approx. 2 cups)
– 1/3 red onion, diced
– 1 lime, juiced
– 2 small cloves garlic, chopped
– handful cilantro, chopped
– 1/2 tsp. cumin
– 1/4 tsp. kosher salt, couple of grinds fresh black pepper

1. Peel the “leafy” part away from the tomatillos.  This has a bonus of smelling like crumpling leaves in the fall!  Wash the whole tomatillo to remove any residue.


2. Cut the tomatillos into quarters, then with your fingers, kind of push out the whole middle part to “seed” them.  These seeds are teeny, so don’t worry if you don’t get all of them.  You also lose a lot of the bulk of the tomatillo in this process, but that’s ok too.


3. Dice a 1/3 of a red onion – make slits along the natural ridges of the onion, lengthwise, then flip it to the side and make horizontal cuts. The onion will dice itself naturally.


4. With a Citrus Reamer, juice a lime into a small prep bowl.  Add the cumin, garlic, salt & pepper, stir to combine.


5. Combine the diced tomatillos, onion, chopped cilantro in a bowl.  Add the dressing and stir to combine.  Taste and adjust seasonings.  Serve as a topping to any mexican dish, or even on its own.

Fish Tacos spiked with Cilantro and Lime

When I first heard of fish tacos, I thought they sounded totally gross.  Fish tacos??  How would that work? Weren’t tacos just meat, salsa, lettuce and shredded cheese? Little did I know.  A couple of years later, these are one of my favorite things to make – they’re healthy, full of flavor, and are really adaptable to different ingredients.  This one infuses tilapia with cilantro and lime flavors, and is topped with avocado slices and a tomatillo salsa for a fresh, quick dinner.  A fresh, light creamy avocado dressing would also be really nice with this, too.

FISH TACOS SPIKED WITH CILANTRO AND LIME (serves 2 for dinner – approx. 4 tacos)
– 1 lb. tilapia
– handful cilantro, chopped
– small whole-wheat tortillas
– 1 lime, zested and juiced
– 1/2 tsp. cumin
– dash paprika
– 1/2 tsp. kosher salt
– 2 tbsp. EVOO
– couple grinds of fresh black pepper
– sour cream, for topping
– tomatillo salsa, for topping
– avocado, for topping


1. Zest the lime (just the green, not the white – the “pith” is really bitter), then juice it.  This was the first time I got to use our new Rosle Citrus Reamer, and holy moly.  Game-changer.


2. Combine the lime juice with the lime zest, cumin, paprika, salt & pepper, stir to allow the spices to mix with the lime juice.  Add the olive oil & chopped cilantro, stir to combine.  


3. Add the fish to a ziplock bag, then pour the marinade over it. Ziplock the bag, shake it all up so that the marinade covers the fish, and let sit for approx. 20 minutes (I used this time to make a tomatillo salsa).


 4. If you have a Le Creuset Grill Pan (Le Creuset continues to be awesome), get it super hot (medium-high heat, no oil), then add the fish.  Cook until it’s flaky and cooked through, approx. 7 minutes on each side, depending on the thickness of the tilapia.


5. Warm the tortillas in a microwave – 4 at a time, in a paper towel, for approx. 45 seconds – then top with the fish.  Add avocado slices, tomatillo salsa, sour cream.  These are light and delicious, and a little different than our typical mexican fare, the turkey taco lettuce wraps.  Hope you like them as much as we do!

Sauteed Zucchini Ribbons with Shallots & Garlic

I’m really looking forward to zucchini season coming around again.  I use it in so many recipes that it makes me sad to see the miniature little organic zucchinis that are available this time of year.  That said, grab a bunch of them, because this is one of the tastiest, most delicate side dishes you can make.


SAUTEED ZUCCHINI RIBBONS WITH SHALLOTS & GARLIC (serves 2-3)
– 5 small or 3 large zucchini
– 2 shallots, sliced into thin moons
– 2 cloves garlic, thinly sliced
– 1 Tbsp. butter
– Kosher salt & freshly ground black pepper to taste

1. Wash the zucchini, then peel it.  Even though the skin will be removed, they’ve still grown in the ground and are dirty – so wash them to get rid of anything that’s lingering. With a vegetable peeler, remove the outside layer of the zucchini – the greenest part – and discard.  Then, continue to peel the zucchini into ribbons until you get to the seeds in the middle.  Throw away the “core” of the zucchini, and set aside the ribbons.

2. In a large saute pan, melt the butter over medium heat.  When melted, add the garlic and shallots, and saute, stirring frequently, approx. 3 minutes.

3. Add the zucchini, then saute until wilted and beginning to color, approx. 5-7 minutes.  If too much brown starts to appear on the bottom of the pan, add 1 tbsp. of water and scrape the bottom of the pan to remove the brown bits and incorporate them back into the zucchini. Add kosher salt & pepper to taste at the end, so that the zucchini gains some color and doesn’t “sweat” as much.

4. Serve alongside your favorite “main” – I love this with steak, but it works with just about anything.

Chickpea, Avocado, & Feta “Smash”


I felt like Maria von Trapp making this, because: Chickpeas? Avocados? Feta? These are a few of my favorite things…

Avocado is a great substitute for mayo – I’ve made some of my favorite chicken salads with avocados as a base – but mashed with chickpeas, combined with a little feta, lemon/lime juice, and cilantro, this was beyond delicious.  The citrus keeps the avocado from browning, so you can keep this for a full day in the fridge for a healthy snack, or a sandwich filler, or a scoop on top of some salad greens.  You get the picture. It’s healthy, it’s filling, and it’s ready in no more than ten minutes, tops.  Enjoy.

CHICKPEA, AVOCADO, & FETA “SMASH” (serves 2-3)  
– 1 can chickpeas, rinsed and drained (I use Eden Organic beans, because they’re fully organic, their cans are BPA-free, and they’re only slightly more expensive but significantly better for you than the alternatives) 

– 1 avocado, cut into chunks
– 1/2 lemon, juiced
– 1/2 lime, juiced
– Approx. 3 tbsp. crumbled feta
– smallish handful of cilantro, chopped (approx. 2 tbsps)
– kosher salt and freshly ground black pepper


1. Rinse the chickpeas well and drain them, then add to a mixing bowl.

2. Cut an avocado into chunks. The easiest way to do this is to cut an avocado in half, lengthwise:  

Then, carefully but firmly, thunk (that’s a made-up cooking term) the knife blade into the avocado pit, twist it a bit, and gently pull out the pit. 
those are some balancing skills, right there!


Then, in the avocado half itself, cut the avocado into a grid, run your knife around the perimeter of the avocado, and squeeze out the chunks into the bowl with the chickpeas:

2. Combine the chickpeas and the avocado, lemon/lime juice, and kosher salt & pepper, and smash it all together.  If you have a Potato Masher, this helps to get things started, but finishing smashing with a fork until you have the chickpea/avocado consistency that you want.  If you want more of a chunkier avocado texture, smash the chickpeas until they’re 75% to the texture you want, then add the avocado to finish. Say smash again.  Smash!!
pre-smash


smashed
3. Add cilantro to taste, then feta, then add salt/pepper/lemon juice or lime juice as needed.


Sandwich filler?  Salad topper? Solo?  Any way (or “S”) you serve it, it’s a winner.

To follow me on Facebook, click here: And What I Ate Facebook Page 

Perfect Chicken

Cooking chicken in a pan was always kind of tough for me – I used to worry about undercoooking it, then overcooking it, then practically burning it until it was either way too tough or dry – until I discovered this technique.  It’s so hands-off it’s ridiculous, gives the chicken a perfect coat of flavor and “kick”, and leaves it juicy and tender, every time. 

PERFECT CHICKEN (adapted from The Kitchn) (serves 2-4)
– 1.5 lbs chicken breasts, cut into strips, or chicken strips
– 1/4 C. Flour
– 1 egg, lightly beaten
– Chopped fresh herbs (thyme, tarragon, rosemary, sage, etc.)
– 1 tsp. dijon mustard (optional)
– 1 tbsp. EVOO
– 1/2 tbsp. butter
– Kosher salt and freshly ground black pepper

1. Pound the chicken breasts to an even thickness, then season with salt and pepper.

2. In a small bowl, lightly beat 1 egg, then combine herbs and mustard, if using, into mixture.

3. Using a pastry brush, lightly coat the chicken with the egg/herb/mustard mixture, then lightly dredge in the flour.

4. Meanwhile, in a large saute pan, heat olive oil and butter over medium high heat. When hot, add the chicken and cook for approx. 1 minute to sear and brown them on one side.

5. Flip the chicken breast strips over, then turn the heat to low.  Put the lid on the pan, set the timer for 10 minutes, and walk away.

6. After those 10 minute have passed, turn the heat off (don’t take the lid off the pan throughout this process – it’s tempting, but you just have to have faith in the end result…and there’s a life metaphor somewhere in there) and leave the chicken breasts covered in the pan for another 10 minutes.


7. When those 20 total minutes are up, remove the lid and check to make sure the chicken is cooked throughout (it will be). The chicken should be seared and golden, tasty, moist, and flavorful. For all of you who’ve struggled with cooking chicken in a pan like I did, this is a game-changer. Enjoy.

Perfect chicken with Kale, Carrot, and White Bean Blend


Fish En Papillote (“Fish in Parchment Paper”)


This has got to be one of the simplest, healthiest, most delicious things I make. It’s pretty. It has a great presentation. There is next to zero cleanup, and it’s about as “clean” as you can get as far as recipes are concerned. Basically, you pick your veggies and fish, pick your herbs & other flavorings, pack it all up in a cute little parchment paper pouch, and then throw them in the oven. The fish and flavorings will steam and cook all together, blending flavors and creating an incredibly tasty dinner. Best of all – this can be ready start to finish in 30 minutes, which makes it a perfect weeknight meal, but it looks so nice that it could be served at dinner parties. 

FISH EN PAPILOTTE (serves as many people as you need it to) 
– 6 oz. of fish per person (any kind – I used cod here, but flounder, tilapia, monkfish, sea bass, salmon, etc. would work. You get the picture.) 
– Veggies. I would julienne squash, carrots, peppers. You can half cherry tomatoes. Cut onions or shallots into thin strips, cut baby potatoes into thin rounds. I used baby bok choy this time, and just put a couple of leaves into each packet, which was also really nice. 
– Herbs. Thyme is fantastic, savory is a bit stronger but also nice. Fresh is best, but if you add dried, add about half of what you would with fresh herbs. 
– Flavors. Thin rounds of lemon to top, a splash of white wine, super thin shavings of butter, etc. 
– Kosher salt and pepper to taste

1. Heat oven to 375. 

2. Prep whatever veggies you’ve decided to use.

lemon sliced into thin rounds, baby bok choy, halved cherry tomatoes, julienned zucchini, shallot cut into thin rounds

3. Cut a heart (like you did in grade school – half a heart on folded paper, then unfold) in parchment paper. Spritz one side with olive oil.


4. Add veggies to the side of the parchment paper with olive oil. Top with the fish, then lemons/butter/”flavors”. Top with salt & pepper.


5. Fold the other half of the “heart” over the fish & veggie combo. Working from the top, crimp the paper over itself into little pleats so it forms a little pouch. Make sure it’s a bit loose in the middle, so steam can circulate and cook the fish and veggies inside.


6. Put pouches on a baking sheet to catch any juices that spill, then bake for 20 minutes or so, or until fish is flaky and cooked through.  The parchment paper will puff a bit, and get golden brown in spots.


7. Serve pouches on individual plates. You can either cut into the top part of the pouch to eat directly from there, or you can open the entire pouch to empty the contents on the plate. The juices (and flavors) will stay concentrated a little more if you do it the first way, but either way, it’s a delicious dinner that I hope you enjoy as much as we do!

Tuna Chickpea Salad with Cucumber and Red Onion – No Mayo

Canned tuna can be so much more than something that’s mixed with mayo, onion, and celery, and served on a sandwich. Mayonnaise kind of skeeves me out, but I get that it’s unavoidable sometimes. This tuna salad, however, substitutes mayo with an olive oil-lemon vinaigrette, adds chickpeas, and some teeny tiny pieces of red onion and english cucumber. It’s fresh, light, and healthy – and actually keeps really well for up to 2 days – I think it’s a perfect lunch.

TUNA CHICKPEA SALAD WITH CUCUMBER AND RED ONION
– 2 cans tuna (a note about this – I know canned tuna can be loaded with mercury. If you can find it, Wild Planet has incredible canned, sushi-grade and wild-caught tuna)
– 1/2 english cucumber, diced into tiny pieces
– 1/4 red onion, diced into tiny pieces
– 1 can chickpeas, drained and rinsed
– handful of parsley, chopped
– Kosher Salt & Pepper to taste
For Dressing:
– Juice of 1/2 lemon
– 2 tbsp. EVOO
– Kosher salt (or Herbamare for a little extra boost of vegetables and minerals) and freshly ground black pepper to taste


1. In a medium size bowl, combine chickpeas, tuna, and parsley.

2. Finely chop the cucumber and red onion. The tiny size of these pieces really “makes” this salad – the overall taste is just different, somehow, from a salad that would have larger chunks of cucumber and red onion. 


Remove the middle “seeded” part of the cucumber (even though english cucumbers are seedless) to get a little more color from the dark green skin of the cucumber.


3. Add cucumber and red onion to chickpea/tuna/parsley mix.

4. Combine dressing ingredients, adjust seasonings to taste.

5. Pour dressing over tuna/chickpea/cucumber/red onion mixture. Stir well to combine. If tuna seems a little dry, add more olive oil and/or lemon juice to taste. Serve by itself or in a wrap with some lettuce.