Kale, Carrot, and White Bean Blend


I had a sleepover at my sister’s the other night, and she brought out this deliciously filling “snack” that could have been dinner if it weren’t for the Grotto pizza we were already sharing. This is one of those super easy recipes that you can just throw together with ingredients you already have, and in no time at all you have a hearty, healthy dish (to go with the pizza that you’re eating).

KALE, CARROT, AND WHITE BEAN BLEND (serves 4 as a side or 2 as a main dish)

– 1/2 a bunch of kale, “ribs” removed, washed and roughly chopped
– 3 carrots, peeled and sliced into 1/8 inch rounds
– 1 can white beans, drained and rinsed
– 2 cloves garlic, chopped
– 1 tbsp. EVOO, 1 tsp. butter

1. Wash your kale and carrots. Even though you’re going to peel the carrots, you should wash them anyway. Any dirt on the skin will get dragged into the carrot itself when you peel them unless they’re clean.

2. Remove the “ribs” from the kale, and roughly chop.

3. Cut the peeled carrots into 1/8 inch rounds.

4. In a large saucepan, bring enough water to cover the carrots to a boil. Add the sliced carrots and boil until just tender (approx. 5 minutes). Drain the carrots and return the saucepan to the burner, now lowered to medium heat.

5. Add 1 tbsp EVOO and a smidge of butter to the saucepan and, when hot, add the garlic and stir until fragrant – appox. 90 seconds.

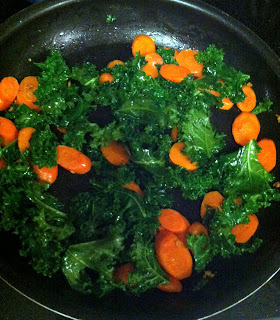
6. Add carrots to the pan and stir to cover with the EVOO/butter/garlic mixture.  Then add the chopped kale, and stir together with the carrots until slightly wilted.
 
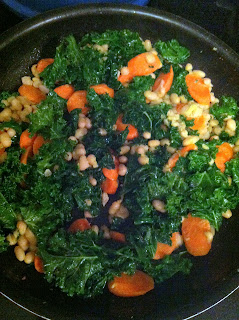
7. Finally, add the can of rinsed and drained white beans, and combine with the kale and carrots until beans are warmed through.  Both the kale and carrots will continue to soften during this time, so make sure the kale isn’t too wilted in the step above.

8. Add seasonings if necessary – kosher salt, freshly ground pepper, garlic powder – to taste and serve warm. This is even good cold as leftovers the next day.

— Happy 64th birthday to my mom, who would love this recipe! xoxoxo

Best Broccoli Ever


This recipe was one of Brad’s best finds. He says he made it because of one specific line in the recipe he read online:  “This broccoli is better than a steak”.  It’s kind of unbelievable how roasting veggies makes them completely different, and broccoli is no exception. Add some lemon, parmesan cheese, and toasted pine nuts, and this side could stand on its own (although sometimes nothing can substitute for a steak). It’s delicious and looks like you put a lot of effort into it, but is quickly thrown together while you’re making an entree.

BEST BROCCOLI EVER (serves 4 or so – copied almost exactly from The Amateur Gourmet)

– 3 medium heads broccoli
– 2 tbsp toasted pine nuts
– 5 glugs EVOO
– 1/2 of 1 lemon (zest and juice)
– 1/4 C. freshly grated parmesan cheese
– 1 tbsp. julienned basil
– 3 garlic cloves, sliced

1. Heat the oven to 425.

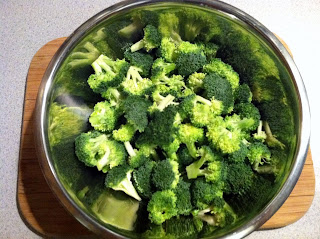
2. Cut broccoli heads into medium size florets, wash and dry thoroughly. 

3. Toss broccoli florets and sliced garlic cloves with 4 of the 5 glugs of EVOO, and kosher salt and pepper (approx. 1 tsp. of each).  Arrange in a single layer on a cookie sheet and roast in the oven for 20 – 25 minutes, or until some edges are brown.
  

 4. Meanwhile, toast the pine nuts (if using) and set aside.

5. When broccoli is roasted, remove from oven, zest the lemon half over the broccoli, then squeeze the juice of the lemon over it as well.  Add toasted pine nuts, parm cheese, basil, and another glug of olive oil, and stir to combine.


6. Serve and enjoy – we had this alongside portabella mushroom “pizzas” for a healthy, carb-free, and delicious dinner.

Roasted Red Beet, White Bean and Sage “Hummus”


On our way up to Good Commons, one of the snacks they stocked “The Good Bus” with was an incredibly tasty beet and white bean dip. They served it with parsnip sticks, which were crunchy and a little spicy, but I was so surprised by how good this dip was that I knew I had to try and copy it when I got home.

I’ve really tried to incorporate beets into my diet – especially after reading about how beet juice was making the rounds in this summer’s Olympic Village as a natural performance enhancer – but sometimes I just can’t get past the “earthy” (read: dirty) taste they can have.  Roasting them makes them a little sweeter, and the addition of sage lightens the whole dip. I tried to copy this completely by serving it with the parsnip “sticks”, but we went back to old faithful, the pretzel chip.  Celery would be really nice with this too. If you have kids, I’m sure they’d go crazy over the fact that this dip is pink, since it was a cool little detail even for the over 30 crowd (ahem).

ROASTED BEET, WHITE BEAN, AND SAGE “HUMMUS” (adapted from Weelicious)
– 1 small beet, cleaned but unpeeled
– 2 cloves garlic, unpeeled
– 1 15 oz. can white beans, rinsed and drained
– 10 fresh sage leaves, chopped
– 1 tbsp. lemon
– 1/4 c. EVOO

1. Heat your oven to 400.

2. Place washed beet and garlic cloves in a little pouch of aluminum foil.  You want to make sure it’s tightly closed, but also has some space so that air can circulate and the flavors can roast together. Bake for approx. 45 minutes.

3. Remove the pouch from the oven – carefully, some of the beet juice spilled out of mine and it was a MESS – and remove the skin from the beet. Again, beets are messy and will stain just about everything, including your hands.  Either wear disposable gloves when peeling the skin (which should slide right off after the beet is roasted) or use a paper towel to kind of scrub it off. Chop beet roughly, and add to a larger bowl.


4. Remove the skin from the garlic cloves and toss into the bowl with the beets. Add chopped sage, lemon juice, and olive oil, then put the whole mixture into a food processor.


5. Combine in the food processor until smooth. Add kosher salt to taste, then serve “hummus” with celery, carrots, pretzel chips, or parsnip sticks.

Sorry, parsnips. You’re pretty. I tried.


Kale, Roasted Butternut Squash, Apple & Parmesan Salad


This salad is all fall. The sweetness of roasted butternut squash and thin slices of apple blend perfectly with the kale dressed in a simple lemon vinaigrette, and topped with curls of parmesan. We had this alongside a tuna chickpea salad for a filling, healthy lunch. Kale is incredibly good for you on so many levels, and I try to work it into as many recipes as I can while it’s available in abundance at our Scranton Farmers’ Market (my favorite grocery place in town, BY FAR. Have you found your local farmers’ market yet?).

KALE, ROASTED BUTTERNUT SQUASH, APPLE & PARMESAN SALAD (serves 2-4)
– 1/2 head of kale, “ribs” cut out and discarded, leaves torn into pieces
– 1/2 butternut squash, roasted
– 1-2 apples (gala, macintosh, etc. Any sweeter apple will work)
– shaves of parmesan cheese (thin pieces of fresh cheddar would also work)

Lemon Viniagrette
– Juice of 1/2 lemon (approx. 1 tbsp)
– 2 Tbsp EVOO
– Kosher salt and pepper to taste

1. Get the squash roasting. The easiest way to do this is to punch a couple of small holes into a whole squash (with a fork, or similar) and throw the whole thing in an oven at 400 for about 20 minutes.  After this time, the squash should be soft enough that you can cut off the bottom without any trouble, then slice it in half and scoop out the seeds.


2. Rub a couple of drops of olive oil on each cut side of the squash, then place cut-side down on a baking sheet. Roast at 400 for approx.30 – 45 minutes, depending on the size of the squash.

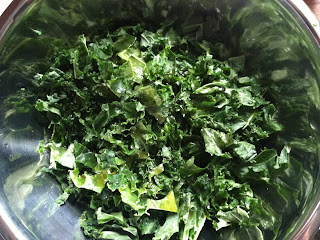
3. Meanwhile, prep the kale. After washing thoroughly, cut out the “ribs” and discard, then roughly tear or cut the kale into similar-size pieces.


4. Wash the apples, then cut them into thin slices. Delicate slices as opposed to larger chunks will give this salad a refreshing little bite with every forkful.

5. When squash is finished roasting, remove from oven, peel the skin (this should come right off if the squash has been fully roasted), then cut squash into chunks.


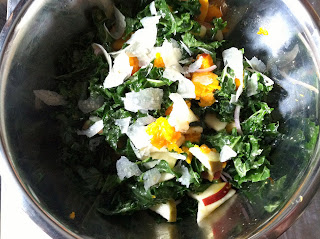
6. Whisk together dressing, then add to the kale and massage into the kale pieces (kale can be kind of tough, so massaging the dressing into the leaves will make them a little more chewable). Add squash, apples, and gently stir to combine. Top with parmesan (or cheddar) and serve as either a side or a main dish.

Roasted Butternut Squash and Kale “Au Gratin”

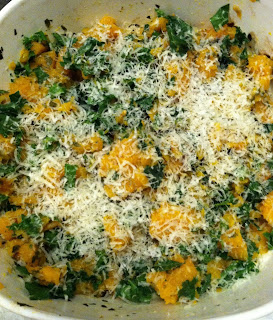
It’s butternut squash season!!  I look forward to this every year. Butternut squash is the basis for some of my favorite fall recipes, from soup to sides to main dishes. This side is savory due to the roasted squash and a light dusting of parmesan cheese, and has an added punch of health benefits with the addition of the kale. I could have eaten this on its own instead of as a side. It was great.

ROASTED BUTTERNUT SQUASH & KALE “AU GRATIN” (serves approx. 4)

– 1 large butternut squash, roasted and cubed
– 2 cups kale, de-stemmed and chopped
– 2 cloves garlic, diced
– Freshly grated parmesan, approx. 1/4 cup

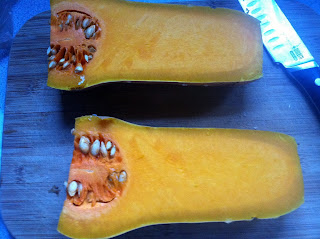
1. Cut the butternut squash in half. I’ve learned that the easiest way to do this is to poke a couple of holes in the squash while it’s still whole, and throw it in the oven at 400 for maybe 15 minutes.  It should soften enough in that time that you can cut it in half, lengthwise, without feeling like you’re going to cut off your fingers accidentally.


2. Scoop out the seeds and stringy stuff at the bottom of the squash. Rub each half with a little olive oil, and place cut-side down on the baking sheet. Roast for approx. 30 – 45 minutes (depending on the size of the squash). Peel and cube squash – it should still be a little firm, but if not, don’t worry about it too much. Lower oven temp to 350.

3. In a saute pan, heat 1 tbsp olive oil, and add chopped garlic. Stir until fragrant, approx. 90 seconds. Add chopped kale and stir to combine until wilted. Set aside.

4. Lightly mist a baking pan with olive oil, then add kale/garlic mixture and cubed squash. Stir to combine, then top with the grated parmesan cheese. Bake at 350 for approx. 10 minutes, or until cheese is melted.


Zucchini Parmesan

Zucchini season is winding down, so in one of my last zucchini-based recipes of the season, I tried this delicious looking zucchini parm. I don’t know if this necessarily falls under the category of “healthy”, considering the cheese and the sauce, but the coating on the zucchini is nice and light, and this could really be served as a meal instead of a side. We loved it.

ZUCCHINI PARMESAN (serves 4-6 as a side)

– 3 large zucchini, washed and cut into 1/4 inch rounds (leave skin on), or cut into strips. Strips might actually be really nice to make this more of a “lasagna”.
– Sauce, approx. 2 cups
– Mozzarella, approx. 1 & 1/2 cups
– Freshly grated Parmesan, approx. 1/4 cup
– Olive Oil
– Breadcrumbs, 2 cups
– Freshly grated Parmesan – 1/4 cup (added to breadcrumb mixture)
– Kosher Salt
– Extra Virgin Olive Oil

1. Preheat oven to 375.

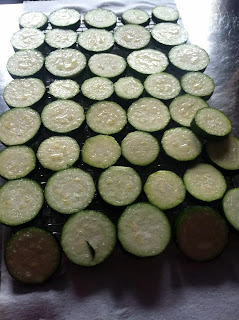
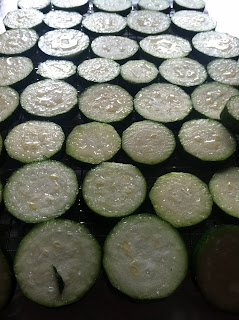
2. Cut zucchini into rounds or strips, and place on a cooling rack over a paper towel. Sprinkle liberally with kosher salt. This draws out the water from the zucchini, so that it bakes a little more crispy, a little less soggy.


3. Look at all the water that’s coming out of these!! Would you ever think?  After about 20 minutes, flip the zucchini rounds/strips, salt the other side, and let sit for another 20 minutes to fully extract as much water as possible. Then, rinse them in a colander and lay them in one layer to dry.


4. When dry, toss zucchini in a bowl with 1-2 tablespoons olive oil. 

5. In a different bowl, combine breadcrumbs and parmesan. Lightly spray a baking sheet with olive oil (Pam makes a decent organic olive oil spray that I use for things like this).

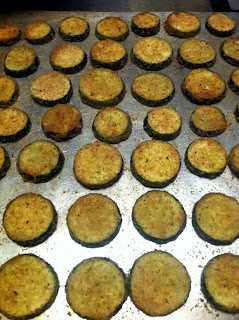
6. Gently press the zucchini rounds/strips into the breadcrumb/parmesan mixture. Arrange on the baking sheet. Bake at 375 for approx. 30 minutes, flipping once halfway, until golden brown-ish.
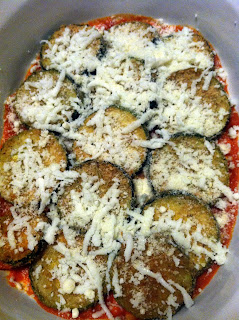
7. Break out your lasagna pan, or just a deeper baking dish. Put a thin coating of sauce over the bottom of the dish, and then place your first layer of zucchini rounds/strips on top of that, overlapping as needed. Top with shredded mozzarella and parmesan.


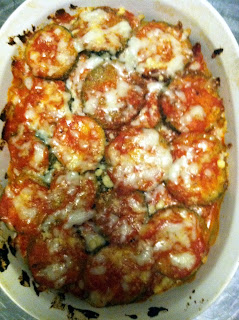
8. Repeat this sequence – sauce, zucchini, mozz/parm, until you’re out of zucchini. Top with a bit of sauce and the last of your shredded cheese, then bake at 375 for approx. 30 minutes, or until sauce is bubbling and cheese is melted.

9. Remove from oven, let cool a bit, then use a spatula to cut into portions. This actually – surprisingly – reheated remarkably well the next day. The crispier the zucchini, the better!


Ricotta, Apple, and Honey-stuffed Squash Blossoms

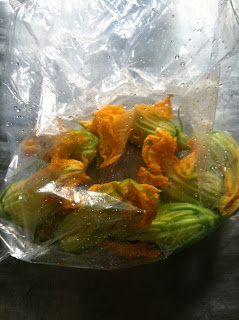
I love fall, and I love the Scranton Farmers’ Market.  The other day, I spotted these gorgeous little squash blossoms, tucked inside a little plastic bag:
  

Look at these guys!  Gorgeous. Making squash blossoms has always seemed pretty out of my league – they’re so delicate, and seemingly decadent. But I couldn’t resist.  I bought a bag, went home, and googled the trash out of “squash blossom recipes”.  The basic premise seemed simple enough – stuff them with something, then either deep fry, bake, or pan sear them.

Since I’d been alerted to the fact that it was Rosh Hashanah, and Brad and I have basically decided on combining our different religious backgrounds to include “traditions”, I thought I’d make him a little pan-seared squash blossom, stuffed with a filling of ricotta, apple, and honey (for a sweet new year). We could have eaten these for dessert instead of a side at dinner. They were savory, so pretty, and honestly, they looked like SO much more of an effort than they actually were to make. So here we go.


RICOTTA, APPLE, & HONEY-STUFFED SQUASH BLOSSOMS
* We had about 8 blossoms in total, but a normal person would probably have eaten 2, max, as a side to dinner

– Squash blossoms
– Good quality ricotta, approx. 2/3 cup
– 1/4 tsp. freshly ground nutmeg, or to taste
– 1/2 tsp. kosher salt
– 1/2 apple of your choice, microplaned (no skin)
– 2 tablespoons organic honey
– extra virgin olive oil (REAL olive oil, see this post for a heads-up on the olive oil you may have been consuming)

1. Be unable to walk by squash blossoms without thinking they’re so pretty, and then mentally talk yourself into the fact that you can cook with them.
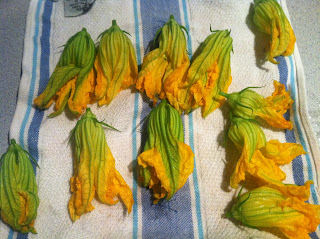
oh, hello there!

2. Wash out the blossoms – gently. You can kind of ply them apart with the larger end of a chopstick. Just make sure any bugs, etc. are out of the blossom.


3. Gently snip out the center of the blossom, being careful not to make a hole in the bottom of the blossom, or tear the leaves.
that center part, the polleny-looking thing, has gots to go.
4. Combine the ricotta, honey, salt, nutmeg, and microplaned apple, stir to combine.  Add mixture to a plastic bag, snip a small corner off the bag. This is now your pastry bag, so you can insert the filling into the blossom more easily.

5. In a large saute pan, add a 1/4 inch of olive oil. Heat over medium high heat until hot.

6. Insert the filling into the squash blossoms. Twist the petals together so that the filling is securely enclosed.

7. Carefully add the squash blossoms to the pan, searing lightly (approx. 2 minutes). With a pair of tongs, flip the blossoms over so that all sides are cooked evenly. Some filling will fall out, but just keep turning them.

8. Serve alongside dinner (ours was Greek Yogurt Chicken and baked leeks). Have your non-practicing, but still tradition-sentimental, Jewish fiance think you’re the most thoughtful thing ever because you remembered his New Year.

Guacamole


So we’ve talked about my avocado obsession, right? I could eat them all day long. Not only are they delicious, but they’re so good for you, and there are a million articles about how they promote heart health, blood sugar regulation, even anti-cancer benefits! Also, according to this site,  the avocado is “colloquially known as the Alligator Pear, reflecting its shape and the leather-like appearance of its skin.”, which totally makes sense.  Ha. The Alligator Pear.

Anyway, this guacamole recipe is super easy and perfect with Pretzel Crisps, which we should basically buy stock in at this point, because we go through so many of them on a weekly basis.  It’s also a great topper for turkey tacos, which are up next.

GUACAMOLE
(serves 4 regular people, or 2 people who live in this house and really love guacamole)
Ingredients:
2 avocados
4-5 cherry tomatoes, seeded and diced 
1/4 of a large vidalia onion, diced
cilantro (approx. 2-3 tablespoons)
juice of 1 lime
kosher salt to taste

1. Peel and dice the avocados. I’ve found that an easy way to do this is right in the avocado half itself (see the dice in the avocado half in the picture above?).  Then just run a knife around the edge and the diced pieces should kind of just squeeze out into the bowl. Mash this gently with a fork.  As you add the other ingredients, the avocado will continue to get smoother, so it depends on how chunky you like your guac.


2. Add the lime juice (this will also prevent the avocado from browning) and the kosher salt, so the salt can kind of blend with the acid in the lime juice.

3. Add the diced tomato and onion (try to make these pieces the same size) and cilantro, mix everything together. Adjust seasonings and enjoy!


Farmer’s Market Quinoa Salad

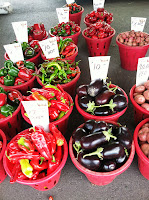
Incredibly, I have never been to the Scranton Farmers’ Market until this week.  Holy crow, have I been missing out. Gorgeous produce, cheeses, meats,even flowers (!), all from local farms and farmers.

There’s really nothing better, food-wise, than farmers’ markets – supporting your community while being able to find out about what you’re eating and where it came from. I picked up some corn, zucchini, tomatoes, onions, and basil, and decided to use a mix of red and white quinoa as a base for this salad. We ate it that day, then took it to Frontier Days, where it was delicious even cold.  The honey-lemon vinaigrette seems odd in theory, but adds a dimension of sweetness that adds to the overall flavors – a feta creaminess, a basil crispness, etc. This is a great end-of-summer dish to use up whatever vegetables you find at the farmers’ market (or, okay, the supermarket).

SEPTEMBER QUINOA SALAD
Ingredients (serves 6-8 as a side dish)
2 cups chicken broth
1 cup quinoa, rinsed really well
1/4 c feta cheese, crumbled
3 ears corn, cut off the cob
2 tomatoes, diced
2 zucchini, seeds removed (just drag a spoon down the center after you cut them in half) and quartered
vidalia onion, sliced
basil, julienned
EVOO
2 garlic cloved, minced

Honey-Lemon Viniagrette:
1 tablespoon lemon zest
2 tablespoons lemon juice
1.5 tablespoons honey
1 garlic clove, minced 
kosher salt and pepper to taste

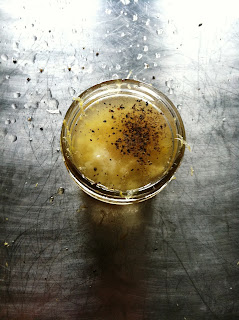
1. Make the dressing – combine all the ingredients in a small mason jar, adding the honey last so the spices can absorb into the lemon juice. Shake it up and let it sit while you make the rest of the dish.
2. In a saucepan, bring 2 cups chicken broth (or vegetable broth, if you want to make this completely vegetarian) to a boil. Rinse the quinoa really well – this is important, since the “dust” that collects on the outside of the quinoa is bitter and will ruin any dish you make if any of it remains. I have a really fine-woven strainer that I bought specifically for rinsing quinoa – otherwise it’s a total PITA trying to get the “dust” off it thoroughly.  Add quinoa to the boiling chicken broth, turn the heat down to medium low, and put a lid on it. Let cook until the broth is absorbed and the quinoa is soft and fluffy.
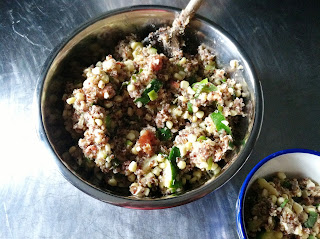
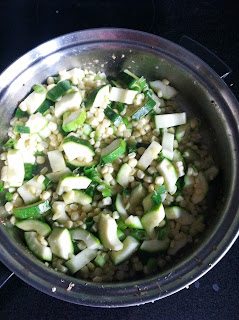
3. In a different saucepan, cook garlic in 1 tablespoon EVOO over medium high heat until fragrant, about 30 seconds.  Add the corn, zucchini, and onions, and a little salt/pepper.  Let cook about 5 minutes, then remove from the heat. Add the cooked quinoa and give it all a good stir.
4. Chop up 2 tomatoes, and add to the quinoa/veggie mixture.
 
Look at these Farmers’ Market tomatoes!!  Gorgeous.

4. Add feta, stir it all up so it gets melty and combines everything together nicely.  Then julienne some basil. 

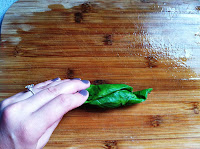
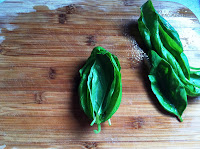
Let’s julienne some basil!  First, clean some leaves, then make a little stack of them. Roll them tightly together like a cigar, then slice thinly from the top down to get perfectly ribboned basil. It’s kind of insane how amazing chopping basil makes your kitchen smell, every time.


5. Add dressing to the salad, mix well, then top with the julienned basil. Serve and enjoy.

Favorite. Salad. Ever.

One of Brad’s and my favorite restaurants in NEPA is the Summerhouse Grill, an amazing, farm-to-table restaurant in Montrose. The food is clean and fresh, it’s BYO, the space is cozy and adorable, and the 45 minute drive from Scranton is time well spent, especially for a date night. Last year, we went to a cooking class they hosted, and learned to make a salad that has been my go-to ever since.  The brightness of the lemon-coriander vinaigrette is balanced by the creaminess of the super-thinly sliced avocado and the peppery crunch of the paper-thin radishes. This was served as an accompaniment to Mexican food, but it really goes with anything. Have I mentioned how much I love avocados?  Because I really, really do.
MIXED GREEN SALAD WITH LEMON-CORIANDER VINAIGRETTE, AVOCADO, AND RADISHES
Ingredients:
Mixed Greens
1 Avocado
3-4 radishes
Dressing:
3 tablespoon Extra Virgin Olive Oil (I use California Olive Ranch olive oil, and only this brand, since reading this “hair-raising article on black market olive oil in the New Yorker that changed the mind-set of every cook who read it.” )
1 tablespoon Lemon Juice
1 teaspoon Coriander
Kosher salt/pepper to taste
1.  Wash the greens, and then (surprisingly), add a teeny pinch of kosher salt to them. Lettuce is technically a vegetable, and should be dressed like one.
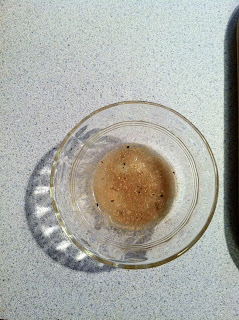
2. In a small bowl, squeeze 1 tablespoon lemon juice (I usually find that this is half of a lemon. Roll it out on a hard surface before cutting it, to loosen the lemon juice) and add to that the coriander, kosher salt, and pepper. 

3. Once you’ve added the spices to the lemon juice (since the ingredients will absorb into the acid better than the oil), whisk in 3 tablespoons olive oil.

4. Verrrrrry thinly slice the radishes and the avocado. They should be paper thin – a microplaner will be able to accomplish this, but it usually just takes a couple practice runs and tossing out the thicker slices before you get it right.

5. Toss the greens with the salad, top with the radishes and the avocado. At the cooking class we went to, the folks at Summerhouse noted that the paper-thin slices “take this recipe from a salad to an event”, and I totally agree.