Turkey Arugula Burgers

I’ve really cut down on the amount of red meat I eat, which means ground turkey is a substitute for a ton of recipes. After I got out of work early the day before the 4th of July, I came home and made these awesome turkey-arugula burgers for lunch. The onion gives them a little crunch, the dijon mustard holds them all together, and they were ready in maybe 10 minutes flat, which was just enough time for me to throw together a summer salad to go with lunch. We put these on potato rolls and mashed up some avocado to use as a base for these, which was awesome. Brendan made these killer dark and stormys and we kicked off the 4th of July weekend right.

TURKEY-ARUGULA BURGERS (makes 4)
– 1 lb. ground turkey
– 1 cup arugula
– 1/4 onion, diced
– 2 tbsp. dijon mustard
– kosher salt & pepper (maybe 1 tsp. each)

1. Get the grill (or grill pan) ready.

2. In a bowl, combine turkey, feta, onion, mustard and salt and pepper.


3. Dig in with your hands and mix it all together.


4. Form mixture into 4 equal burgers.


5. Grill for maybe 3-4 minutes on each side.


6. Serve on a bun with more arugula and mashed avocado, and enjoy the weekend.


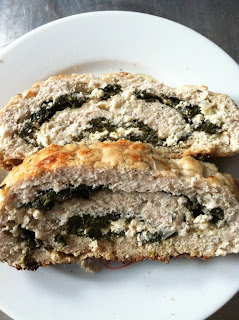
Greek Turkey Meatloaf “Roll-Up”

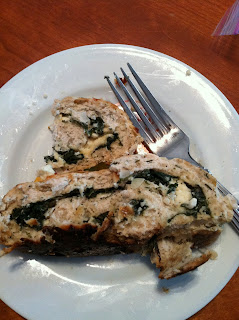
I love making Spanakopita, even though all those delicate layers of pastry dough are my nemesis (nemeses??).  That said, all those Greek flavors – spinach, feta, a little lemon, and dill – are some of my very favorites.  Could we take those and incorporate them into a turkey meatloaf?  Yes.  Yes we could.  This was delicious, and I didn’t tell B what I had added, but he noticed the light lemon and dill flavor after a couple of bites.  They definitely add a different dimension to your typical turkey meatloaf, but in an awesome way. Rolling this up makes it so pretty, too!
 
GREEK TURKEY MEATLOAF “ROLL-UP” (serves 4-6)
Ingredients:
– 2 lbs ground turkey
– 1 Vidalia onion, diced
– 5-6 packed cups fresh baby spinach (approx. a 10-oz. bag), wilted, drained, and chopped
– 1/2 cup feta cheese, crumbled
– 1 egg & 1 egg white, slightly beaten
– 1 cup panko bread crumbs
– 2 tbspns olive oil (or 1 tbspn olive oil and 1 tbspn butter)
– salt and pepper
– dried dill (1.5 tbsps)
– juice of 3/4 of a lemon  (approx. 1.5 tbsp)
 
1. Preheat the oven to 400. 
 
2. Heat 2 tbspns olive oil (or 1 tablespoon olive oil and 1 tablespoon butter) in a large saute pan over medium heat.
 
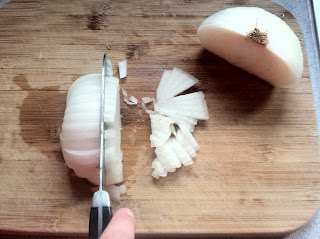
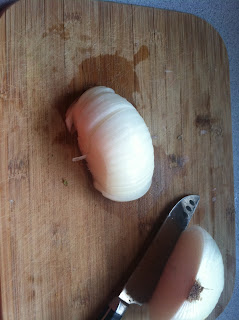
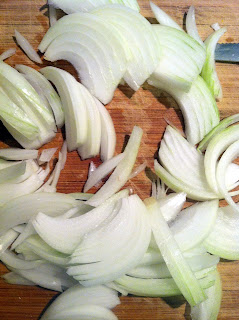
3. Dice the vidalia onion like this:
Half an onion, slice off the top part (but keep the “root” part intact) and then make slits along the ridges of the onion, almost down to the root. You can kind of follow the natural lines of the onion.  Then flip it on its side, and slice it horizontally. The onion will “dice” itself naturally.
 
4. Saute the onion in the oil or oil/butter combo until soft, add salt/pepper to taste.
 
5. Meanwhile, in a mixing bowl, combine turkey, dill, breadcrumbs, the lemon juice, the egg, 1/2 a teaspoon salt, and 1/2 a teaspoon pepper.
 
6. When onion is soft, remove from the pan and put on a plate to cool slightly.
 
7. Put pan that previously contained onions back on the heat, and add spinach to it.  Lower heat and stir until just wilted, then remove spinach and drain by either pressing spinach against the sides of a sieve, using a cheesecloth to wring it out in bunches, or squeezing most of the liquid out with your hands (but let it cool first, obviously). When the spinach is drained, roughly chop. Set aside.
 
8. Add cooled onions to the turkey mixture, stir everything to combine. You can really get your hands in there to mix it up, which is probably easiest. Form turkey mixture into a ball, and then press into an oblong shape on a piece of wax paper, and flatten minimally.
 
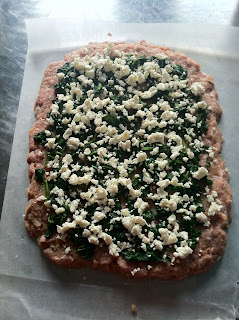
9. Top turkey mixture with chopped spinach, and then top with the crumbled feta:
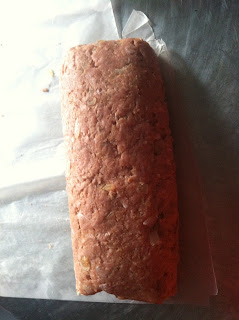
10. Using the wax paper to help get things moving, roll the turkey meatloaf, beginning at either short end of the roll. It should look like this when you’re finished:
12. Put the meatloaf in a foil-lined baking pan, and bake in the oven at 400 for approx. an hour, or when the internal temperature reaches 160 Degrees 160 degrees.  About 45 minutes into this, I took it out of the oven and drained off the fat/liquid that had pooled in the foil. You don’t have to, but it probably helps.
 
This is really pretty, so tasty, and is even better for lunch the next day, hot or cold.

Linguini with White Clam Sauce

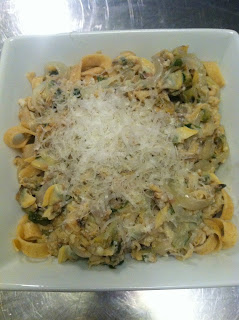
This recipe has been my simplest go-to meal to cook for company since I got my first apartment. It’s comfort food that seems fancier than it really is, it takes almost no time at all to throw together (minus the simmering), and if you make it with fresh pasta (please do) it’ll be immediately added to the rotation.  I have never known anyone who didn’t completely love this recipe.  Thanks Mom!


LINGUINI WITH WHITE CLAM SAUCE (serves 3-4)

– 3 cans whole baby clams (& juice of 2 of those cans)
– 1 vidalia onion, sliced into thick half moons
– 2 garlic cloves, minced
– handful fresh parsley, chopped
– 3/4 cup good white wine (optional, but lends a nice dimension of flavor)
– 1 tbsp. butter
– 1 tbsp. EVOO
– 1/4 c. grated parmesan cheese, plus more for topping
– pasta, approx. 1/4 lb., or 3-4oz. for each guest 

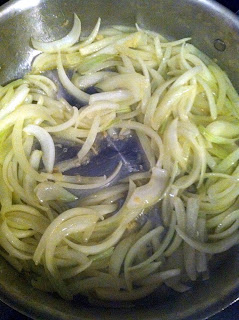
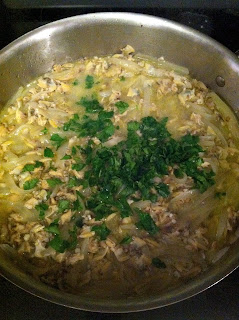
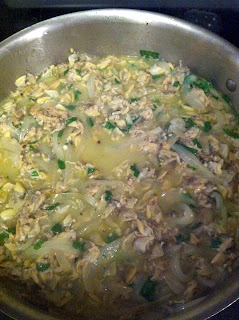
1. In a large pan, melt the butter and EVOO over medium heat until combined. Add the garlic and stir until fragrant, approx. 60 seconds.  Add the onions and saute until soft, approx. 5-7 minutes.

2. Add the wine and let the alcohol burn off, approx. 3-5 minutes. 

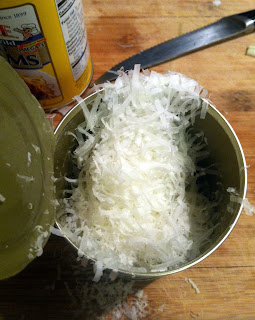
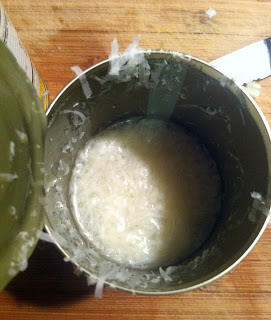
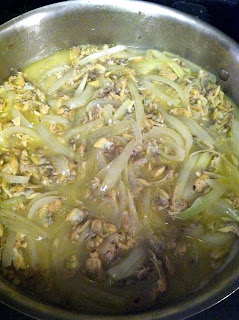
3. Add juice of 1 can and all the baby clams.  Take 1 can of juice and discard. In the remaining can with the juice, add 1/4 c. grated parm, combine, and add to the pan.

3. Stir to combine, then turn heat down to low.  Cover and simmer for about an hour, stirring every now and then.


4. At the very end, throw in the chopped parsley and stir to combine.  Cook the pasta, then top with the white clam sauce.  There will be quite a bit of juice, which is delicious, so keep the pasta separate so it doesn’t soak it up (if you’re going to have leftovers).

5. Serve, per my Mom’s instructions: “with a salad & of course a good bottle of white wine.  Invite a friend over for a real treat!”

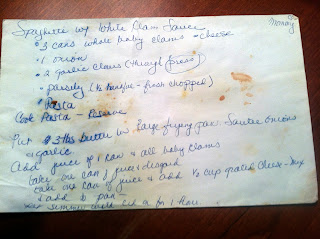
That’s a well-used recipe card from my Mom, right there!

In other news, I am super psyched for a weekend yoga workshop with the amazing Pradeep at Balance Yoga  despite this snowstorm that’s meant to be bombarding the Northeast this weekend.  Also, snowstorm “Nemo”?  Seriously??

Avocado Chicken Salad – No Mayo!


In the last post I mentioned that I’ve made some of my favorite chicken salads with avocado as a substitute for mayo, so I thought I would post that recipe this time around.  This, again, is a super easy recipe – very light and flavorful, and really healthy too.  It’ll keep for a day or two, but it’ll probably be gone before then!

AVOCADO CHICKEN SALAD (makes approx. 2 servings)
– Shredded cooked chicken, approx. 2 cups
– 1 avocado, cubed
– juice of 1 lime (a Rosle Citrus Reamer works great for this)  
– 1 tbsp. cilantro, roughly chopped
– 2 scallions, chopped

1. Cut an avocado in half, remove the pit, and dice it.  Add to a bowl and mash roughly with a fork to break it up a bit.


2. Once the avocado is mashed, add the cilantro, lime juice, scallions, and kosher salt/pepper (a pinch of each to start – then add more to taste).  You want to kind of make a guacamole base, and then add the chicken to it. 


3. Add the shredded chicken to the mix, then stir to combine.


4. Taste, season, then taste again.  Delicious!

Chickpea, Avocado, & Feta “Smash”


I felt like Maria von Trapp making this, because: Chickpeas? Avocados? Feta? These are a few of my favorite things…

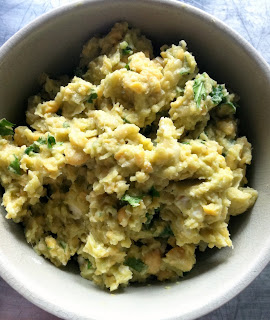
Avocado is a great substitute for mayo – I’ve made some of my favorite chicken salads with avocados as a base – but mashed with chickpeas, combined with a little feta, lemon/lime juice, and cilantro, this was beyond delicious.  The citrus keeps the avocado from browning, so you can keep this for a full day in the fridge for a healthy snack, or a sandwich filler, or a scoop on top of some salad greens.  You get the picture. It’s healthy, it’s filling, and it’s ready in no more than ten minutes, tops.  Enjoy.

CHICKPEA, AVOCADO, & FETA “SMASH” (serves 2-3)  
– 1 can chickpeas, rinsed and drained (I use Eden Organic beans, because they’re fully organic, their cans are BPA-free, and they’re only slightly more expensive but significantly better for you than the alternatives) 

– 1 avocado, cut into chunks
– 1/2 lemon, juiced
– 1/2 lime, juiced
– Approx. 3 tbsp. crumbled feta
– smallish handful of cilantro, chopped (approx. 2 tbsps)
– kosher salt and freshly ground black pepper


1. Rinse the chickpeas well and drain them, then add to a mixing bowl.

2. Cut an avocado into chunks. The easiest way to do this is to cut an avocado in half, lengthwise:  

Then, carefully but firmly, thunk (that’s a made-up cooking term) the knife blade into the avocado pit, twist it a bit, and gently pull out the pit. 
those are some balancing skills, right there!


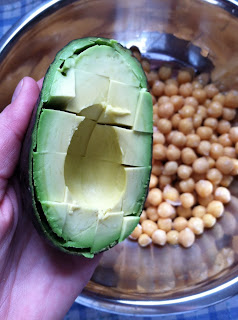
Then, in the avocado half itself, cut the avocado into a grid, run your knife around the perimeter of the avocado, and squeeze out the chunks into the bowl with the chickpeas:

2. Combine the chickpeas and the avocado, lemon/lime juice, and kosher salt & pepper, and smash it all together.  If you have a Potato Masher, this helps to get things started, but finishing smashing with a fork until you have the chickpea/avocado consistency that you want.  If you want more of a chunkier avocado texture, smash the chickpeas until they’re 75% to the texture you want, then add the avocado to finish. Say smash again.  Smash!!
pre-smash


smashed
3. Add cilantro to taste, then feta, then add salt/pepper/lemon juice or lime juice as needed.


Sandwich filler?  Salad topper? Solo?  Any way (or “S”) you serve it, it’s a winner.

To follow me on Facebook, click here: And What I Ate Facebook Page 

Zucchini, Shallot, & Chicken Sausage “Pie” – No Crust


Sometimes I wish zucchini season would last all year long. There are so many things you can use it as a base for – it’s one of my most-used ingredients.

This zucchini “pie” has a base of shredded and drained zucchini, shallots – which soften and release a lovely little flavor during cooking – and cooked chicken sausage. I added some wilted spinach and a combo of mozzarella and feta to this, then topped it with a really thin whole wheat mixture to bind it a little bit. It cooks well, keeps well, and is incredibly filling. You can opt out of the chicken sausage if you want to keep this completely vegetarian – it’s just as good.

ZUCCHINI, SHALLOT, & CHICKEN SAUSAGE “PIE” (adapted from Skinny Taste)
– 2 medium zucchini, washed and shredded. Save the ends and slice about 20 very thin rounds to use as a base layer.
– 2/3 c. shallots, sliced thinly
– 1 c. chicken sausage, uncooked
– 1 c. baby spinach leaves
– 1/2 c. shredded mozzarella
– 1/4 c. crumbled feta
– 2/3 c. whole wheat pastry flour
– 1 tsp. baking powder
– 2/3 c. milk
– 1 tsp. olive oil
– 2 large eggs – 1 white & yolk, 1 white
– 1/2 tsp. kosher salt

1. Preheat oven to 400.

2. Shred the zucchini, and drain it really well. I’ve found the best way to do this is to really wring it out in cheesecloth, which can be found everywhere from grocery stores to Bed, Bath, & Beyond.  Make sure you get as much water out as possible, so the zucchini pie won’t be a zucchini mess. Add drained zucchini to a bowl. 


3. Put the zucchini rounds on a baking sheet over a paper towel. Sprinkle with kosher salt, let sit for ten minutes, and then flip the rounds, sprinkle with salt again, and let sit for another 10 minutes. This will extract the water from the zucchini. After salting both sides, rinse zucchini rounds and dry well.


4. Meanwhile, brown sausage in a pan. When cooked, add spinach, remove from heat, and combine until spinach is wilted. Let cool a bit.

5. Chop the shallots, shred the mozzarella, and add to the shredded zucchini.  Add feta, then add sausage/spinach mixture. Mix well to combine.


6. Whisk together flour and baking powder in a separate bowl. Add milk, olive oil, salt, & eggs to this mixture, and combine. It will be pretty thin – this is good.

7. Spray a pie pan with cooking spray or olive oil.  Make a layer of the zucchini rounds, overlapping each other, for your zucchini pie base.


8. Add the zucchini/shallot/sausage/cheese mixture and spread evenly into the pan.


9. Pour the “batter” mixture evenly over the zucchini mixture.  You can sort of bang the edges or bottom of the pie pan to get the batter into the crevices of the pie, so it will bind it more.

topped with the batter & dusting of parm, right before going into the oven

10. Top with a dusting of freshly grated parmesan cheese, and bake for approx. 30 – 35 minutes, or until a knife can be inserted and removed cleanly from the center of the pie.  Let stand for 15 minutes, then slice and serve. 


Tuna Chickpea Salad with Cucumber and Red Onion – No Mayo

Canned tuna can be so much more than something that’s mixed with mayo, onion, and celery, and served on a sandwich. Mayonnaise kind of skeeves me out, but I get that it’s unavoidable sometimes. This tuna salad, however, substitutes mayo with an olive oil-lemon vinaigrette, adds chickpeas, and some teeny tiny pieces of red onion and english cucumber. It’s fresh, light, and healthy – and actually keeps really well for up to 2 days – I think it’s a perfect lunch.

TUNA CHICKPEA SALAD WITH CUCUMBER AND RED ONION
– 2 cans tuna (a note about this – I know canned tuna can be loaded with mercury. If you can find it, Wild Planet has incredible canned, sushi-grade and wild-caught tuna)
– 1/2 english cucumber, diced into tiny pieces
– 1/4 red onion, diced into tiny pieces
– 1 can chickpeas, drained and rinsed
– handful of parsley, chopped
– Kosher Salt & Pepper to taste
For Dressing:
– Juice of 1/2 lemon
– 2 tbsp. EVOO
– Kosher salt (or Herbamare for a little extra boost of vegetables and minerals) and freshly ground black pepper to taste


1. In a medium size bowl, combine chickpeas, tuna, and parsley.

2. Finely chop the cucumber and red onion. The tiny size of these pieces really “makes” this salad – the overall taste is just different, somehow, from a salad that would have larger chunks of cucumber and red onion. 


Remove the middle “seeded” part of the cucumber (even though english cucumbers are seedless) to get a little more color from the dark green skin of the cucumber.


3. Add cucumber and red onion to chickpea/tuna/parsley mix.

4. Combine dressing ingredients, adjust seasonings to taste.

5. Pour dressing over tuna/chickpea/cucumber/red onion mixture. Stir well to combine. If tuna seems a little dry, add more olive oil and/or lemon juice to taste. Serve by itself or in a wrap with some lettuce.


Roasted Carrot Soup With Thyme and Ginger (aka, “Finally Went to the Farmers Market”)

I finally got out today to go grocery shopping, so we can stop the whole “eating every meal as take-out” thing we’ve been doing. And we’re starting small. This roasted carrot soup is one of the simplest, most surprisingly delicious things I make. The roasted carrots get sweeter, and give the soup this depth of flavor that’s incredible. Since there are only 6 ingredients in this, make sure you get the best quality available – locally grown carrots, a good organic vegetable stock (I use either Pacific or Imagine broths, which are both amazing), etc. This soup tastes so flavorful and rich, you won’t believe so little went into it.

ROASTED CARROT SOUP WITH THYME AND GINGER (recipe source: Food52)
– 8 carrots
– 1/2 vidalia onion, chopped
– 6 cups vegetable stock (8 oz. = 1 cup, so 48oz.)
– 1 piece ginger, peeled, approx. 1 inch long
– Couple sprigs of thyme
– 2 garlic cloves, chopped
– Kosher Salt & freshly ground black pepper to taste
– EVOO

1. Wash carrots, then peel and cut into 1/4 inch rounds. Even though you’re peeling the skins, these still grew in the ground and are dirty. Peeling the skin is going to drag any debris from the carrot skin into the carrot itself unless you wash them beforehand.

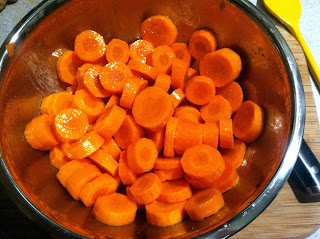
2. Toss carrots with a glug of olive oil and sprinkle generously with kosher salt.  
3. Arrange in a single layer on a baking sheet, then broil on high until the brown and soften, flipping every five minutes or so. If the carrots get blackened edges a little, don’t worry – this actually adds a nice dimension to the soup.

2. In a smaller saucepan, bring vegetable stock to a boil, then add peeled ginger and thyme spring. Simmer 15 minutes (while the carrots are roasting).

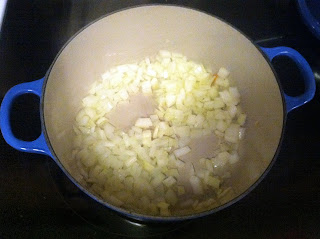
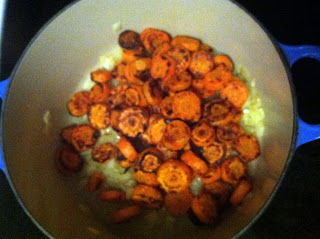
3. Meanwhile, in the pot you’re going to use for your soup (I use a Le Creuset Dutch Oven for this, and just about everything else – it’s borderline impossible to mess up cooking in these), “sweat” the onion in 1 T. olive oil and a pinch of kosher salt over medium-high heat until soft and translucent.  Add garlic and stir until fragrant (90 seconds or so), then add carrots.

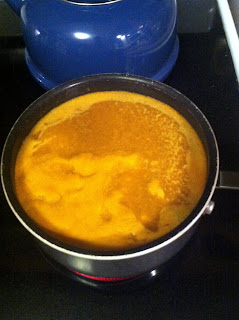
4. Remove the ginger and thyme from the vegetable stock and discard.  Add stock to the pot with the onion and carrot mixture. Bring to a boil and then simmer 5-10 minutes until the carrots are soft.
5. Using an immersion blender (this one looks fantastic) or a regular blender, puree the soup. If you use a regular blender, make sure your soup has cooled – if it’s hot, it could explode in the blender.

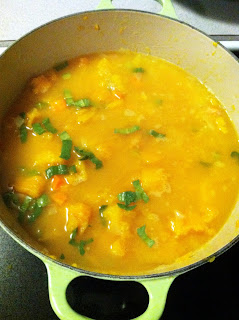
6. When soup is pureed, salt and pepper to taste. Garnish with thyme sprigs to make it look pretty. We had this soup, a roast chicken, and a salad with local greens for the first meal I cooked in over a week. So good.

Roasted Butternut Squash Soup


This roasted butternut squash soup just nails it. It’s basically pureed squash and chicken (or veggie) broth, some added vegetables, spices and a splash of heavy cream. I think it would be great for kids, or even baby food, minus the heavy cream and spices. That bit of info, for me however, is filed away under “for future reference”, at least for the time being. :]

ROASTED BUTTERNUT SQUASH SOUP (makes a giant pot of soup that freezes really well, too)

– 2 large butternut squash (squashes??)
– 2 celery stalks, chopped
– 2 carrots, chopped
– 1 vidalia onion, diced
– 6 cups chicken broth (this will depend on the height of your squash, though. I’d buy 64 oz. of chicken broth just to be safe)
– 1 T. butter
– 1 T. EVOO
– Splash of heavy cream, or up to 1/4 c. to taste
– Kosher Salt
– White pepper (this blends into the soup nicely)
– Freshly grated nutmeg
– 8-10 sage leaves, chopped

1. Preheat oven to 400.

2. Pierce each squash with a fork or skewer a few times. Cut each squash in half, length-wise, and scoop out the seeds and stringy things at the bottom of the squash. Rub with a couple of drops of olive oil, then roast, cut-side down, for approx. 30 – 45 minutes. Set aside and allow to cool.


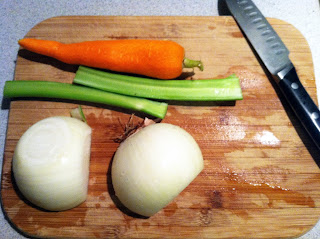
3. In your soup pot (I cannot say enough great things about Le Creuset ), heat 1 T butter and 1 T olive oil over medium high heat. Add chopped onion, celery, and carrot, saute for 10 minutes or until soft.  You want these to “sweat”, not brown, so make sure you give them some room, and salt them with some Kosher salt to draw out as much water as possible.

Look at this Farmers’ Market celery!!! Unbelievable.


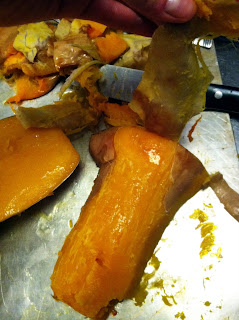
3. When squash is cool enough to handle, peel off the skin. This should come right off, but cut away anything that remains. Roughly chop the roasted squash into chunks.


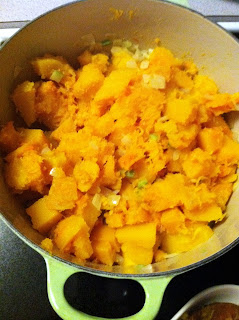
4. Add squash to the onion/celery/carrot mixture. Add chopped sage and approx. 1 T. of Kosher salt. Add chicken (or vegetable) stock until it just covers the squash in the pot. 


5. Bring to a boil, cover, and reduce heat to low. Simmer for 45 minutes – 1 hour. 

6. After an hour, use an immersion blender to puree the soup into a creamy consistency. Breville makes great immersion blenders, and we are definitely registering for one, since the one I use (all the time) I won during a “Yankee Swap” at my very first job out of college at MSPCC.  If you don’t have an immersion blender, you can use a regular blender. Just make sure the soup is cool, because if it’s hot, it could explode in your blender (really).


7. Season to taste with nutmeg, white pepper, Kosher salt. Swirl in heavy cream for some richness.


— This soup will continue to blend the flavors, so when you think you’re “almost there” with the spices, STOP.  It’ll come together perfectly in a couple of hours!  You can even throw this together the night before, then reheat for dinner or lunch the next day to get that perfect flavor combination.

Turkey Meatloaf – Ina Meets Alton

When I was a kid, I detested meatloaf. It just seemed like such a weird, gross thing to me, and I would sit and sulk at the dinner table while I picked miserably at it. That ship has sailed. My mom’s meatloaf is one of the comfort foods I’d crave most of all when I lived outside of NEPA, and I’ve put together tons of different versions based on her recipe. 

This turkey meatloaf, however, is Inga’s.  The sauce is (almost) Alton’s. It was incredibly tasty, juicy (for turkey meatloaves, this can be hard to accomplish), had a note of sweetness, and was spiked with cumin – which is apparently packed with health benefits.  That mix might sound a little “off”, but the flavors all came together in a totally delicious way. There was enough left over for 2 meatloaf sandwiches the next day, and that was about it! 

TURKEY MEATLOAF WITH A CUMIN-KETCHUP-HONEY & BROWN SUGAR GLAZE (serves 4)

– 2 lbs. ground turkey
– 3/4 tsp. tomato paste
– 1.5 vidalia onions, chopped
– 1/2 c. chicken stock
– 1.4 c. Worcestershire sauce
– 3/4 c. breadcrumbs (plain or seasoned)
– 1.5 large eggs, beaten
– 1/4 tsp. thyme or Herbes de Provence
– EVOO
– 1 tsp. kosher salt, 1/2 tsp. ground pepper

Glaze:
– 1/2 c. ketchup
– 1 tsp. cumin
– Dash Worcestershire sauce
– 1 tablespoon honey
– 1 tsp. brown sugar
– 1 tsp. yellow mustard

1. Preheat oven to 350.

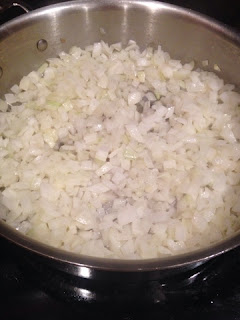
2. In a saute pan, “sweat” the onions in 1 T olive oil until translucent.

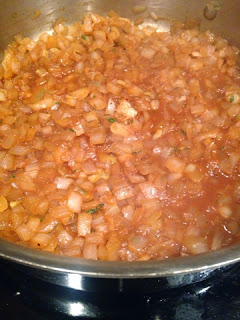
3. Add salt, pepper, thyme, Worcestershire sauce, chicken stock and tomato paste, mix well. This smelled like a variation on French Onion soup. It was all I could do to keep going with the Turkey Meatloaf recipe). Remove from heat, cool to room temperature.


Pacific makes a great organic chicken broth, in  a 4-pack of 1 cup containers that are perfect for cooking.


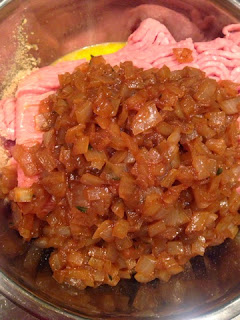
4. In a large mixing bowl, combine ground turkey, bread crumbs, egg, and onion mixture; mix well.


5. With your hands, shape the turkey mixture into a rectangular loaf. Place on an ungreased sheet pan.


6. Combine glaze ingredients; spread evenly over the meatloaf with a silicone basting or pastry brush. 


7. Cook the meatloaf approx. 1 hour, or until the internal temperature is 160 (check with a meat thermometer after 45 minutes).


— For those of you who are opting out of the glaze, add a little oven-proof bowl of water to the oven while cooking the meatloaf – this will apparently help prevent the meatloaf from cracking, and it’s all I can do not to make a joke about that.