Roasted Butternut Squash and Kale “Au Gratin”

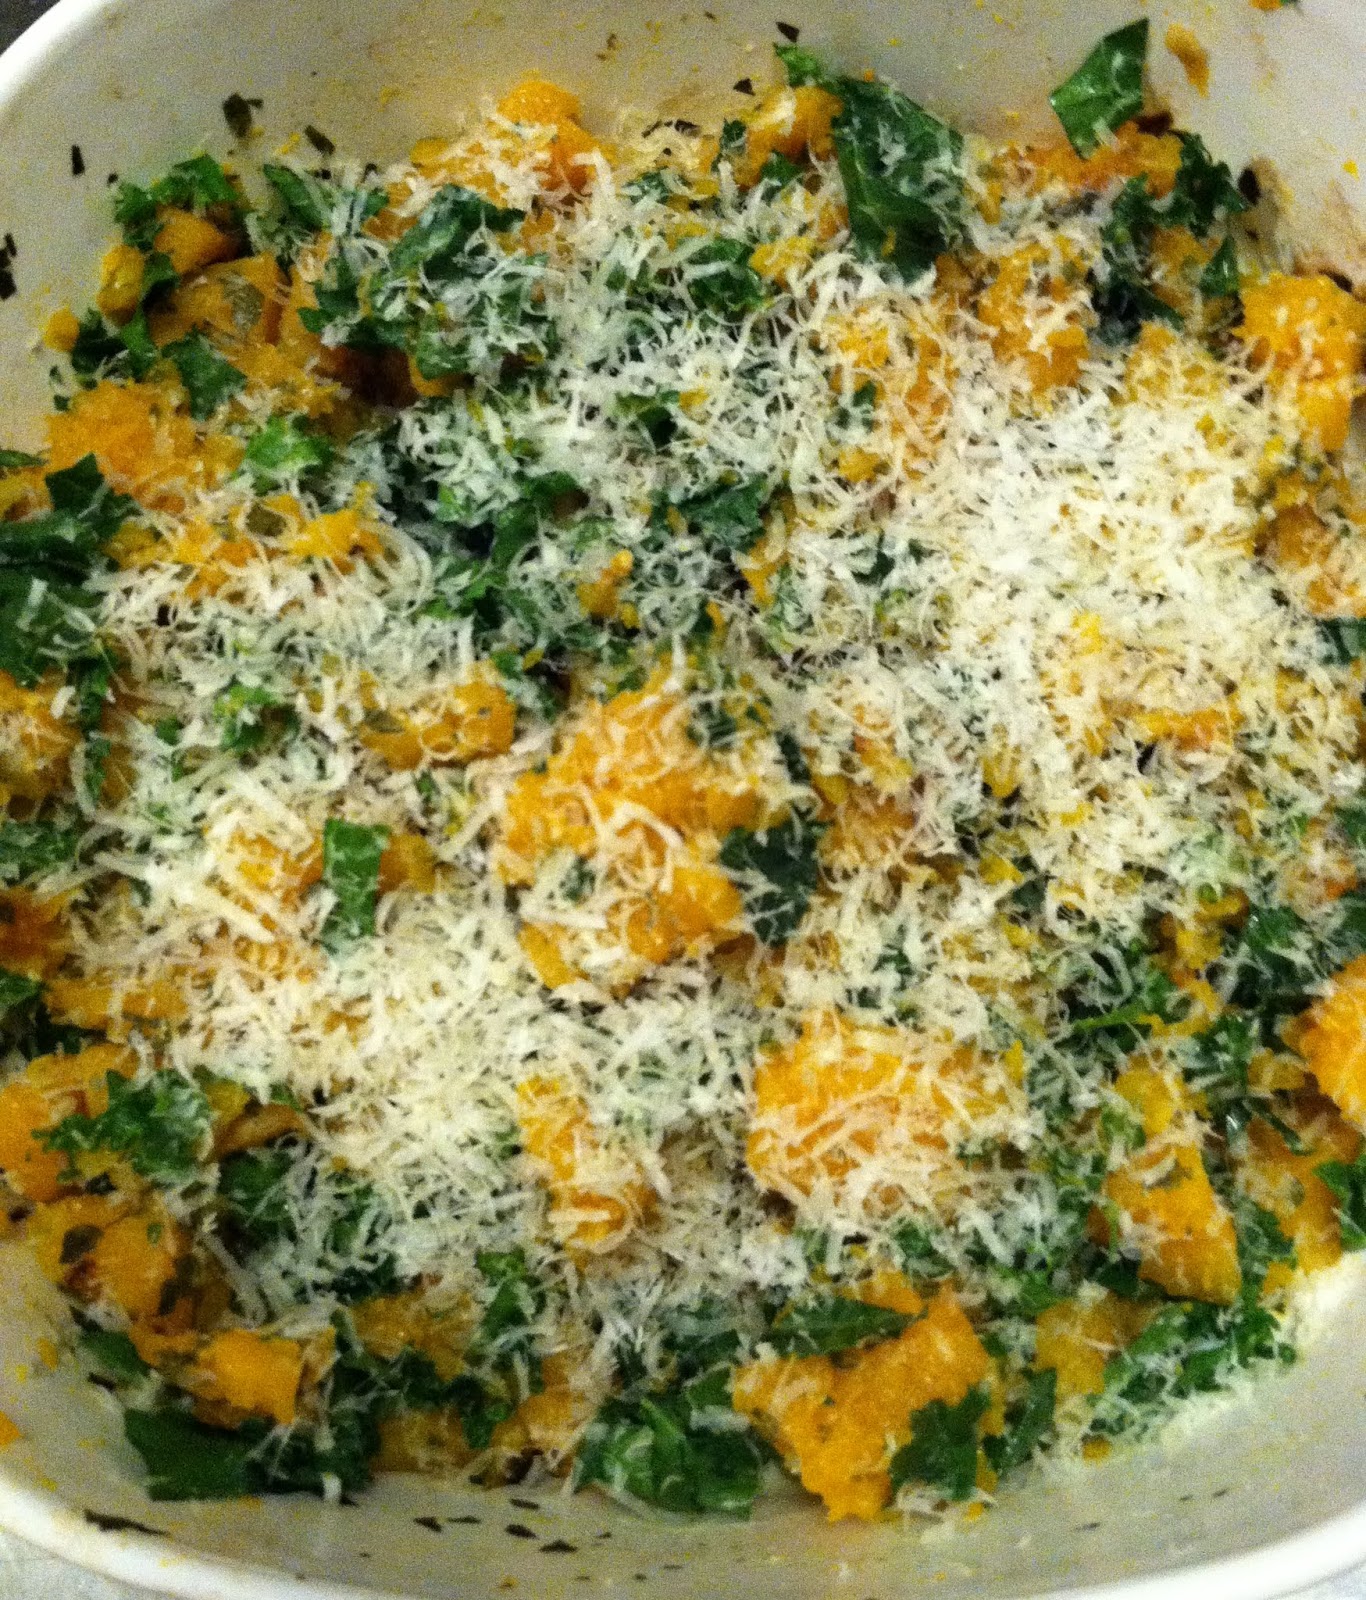
It’s butternut squash season!!  I look forward to this every year. Butternut squash is the basis for some of my favorite fall recipes, from soup to sides to main dishes. This side is savory due to the roasted squash and a light dusting of parmesan cheese, and has an added punch of health benefits with the addition of the kale. I could have eaten this on its own instead of as a side. It was great.

ROASTED BUTTERNUT SQUASH & KALE “AU GRATIN” (serves approx. 4)

– 1 large butternut squash, roasted and cubed
– 2 cups kale, de-stemmed and chopped
– 2 cloves garlic, diced
– Freshly grated parmesan, approx. 1/4 cup

1. Cut the butternut squash in half. I’ve learned that the easiest way to do this is to poke a couple of holes in the squash while it’s still whole, and throw it in the oven at 400 for maybe 15 minutes.  It should soften enough in that time that you can cut it in half, lengthwise, without feeling like you’re going to cut off your fingers accidentally.


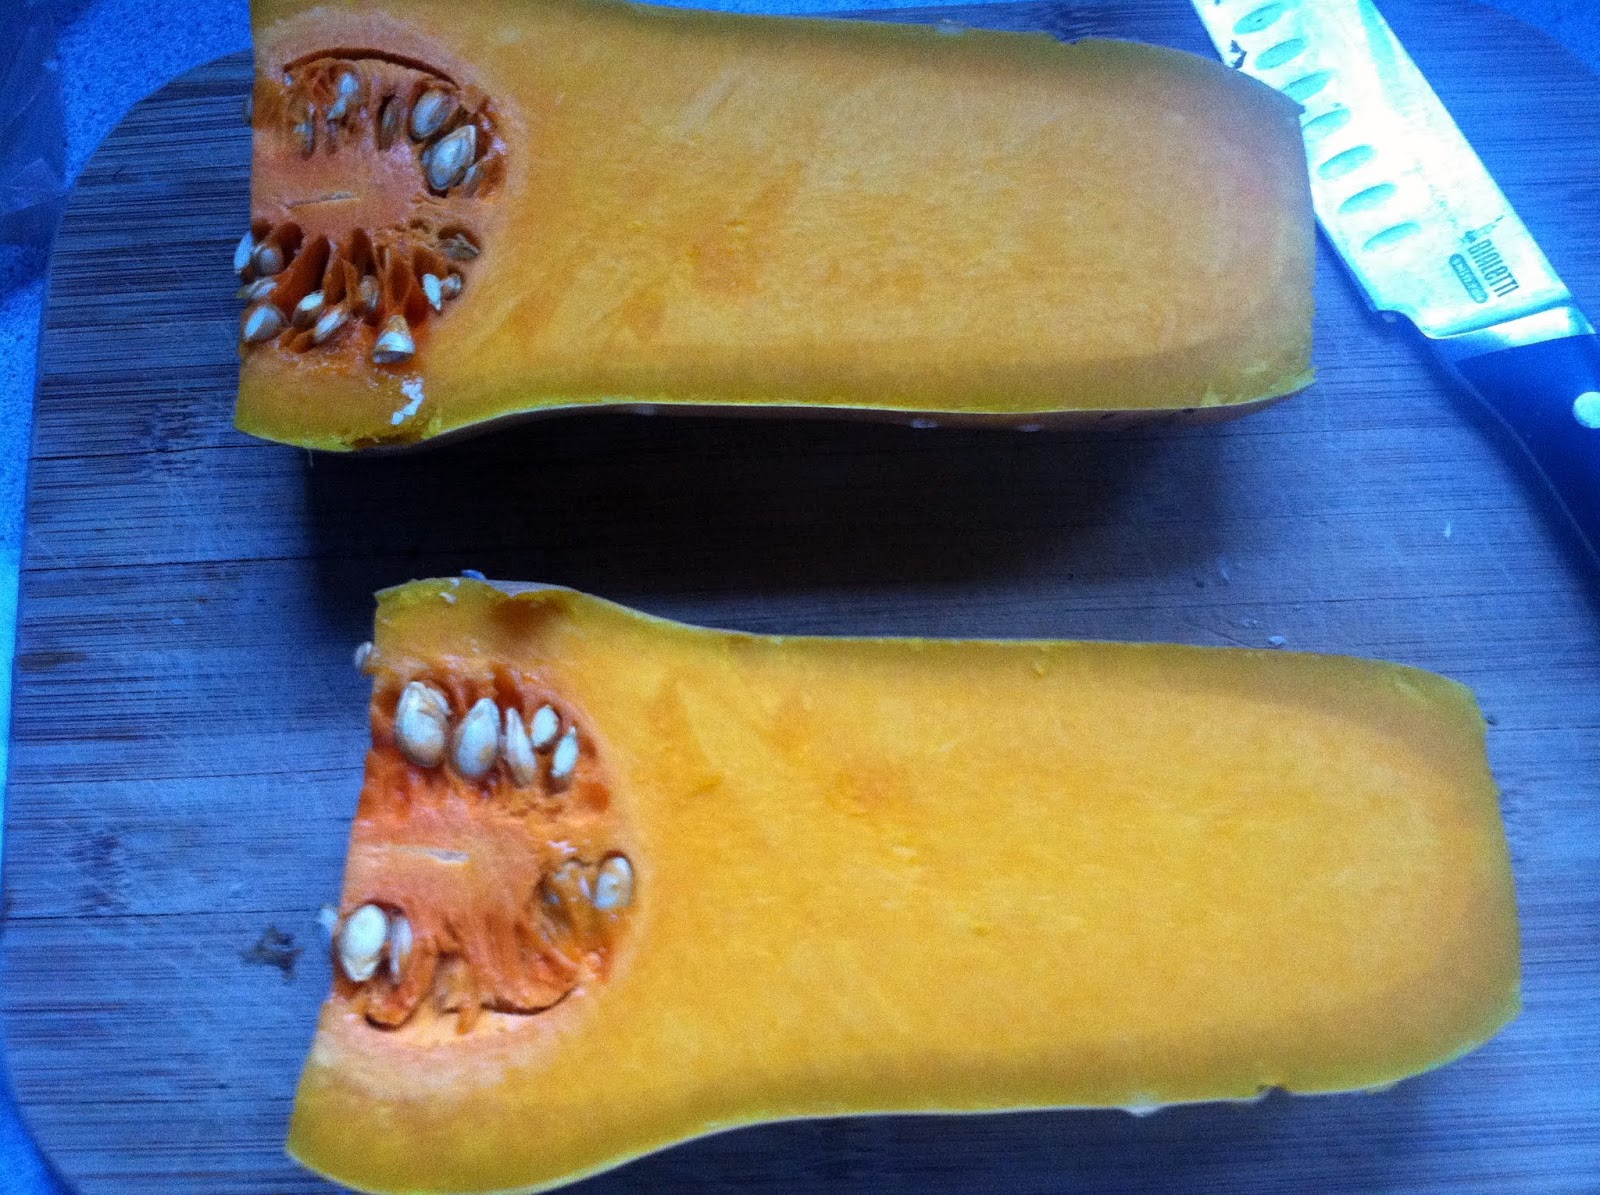
2. Scoop out the seeds and stringy stuff at the bottom of the squash. Rub each half with a little olive oil, and place cut-side down on the baking sheet. Roast for approx. 30 – 45 minutes (depending on the size of the squash). Peel and cube squash – it should still be a little firm, but if not, don’t worry about it too much. Lower oven temp to 350.

3. In a saute pan, heat 1 tbsp olive oil, and add chopped garlic. Stir until fragrant, approx. 90 seconds. Add chopped kale and stir to combine until wilted. Set aside.

4. Lightly mist a baking pan with olive oil, then add kale/garlic mixture and cubed squash. Stir to combine, then top with the grated parmesan cheese. Bake at 350 for approx. 10 minutes, or until cheese is melted.


Zucchini Parmesan

Zucchini season is winding down, so in one of my last zucchini-based recipes of the season, I tried this delicious looking zucchini parm. I don’t know if this necessarily falls under the category of “healthy”, considering the cheese and the sauce, but the coating on the zucchini is nice and light, and this could really be served as a meal instead of a side. We loved it.

ZUCCHINI PARMESAN (serves 4-6 as a side)

– 3 large zucchini, washed and cut into 1/4 inch rounds (leave skin on), or cut into strips. Strips might actually be really nice to make this more of a “lasagna”.
– Sauce, approx. 2 cups
– Mozzarella, approx. 1 & 1/2 cups
– Freshly grated Parmesan, approx. 1/4 cup
– Olive Oil
– Breadcrumbs, 2 cups
– Freshly grated Parmesan – 1/4 cup (added to breadcrumb mixture)
– Kosher Salt
– Extra Virgin Olive Oil

1. Preheat oven to 375.

2. Cut zucchini into rounds or strips, and place on a cooling rack over a paper towel. Sprinkle liberally with kosher salt. This draws out the water from the zucchini, so that it bakes a little more crispy, a little less soggy.


3. Look at all the water that’s coming out of these!! Would you ever think?  After about 20 minutes, flip the zucchini rounds/strips, salt the other side, and let sit for another 20 minutes to fully extract as much water as possible. Then, rinse them in a colander and lay them in one layer to dry.


4. When dry, toss zucchini in a bowl with 1-2 tablespoons olive oil. 

5. In a different bowl, combine breadcrumbs and parmesan. Lightly spray a baking sheet with olive oil (Pam makes a decent organic olive oil spray that I use for things like this).

6. Gently press the zucchini rounds/strips into the breadcrumb/parmesan mixture. Arrange on the baking sheet. Bake at 375 for approx. 30 minutes, flipping once halfway, until golden brown-ish.
7. Break out your lasagna pan, or just a deeper baking dish. Put a thin coating of sauce over the bottom of the dish, and then place your first layer of zucchini rounds/strips on top of that, overlapping as needed. Top with shredded mozzarella and parmesan.


8. Repeat this sequence – sauce, zucchini, mozz/parm, until you’re out of zucchini. Top with a bit of sauce and the last of your shredded cheese, then bake at 375 for approx. 30 minutes, or until sauce is bubbling and cheese is melted.

9. Remove from oven, let cool a bit, then use a spatula to cut into portions. This actually – surprisingly – reheated remarkably well the next day. The crispier the zucchini, the better!


Greek Yogurt Chicken


Greek yogurt is everywhere nowadays. I’ve started using it in baking, cooking, even in dressings. But a Greek yogurt coating? On chicken?? When I first read about this on Pinterest, I thought it sounded totally gross, but I was too curious to find out how it would be. Turns out, it’s healthy, flavorful, and creates a little tangy coating that keeps the chicken juicy. This recipe can be ready from start to finish in an hour, tops, which gives you enough time to make a nice side salad, or steam some veggies, and have yourself a nice glass of wine. We’ve used this recipe dozens of times, and it’s just one of the easiest, most delicious ways we make chicken.

GREEK YOGURT CHICKEN

– Chicken breasts
– 1 container greek yogurt (I like Chobani)
– Freshly grated parmesan cheese, approx. 1/3 cup
– 1/2 tsp. garlic powder 
– 1 tbsp. kosher salt
– 1/2 tsp. pepper


1. Preheat oven to 375.

2. In a “breading” bowl, combine the yogurt, cheese, and seasonings, stir to combine.

3. Place a cooling rack over a deeper roasting pan lined in foil. This creates a “convection” type of cooking for those of us with basic ovens (someday, Viking convection oven. I’m coming for you!).

4. Coat the chicken with the mixture. You really don’t need a lot of it – it’s a ton of flavor in even a thinner coating. 

5. Bake for 45 – 55 minutes, depending on your oven. It seems like some folks have had a lot of luck with this coating turning golden, almost “fried” looking, but whatever color it ends up being, just make sure you make a small slice to check that it’s cooked all the way through.

My Mom’s Minestrone Soup

I love soup. It’s hearty, healthy, and comforting. With the Farmers’ Markets packed with produce, this is a great way to use up some veggies and kind of ease your way into fall. My mom’s minestrone is at the top of my list of favorite things. It’s delicious the day of, for days afterwards, and even pureed. We’ve always added some thinly sliced provolone cheese to the soup to give it a little more richness, but that’s up to you.  This minestrone just makes me feel better every time I have it.

MINESTRONE SOUP (makes an enormous pot of soup which you can freeze – if there’s any left after a couple of days)
– 1 cabbage, sliced into long strips. I usually take out the “ribs” of the cabbage and just use the majority of the leaves.
– 4 stalks celery, cut
– 1 large vidalia onion, sliced into long strips
– 2 32 oz. containers of chicken stock (or vegetable, if you want to make this completely vegetarian)
– 2 cans chick peas, rinsed and drained
– 1 large can plum tomatoes, roughly cut (don’t get diced tomatoes – the plum ones work so much better)
– 1 16. oz can chopped spinach leaves
– 3 tablespoons butter


1. In a large stockpot, melt 3 tablespoons butter over medium high heat. 
2. Get your veggies ready, and then add them to the pot with the melted butter. Cook down until wilted.

3. When the veggies are soft, add the chicken or veggie stock, and stir.  
4. Add tomatoes and juice from the can, spinach, and chick peas.  Stir, cover, and turn heat down to low. Simmer for 1 hour or up to 4. Add kosher salt/pepper to taste, but be careful not to overseason – the flavors will continue to come together overnight.

5. When soup has simmered enough (I usually can’t wait the 4 hours), pour yourself a bowl, shred some provolone cheese into it, and dig in. This is good today, but it will be great tomorrow. 

Mom’s minestrone soup = love


Turkey Taco Lettuce Wraps

These turkey taco lettuce wraps, from the very first time I made them, got added to the rotation immediately. They are incredibly healthy: you make your own taco seasoning, so you avoid all the preservatives and bad things in the grocery store seasonings, the lettuce wrap completely eliminates the corn taco you would otherwise use, and if you use the guacamole recipe from a couple days ago, you get the added bonus of the avocado health benefits.

Also, this is fun to eat! It’s a little messy but so worth it. If you’re having trouble with the lettuce wraps, you can always shred the lettuce and put the turkey and toppings over it like a turkey taco salad.

TURKEY TACO LETTUCE WRAPS (adapted from Skinny Taste)
Ingredients (serves 4-6)
– 2 lbs. ground turkey
– 1/2 vidalia onion, minced
– 1/2 yellow, orange, or red bell pepper, minced
– 8 oz. tomato sauce
– 1/4 c. water
– Any kind of lettuce for the wraps – boston bibb works well, as does iceberg or romaine (seen here)

Taco Seasoning:
– 2 tsp. garlic powder
– 2 tsp. cumin
– 2 tsp. salt
– 2 tsp. paprika
– 1 tsp. chili powder
– 1 tsp. oregano

1. Mix ingredients for taco seasoning, adjusting to your preference (if you like it a little hotter, double the chili powder), and set aside.

2. Over medium high heat, brown the turkey. 

3. When turkey is brown, add taco seasoning and stir to combine.

4. Mince that bell pepper and the onion, add to the ground turkey, along with the tomato sauce. Add 1/4 c. of water and stir to combine well. Cover and simmer on low for approx. 25 minutes. 

5. Arrange your toppings, assemble, and bring a lot of napkins to the table – this is a messy one!

Guacamole


So we’ve talked about my avocado obsession, right? I could eat them all day long. Not only are they delicious, but they’re so good for you, and there are a million articles about how they promote heart health, blood sugar regulation, even anti-cancer benefits! Also, according to this site,  the avocado is “colloquially known as the Alligator Pear, reflecting its shape and the leather-like appearance of its skin.”, which totally makes sense.  Ha. The Alligator Pear.

Anyway, this guacamole recipe is super easy and perfect with Pretzel Crisps, which we should basically buy stock in at this point, because we go through so many of them on a weekly basis.  It’s also a great topper for turkey tacos, which are up next.

GUACAMOLE
(serves 4 regular people, or 2 people who live in this house and really love guacamole)
Ingredients:
2 avocados
4-5 cherry tomatoes, seeded and diced 
1/4 of a large vidalia onion, diced
cilantro (approx. 2-3 tablespoons)
juice of 1 lime
kosher salt to taste

1. Peel and dice the avocados. I’ve found that an easy way to do this is right in the avocado half itself (see the dice in the avocado half in the picture above?).  Then just run a knife around the edge and the diced pieces should kind of just squeeze out into the bowl. Mash this gently with a fork.  As you add the other ingredients, the avocado will continue to get smoother, so it depends on how chunky you like your guac.


2. Add the lime juice (this will also prevent the avocado from browning) and the kosher salt, so the salt can kind of blend with the acid in the lime juice.

3. Add the diced tomato and onion (try to make these pieces the same size) and cilantro, mix everything together. Adjust seasonings and enjoy!