The Kitchen’s Tomato Soup

The Kitchen, one of my very favorite restaurants in Boulder, is everything that’s right with the world.  The space is warm and welcoming.  Their food is outrageously, ridiculously delicious.  They highlight local & organic farms, farmers, and Colorado ranchers. They’re committed to sustainability, financially generous to their community, and environmentally conscious to the point where the restaurant’s leftover cooking oil is used to fuel the car of one the servers.

And.

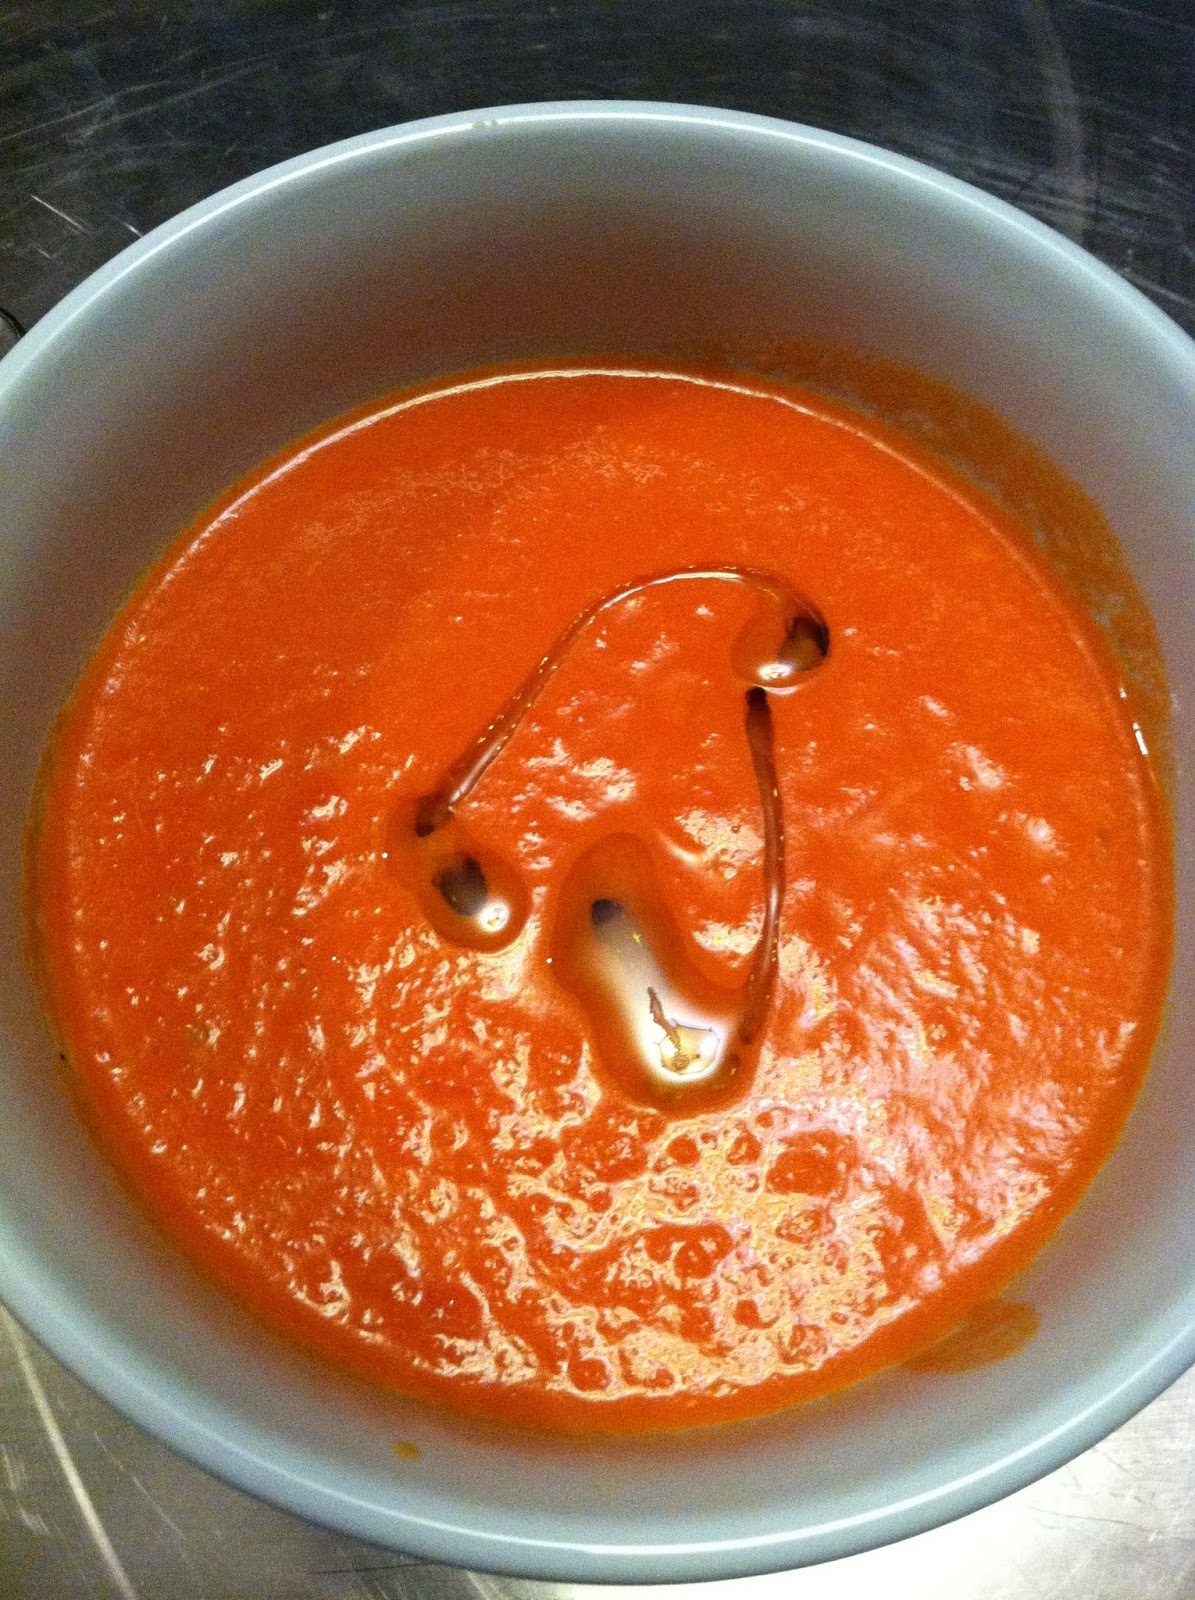
They make the world’s greatest tomato soup. Enjoy.

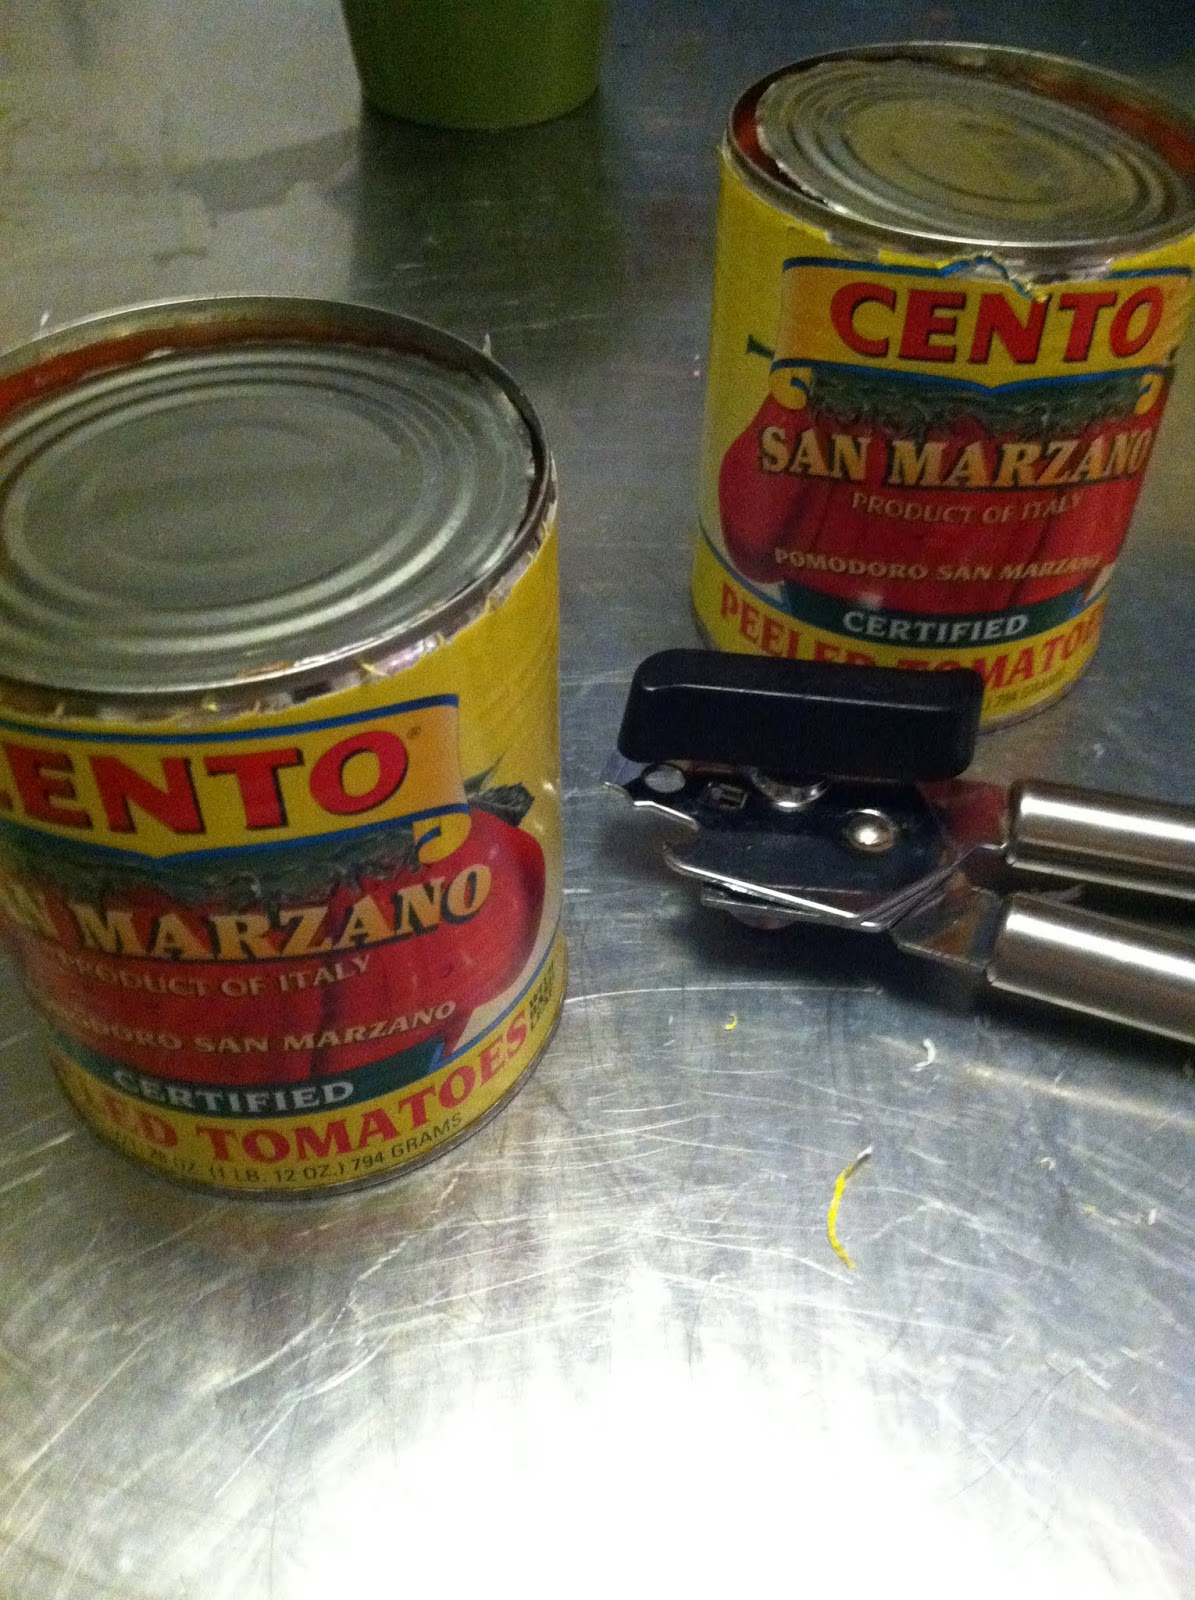
THE KITCHEN’S TOMATO SOUP (serves 8-10, or 2 very lucky people who will eat this for lunch & dinner for 2 days straight.  Ahem.)
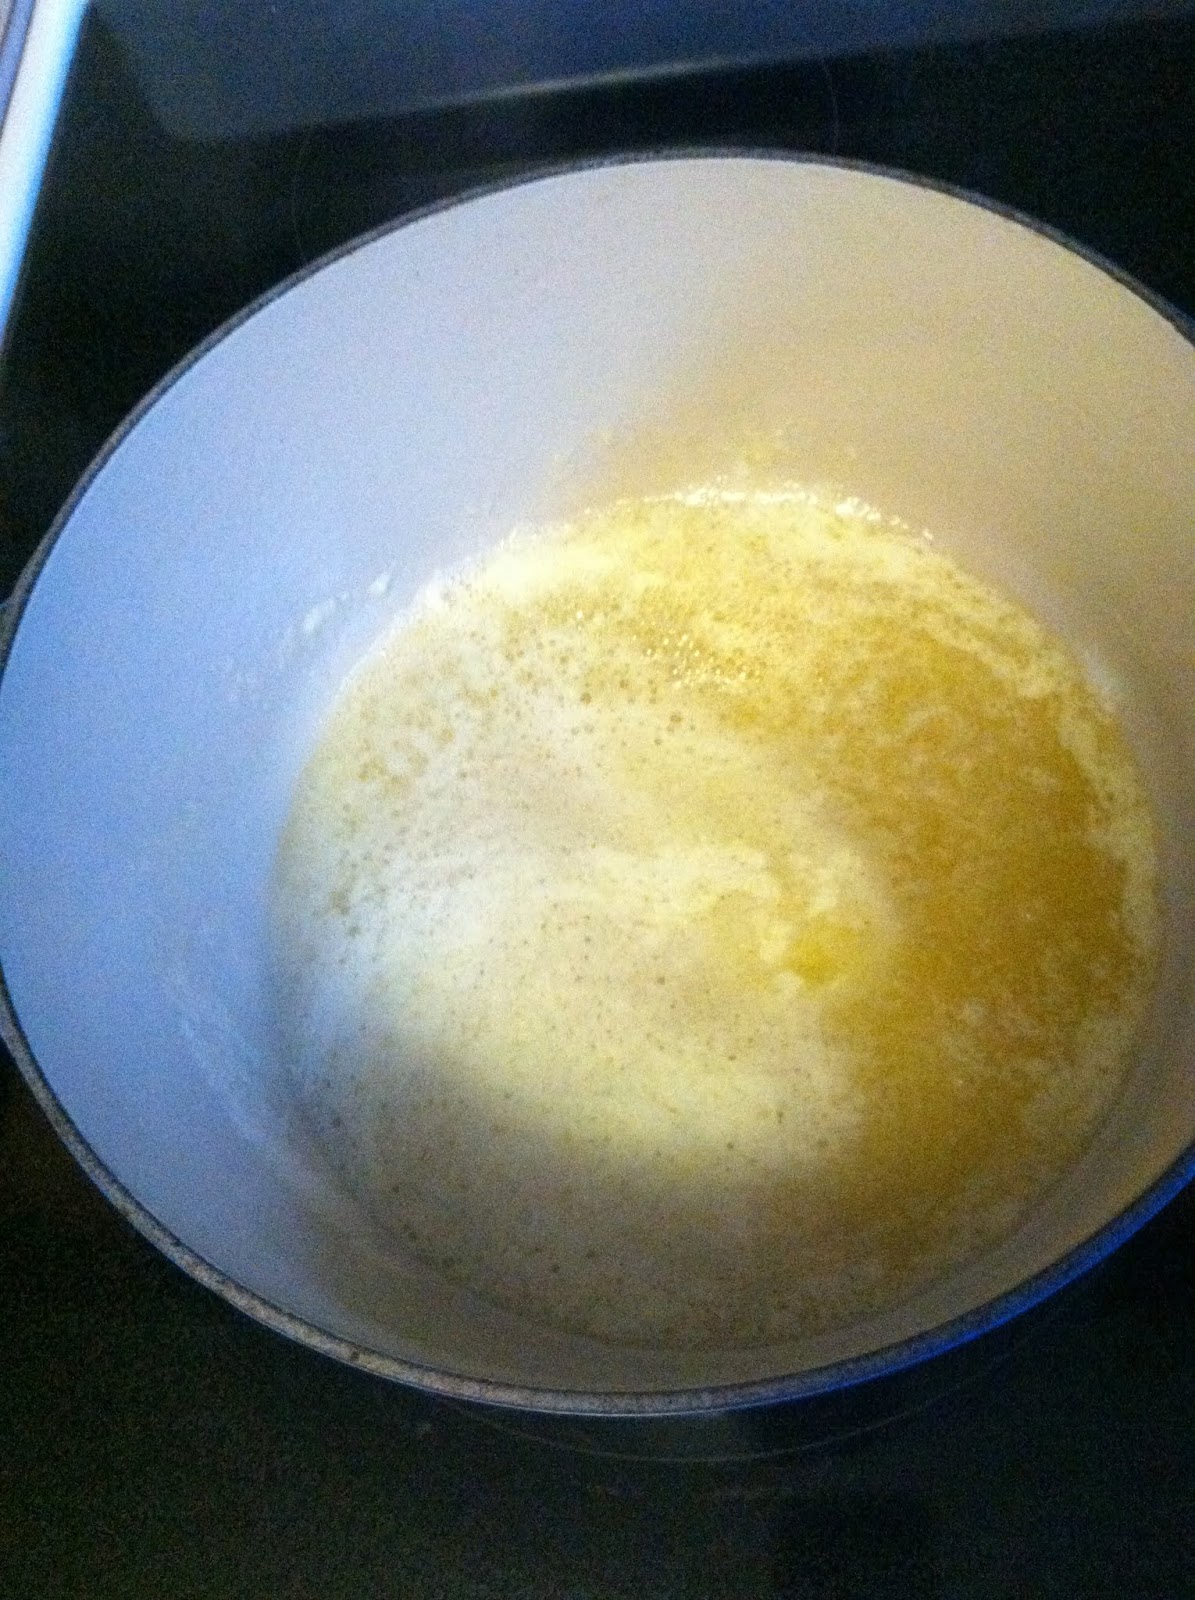
– 1 & 1/3 sticks unsalted butter. 
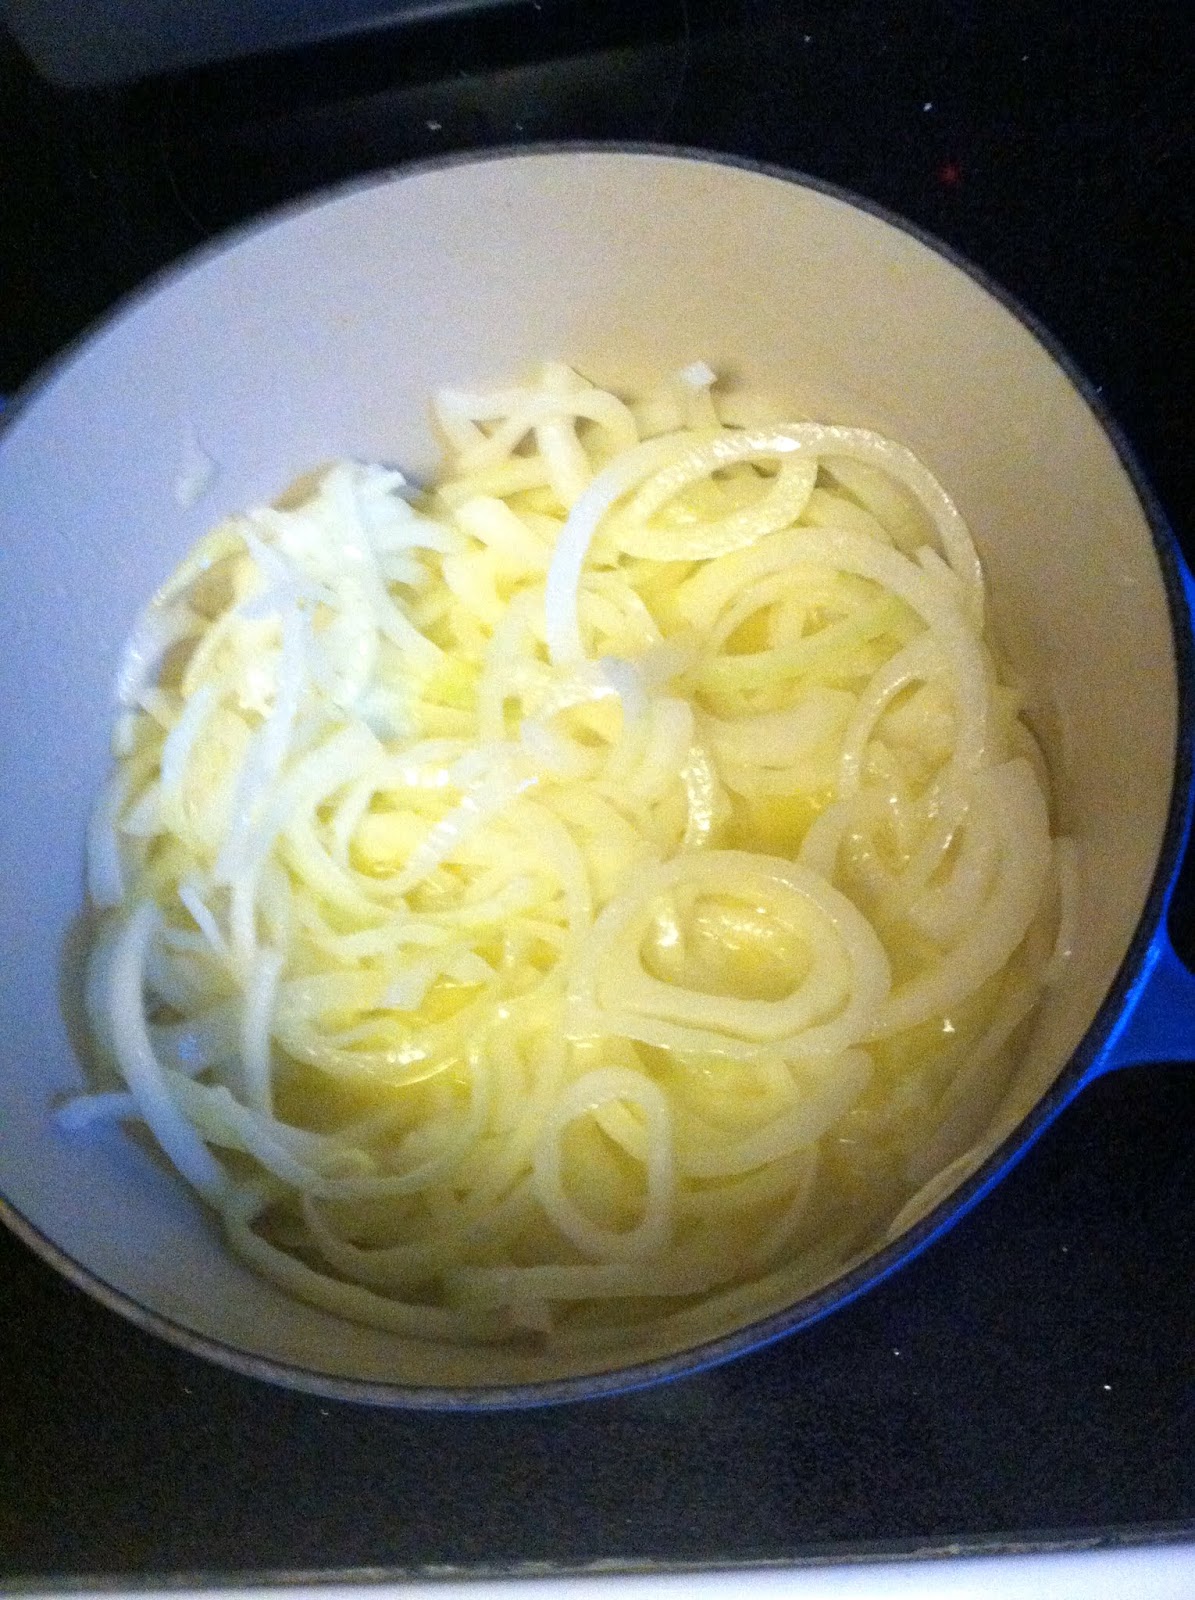
– 1 large vidalia onion, sliced into half-moons
– 3 16-oz. cans whole peeled organic tomatoes, preferably San Marzano
– 1/3 cup heavy cream
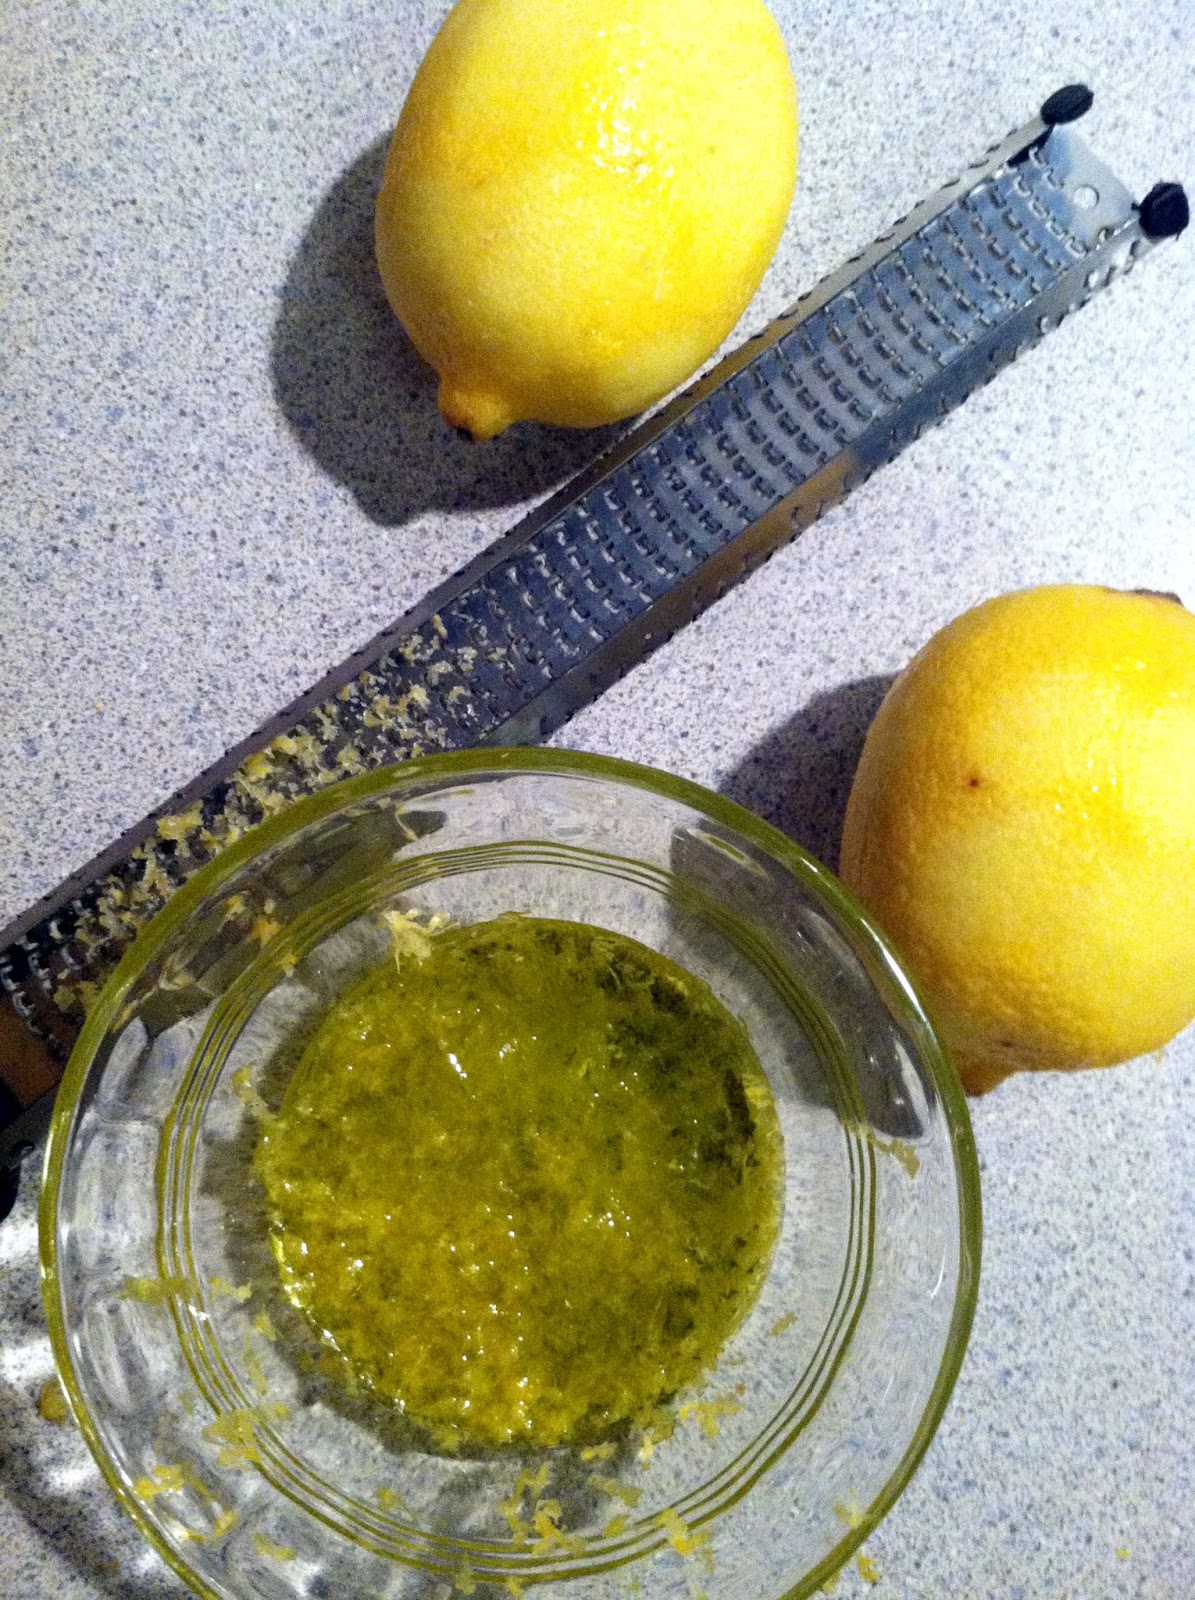
– Good quality EVOO or Basil Oil, for finishing
– Kosher salt

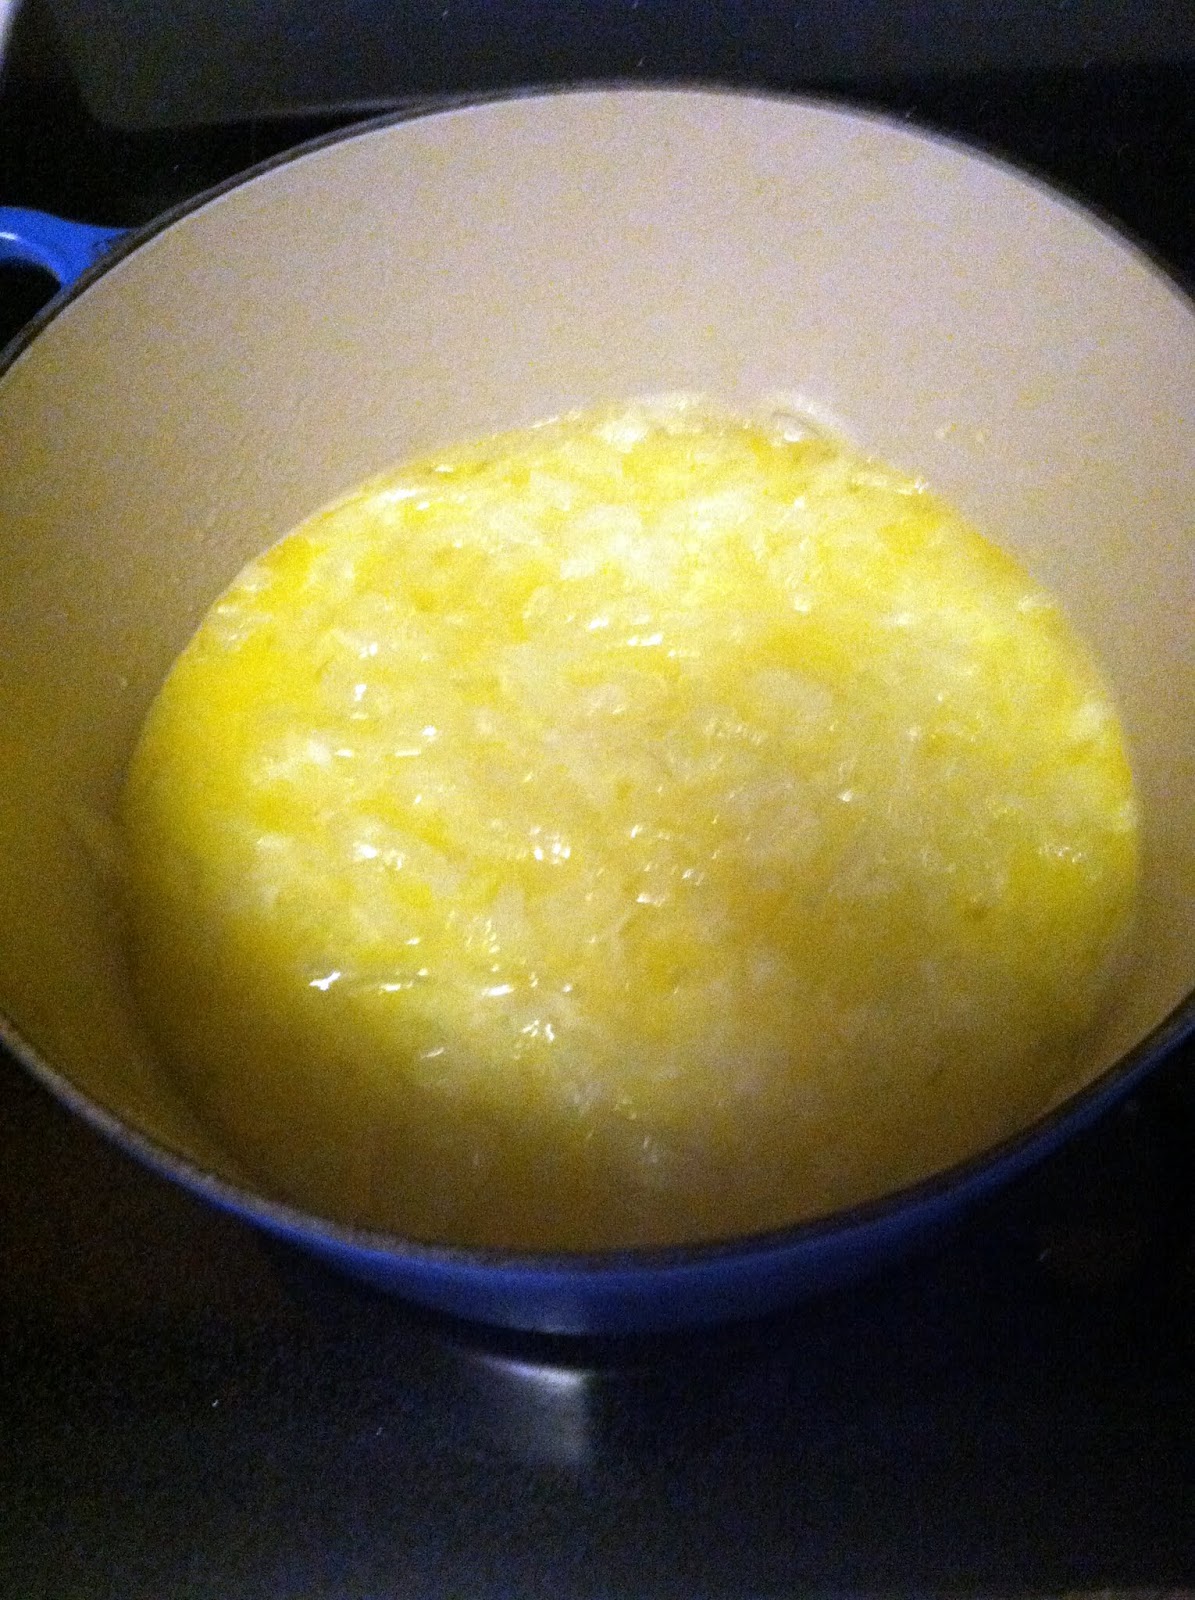
1. In a large saucepan (or, better, a Le Creuset dutch oven, which I use for just about everything), melt butter over low heat.  Add the half-moons of onions and stir to coat with the butter.  Add a good pinch of salt to help them “sweat”, not brown, and stir to incorporate that.  Reduce heat to lowest possible setting, cover, and cook for approx. 30 minutes or so, until the onions are translucent. Stir occasionally during the 30 minutes these are cooking.


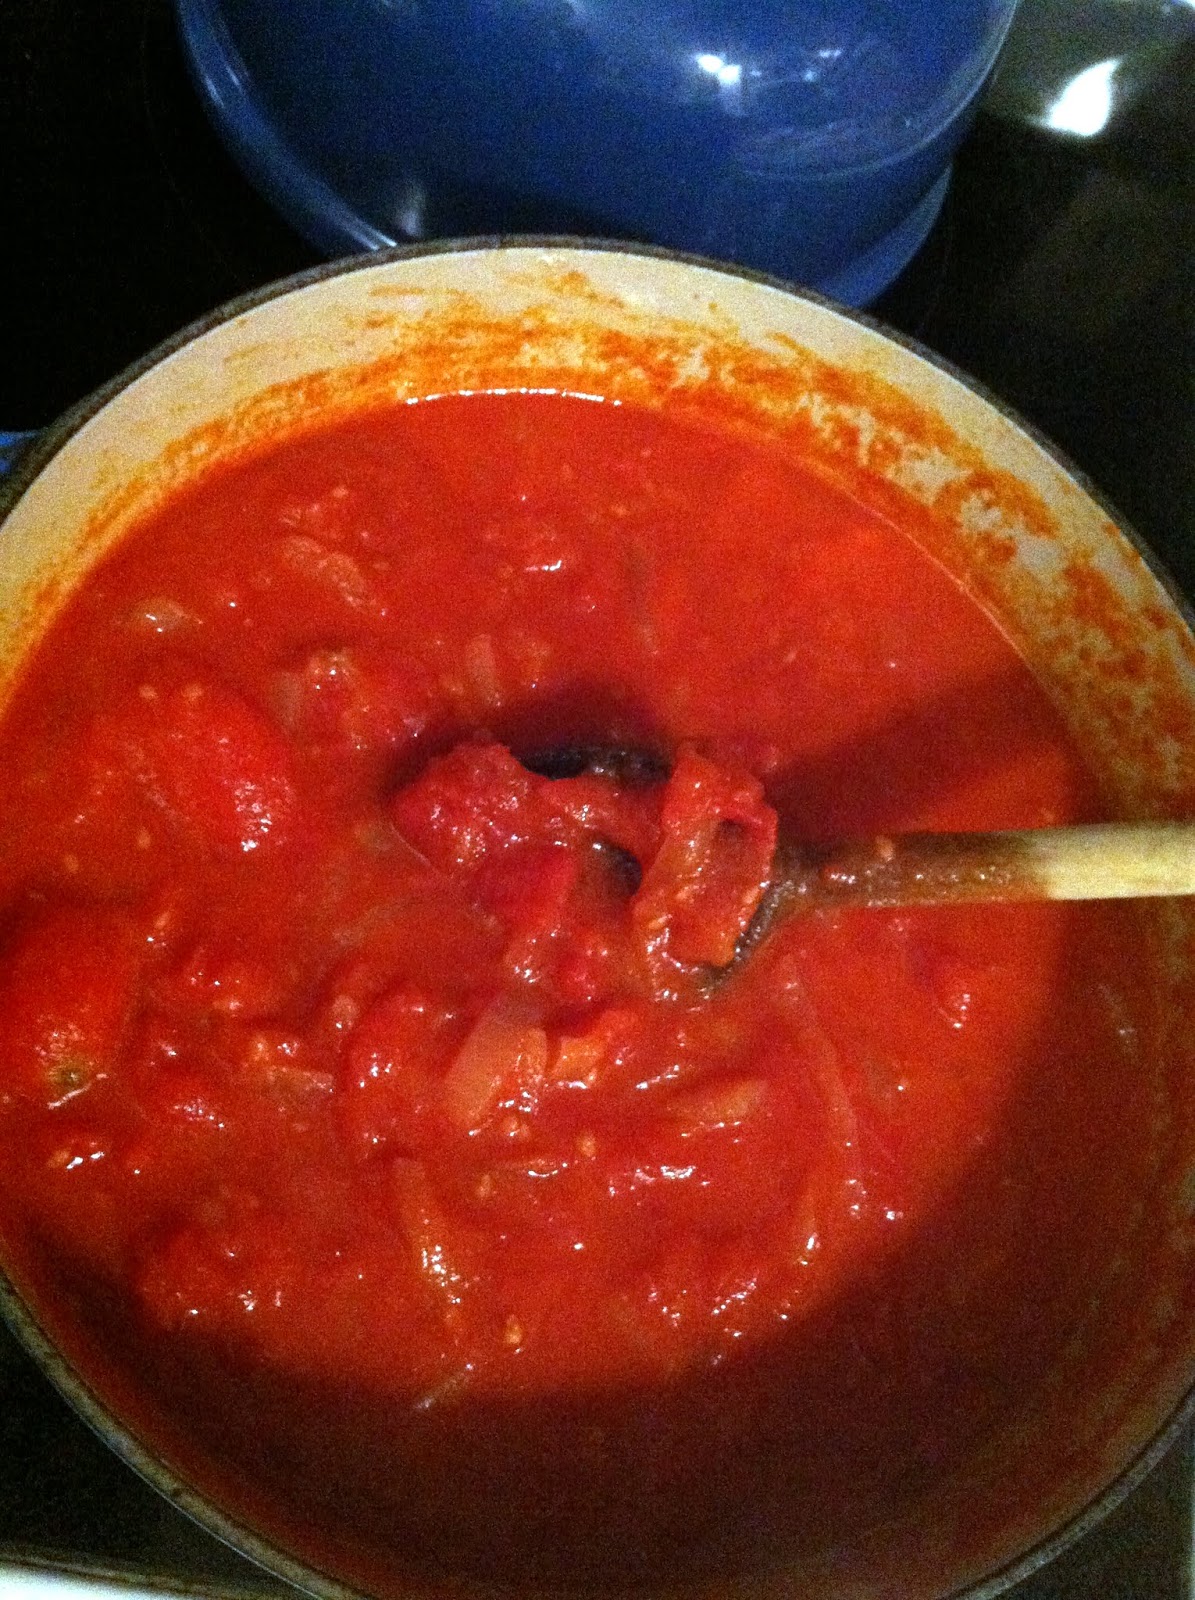
2. When onions are soft, add the tomatoes & their juices.  Increase heat a little bit – to a simmer – and gently cook these for another 30 minutes.


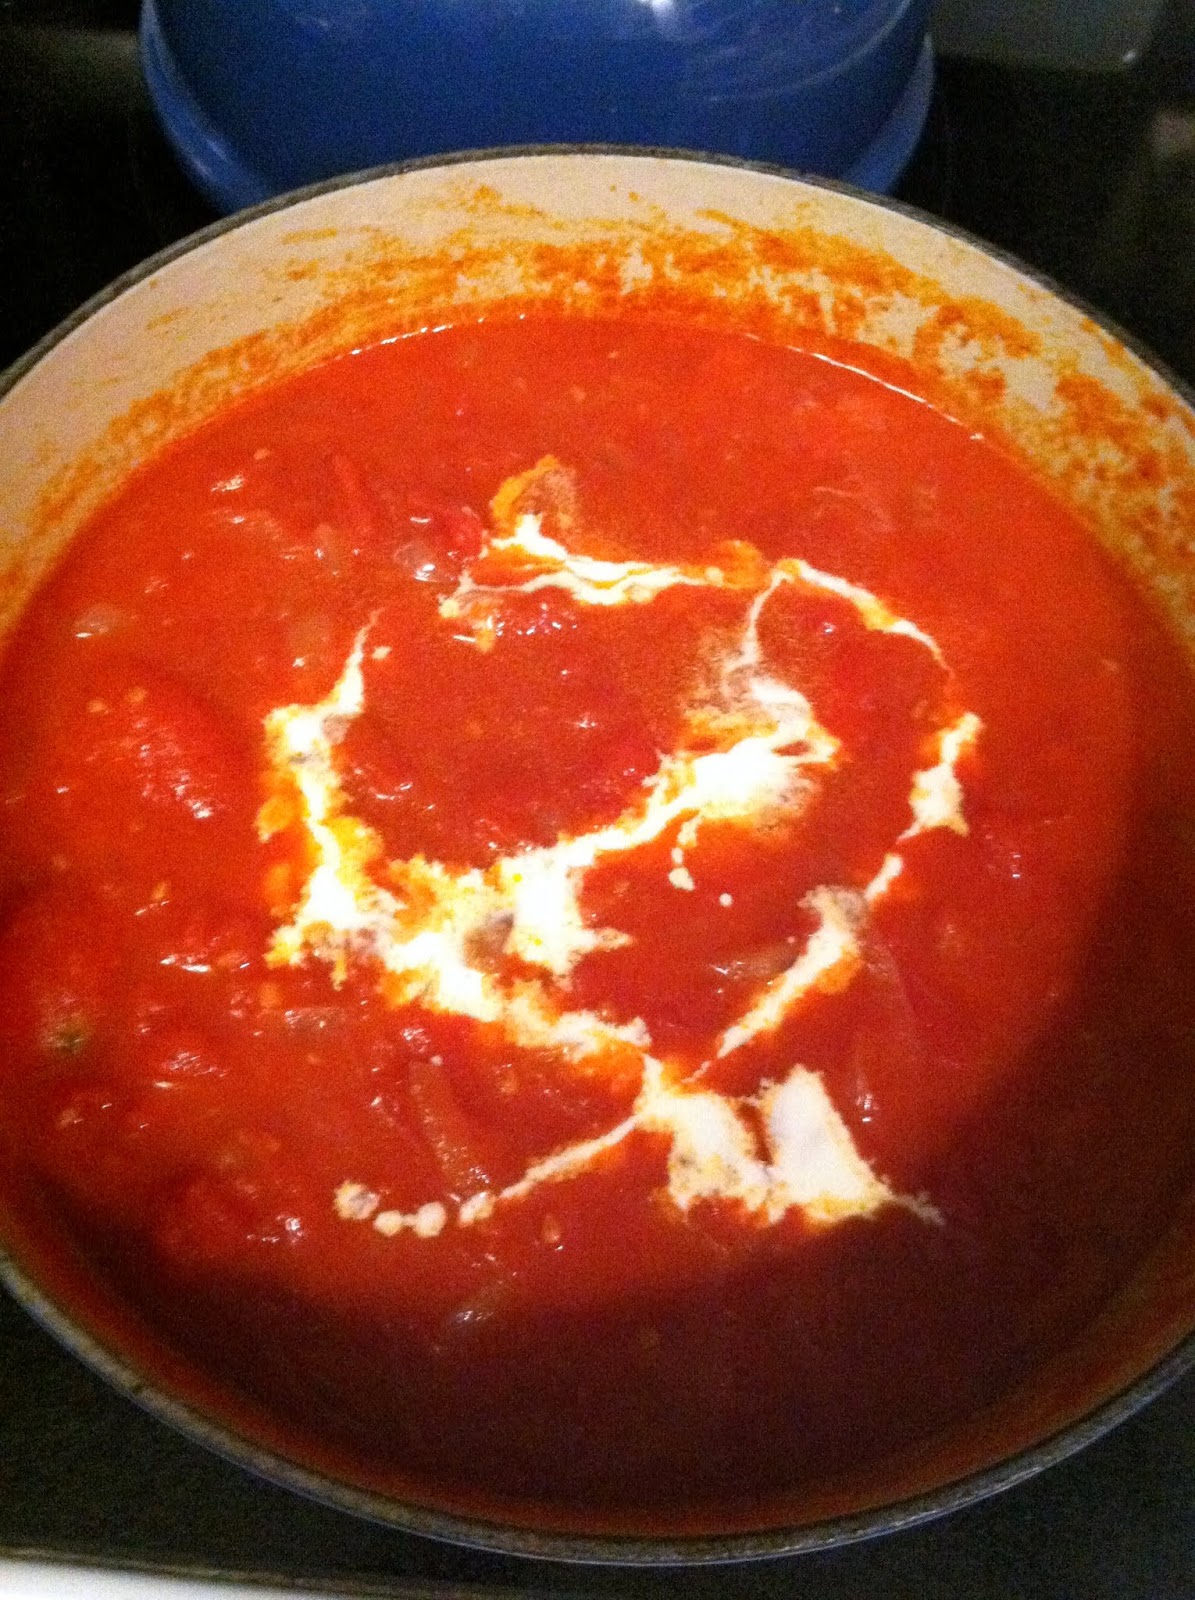
3. Add cream, stir to combine.  Then, with an Immersion Blender – I’m amazed by how much I use this in cooking – puree the soup until the texture is smooth but still has a little texture to it.  Taste, adjust seasonings, and taste again.

pre-stirred, pre-blended
 4. Pour yourself a bowl, drizzle a little EVOO or basil oil over the top, serve alongside a grilled cheese sandwich, and add The Kitchen to your list of places to eat at the next time you’re in Colorado. 

Oscars tonight!!!

Sauteed Zucchini Ribbons with Shallots & Garlic

I’m really looking forward to zucchini season coming around again.  I use it in so many recipes that it makes me sad to see the miniature little organic zucchinis that are available this time of year.  That said, grab a bunch of them, because this is one of the tastiest, most delicate side dishes you can make.


SAUTEED ZUCCHINI RIBBONS WITH SHALLOTS & GARLIC (serves 2-3)
– 5 small or 3 large zucchini
– 2 shallots, sliced into thin moons
– 2 cloves garlic, thinly sliced
– 1 Tbsp. butter
– Kosher salt & freshly ground black pepper to taste

1. Wash the zucchini, then peel it.  Even though the skin will be removed, they’ve still grown in the ground and are dirty – so wash them to get rid of anything that’s lingering. With a vegetable peeler, remove the outside layer of the zucchini – the greenest part – and discard.  Then, continue to peel the zucchini into ribbons until you get to the seeds in the middle.  Throw away the “core” of the zucchini, and set aside the ribbons.

2. In a large saute pan, melt the butter over medium heat.  When melted, add the garlic and shallots, and saute, stirring frequently, approx. 3 minutes.

3. Add the zucchini, then saute until wilted and beginning to color, approx. 5-7 minutes.  If too much brown starts to appear on the bottom of the pan, add 1 tbsp. of water and scrape the bottom of the pan to remove the brown bits and incorporate them back into the zucchini. Add kosher salt & pepper to taste at the end, so that the zucchini gains some color and doesn’t “sweat” as much.

4. Serve alongside your favorite “main” – I love this with steak, but it works with just about anything.

Cauliflower Mashed “Potatoes”

These were, in my opinion, the recipe standout during the South Beach Diet craze.  With the inclusion of (small amounts, but still) butter, heavy cream, and a dollop of Boursin cheese, a little richness gets added, but  these still stay much more on the side of “healthy” than traditional mashed potatoes ever would.  I actually think these are better than mashed potatoes – see if you can sneak them in as a substitute and see if anybody notices the difference.

CAULIFLOWER MASHED “POTATOES” – serves 3-4
– 1 large head cauliflower (organic, preferably)
– 1/4 c. heavy cream or half & half
– 1 tbsp. butter
– 2 tbsp Boursin – we use shallot & chive, but any flavor you like will work
– Kosher salt & pepper to taste
– 2-3 bay leaves

1. In a deep pot, boil about 3 inches of water & add a couple of bay leaves.  The bay leaves will infuse the water, and consequently the cauliflower as it steams, with more of a “potato” sort of flavor.


2.  Wash a cauliflower, then cut it into chunky florets.  The easiest way to do this is to cut the cauliflower in quarters, then cut out the middle stem.  The florets should naturally fall away, and you won’t get tons of chopped up pieces of cauliflower all over the counter.


3. Throw the florets in a Colander, then place over (not in) the boiling water, and put a lid over the top of it to keep in the steam.  I’m sure there are (much) fancier ways to steam things, but this is what we’re working with here.

4. Let cauliflower steam for approx. 10 minutes until fork-tender.  Remove the colander from the heat, turn off heat completely, and drain the water.

5. Put the cauliflower back in the drained pot on the same burner you previously used, which is now turned off.  This is my Dad’s trick for getting rid of excess water for mashed potatoes, and it works just as well here.  The leftover heat will kind of zap out any remaining water, which will give you fluffy “potatoes” instead of soggy, watery ones.  Stir the cauliflower pretty well to make sure it doesn’t burn.

6. Add the “extras”.  Heavy cream, butter, boursin.  The remaining heat of the burner will help break these down and combine them.  Mix this all together, then remove from the burner.

7. With an Immersion Blender – I’m amazed by how often I use this in cooking – blend this all together, really really well to achieve your desired consistency.  Taste, then add seasonings – I typically start with 1/2 tsp. kosher salt and a couple of grinds of black pepper,  stir & taste, then adjust again.

8. Serve immediately, or refrigerate leftovers up to 2 days.

Shaved Cauliflower & Radicchio Salad with Honey-Toasted Walnuts & a Meyer Lemon Vinaigrette

Did you need something super healthy and fresh to kind of ease you back into a week following the over-indulgence of Super Bowl weekend?  I did.  I also got to use one of B’s Christmas gifts to me for the first time, this ridiculous Cuisinart Food Processor, which made making this salad a 10 minute process instead of maybe a 20 minute one.  Shaving the cauliflower and radicchio into paper-thin slices really “takes this salad from a meal to an event” (we do the same thing with the radishes and avocado for our Favorite Salad Ever), so a julienne will work just as well if you don’t have a food processor that will accomplish this.  You can also just shave these into thin slices with a really sharp knife.  This salad is so pretty and crunchy, the dressing gives it a little lift of sweetness, and the honey-kosher salt toasted walnuts finish it perfectly.  It also makes a ton of it (this would be great for parties), so I just kept the salad and the dressing separate so we could combine them when we were ready to have this over the next day or so.  A paper towel in the bowl with your salad will keep the ingredients from getting soggy.


SHAVED CAULIFLOWER & RADICCHIO SALAD WITH HONEY-TOASTED WALNUTS & A MEYER LEMON VINAIGRETTE (makes a really big bowl of salad – adapted almost exactly from the lovely Happy Yolks)
– 1/2 a head of cauliflower (not cored)
– 1 head radicchio, cored
– 4-5 celery stalks, with leaves
– 1/4 c. chopped fresh parsley
– 1/2 c. honey-toasted walnuts
– 1-2 tbsp honey
– 3 meyer lemons, juiced
– 1 tbsp. dijon mustard
– 1/4 c. EVOO
– kosher salt & fresh ground black pepper

1. Cut a head of cauliflower in half, then shave it either with a julienne, a food processor, or a very sharp knife. Include the stem of the cauliflower. Throw this all into a big bowl.


2. Core a head of radicchio, and shave that as well. Do the same with the celery sticks, and also roughly tear  the celery leaves.  Add to the bowl. Chop the chives and the parsley, add to the ingredients, and stir everything to combine.


3. For the meyer lemon vinaigrette, juice the lemons, then add (in this order, to help it all blend together) kosher salt, pepper, dijon mustard.  Whisk together (or shake it up, if you’re using a little mason jar), then add the olive oil. Whisk or shake it to combine, then add to the salad (or keep separate if you’re planning to eat this over the next day or so, too).

3. To make the walnuts, drizzle them with honey and then sprinkle lightly with kosher salt.  Bake for approx. ten minutes at 350.  Remove, let cool slightly, then top the salad with these.  Serve and enjoy.


Four-Ingredient Fruit Snacks

There have been a bunch of recipes for fruit snacks on Pinterest popping up in my news feed lately, and blueberries were on sale at Wegman’s, and we’re always looking for snack alternatives to our beloved hummus and Pretzel Chips. So….fruit snacks it is! As someone who likes to know what we’re consuming, and where it comes from, the fact that there were 4 ingredients in this, total, was really appealing. Organic blueberries, local organic honey, and lovely Meyer Lemons make up for the fact that these include gelatin.  Let’s just think of the detoxifying benefits of the lemons cancelling that right out, though!

HOMEMADE FRUIT SNACKS (makes approx. 2.5 cups)
– 1.5 cups blueberries (or your choice of berry)
– 3/4 cup meyer lemon juice (approx. 4-5 meyer lemons) These are a cross between a clementine & a lemon (a friend of mine calls them “lemontines”), which makes the recipe sweeter, and better, than the sourness of traditional lemons
– 2 tbsp. honey
– 2 tbsp. gelatin

1. Wash the blueberries, juice the lemons, then combine in a saucepan over medium heat until the berries start to soften.


2. Remove from heat and let cool approx. 5 minutes.


3. Puree – ideally with an Immersion Blender – or in a blender.  Strain to remove the blueberry skins.  A lot of these will just come up with the immersion blender, so if that’s good enough for you it’s good enough for me (it was).

4. Add honey, stir to combine.  Taste at this point – what it tastes like now is what it’ll taste like when it sets, so modify the recipe as needed.  More honey, more juice, etc. 

5. Whisk in gelatin a tiny bit at a time, until fully incorporated.

6.  Pour mixture into an ungreased shallow glass dish, and refrigerate for approx. 45 minutes until set.  


7. Cut them into whatever shapes you like, remove from the glass dish, dust with a tiny bit of cornstarch to prevent them from sticking together, and store in a tupperware container (in the fridge) to enjoy.  These had kind of a jello jiggler texture, which we liked, but if you want them to be more of a traditional “fruit snack” texture, I’d add maybe 2 more tbsps. of gelatin.

Avocado Chicken Salad – No Mayo!


In the last post I mentioned that I’ve made some of my favorite chicken salads with avocado as a substitute for mayo, so I thought I would post that recipe this time around.  This, again, is a super easy recipe – very light and flavorful, and really healthy too.  It’ll keep for a day or two, but it’ll probably be gone before then!

AVOCADO CHICKEN SALAD (makes approx. 2 servings)
– Shredded cooked chicken, approx. 2 cups
– 1 avocado, cubed
– juice of 1 lime (a Rosle Citrus Reamer works great for this)  
– 1 tbsp. cilantro, roughly chopped
– 2 scallions, chopped

1. Cut an avocado in half, remove the pit, and dice it.  Add to a bowl and mash roughly with a fork to break it up a bit.


2. Once the avocado is mashed, add the cilantro, lime juice, scallions, and kosher salt/pepper (a pinch of each to start – then add more to taste).  You want to kind of make a guacamole base, and then add the chicken to it. 


3. Add the shredded chicken to the mix, then stir to combine.


4. Taste, season, then taste again.  Delicious!

Apple, Banana, Avocado & Honey Smoothie

Not only does this smoothie give you, most likely, your total potassium values for the day, it’s also incredibly tasty. The avocado gives it a smoothness (a smoothness smoothie – ha), and the honey adds a lift of delicate sweetness. I had it for breakfast this morning and wasn’t hungry until hours later.

APPLE, BANANA, AVOCADO & HONEY SMOOTHIE (Makes 2 large smoothies)
– 1 red apple (I used Cortland), washed, and cut into chunks. Leave the skin on to retain the nutrients
– 1 banana, peeled and cut into chunks
– 1 avocado, peeled and cut into chunks
– 2/3 C. milk
– 1 C. ice
– 1 tbsp honey – local and organic, if you can find it (this, bizarrely, will help with allergies)

1. Cut up the apple, banana, and avocado.


2. Add ice, milk, fruit, and honey to the blender.


3. Blend until smooth. Add milk to thin to taste.


Roasted Lemon Cauliflower

I would eat this every day, if it didn’t kind of make your kitchen smell like you were roasting tupperware.  That said, please open a window and try this, because it’s one of the healthiest, simplest, tastiest snacks you’ll ever have. 

ROASTED CAULIFLOWER WITH LEMON (serves 4 as a snack or side)
– 1 large head cauliflower
– 2 lemons, zest of 1
– 1-2 tbsp EVOO
– 1/2 tsp. kosher salt

1. Preheat oven to 450.

2. Wash and thoroughly dry the cauliflower, then cut into florets.  The easiest way to do this is to cut the cauliflower into quarters, then cut out the middle “stem” part.  The florets should fall away naturally, and you won’t end up with teeny pieces of cauliflower all over your kitchen.


3. In a small bowl, combine the juice of 1/2 a lemon and the salt, mixing to combine. Then, using a Microplane, add the zest of two lemons (just the yellow – zesting the white part, or the “pith”will make this really bitter) and the EVOO, and mix that together as well.


4.  Pour this lemon/EVOO mixture over the cauliflower florets, and toss to combine.  Arrange the florets in a single layer on an ungreased roasting sheet and put in the oven.


5. Every 10 minutes or so, take the cauliflower out of the oven, squeeze the juice of 1/2 a lemon over them, and flip them with a spatula. Repeat until the edges of the cauliflower are deep brown and caramelized – this should take approx. 30 minutes.

Cauliflower, after the first flip.

6. When roasted, remove the florets from the oven, squeeze the juice of another lemon half over them, then serve. This is fantastic either hot or cold.

Parmesan Crusted Brussels Sprouts

Ok – I literally did not know there was an “s” at the end of “brussels” until just this minute.  That still looks weird to me, but it’ll stay. It fits, though, because much like getting used to the “s” at the end of the word, brussels sprouts themselves also took some getting used to. As a kid, I wasn’t a fan, but as an adult, they’re one of my favorite sides.  Roasting them in a pan caramelizes them somewhat, and the light dusting of parm gives them a salty little kick.  I swear these are better than candy.

PARMESAN CRUSTED BRUSSELS SPROUTS (serves 2-4 as a side – via 101 Cookbooks)
– 20 brussels sprouts, trimmed and halved (choose ones that have tighter leaves – these will be fresher)
– 2 tbsp EVOO
– kosher salt
– freshly grated parmesan cheese – a microplane works well to shred the parm into superfine little wisps

1. Wash and trim the brussels sprouts – peel away a few of the looser outer leaves, trim the stems. Then, cut them in half and toss them in a bowl with a tablespoon of EVOO.

2. Heat the other tablespoon of EVOO in a large skillet over medium heat.  When hot, arrange the brussels cut-side down, sprinkle with some kosher salt, cover, and cook for 5 minutes.

3.  After 5 minutes, uncover, raise heat to medium high, and cook until the brussels are browned and caramelized. Using a spatula, toss them around the skillet a few times to cook the sides and the edges.

4. Turn off the heat, then dust the brussels with the parmesan cheese.  Serve immediately, and watch your guests become brussels sprouts converts.

Roasted Red Grapes with Thyme

I can’t even tell you how simple, delicious, and pretty this side is. It’s perfect for entertaining  – put it alongside a cheese plate, and you have a lovely little spread of hors d’oeuvres. Roasting the grapes brings out their natural sweetness, but that’s balanced by the thyme, kosher salt, and freshly ground black pepper. We love this. Love this. Love this.

ROASTED RED GRAPES WITH THYME (orginial recipe found on Noble Pig)
– 1 bunch seedless red grapes (organic, if you can find them)
– 4-5 sprigs of thyme, leaves removed
– 1 tsp. kosher salt
– 1/4 tsp. freshly cracked black pepper
– EVOO (approx. 2 tbsp)
– Parchment paper

1. Preheat oven to 450.

2. Wash grapes and dry thoroughly.

3. Gently combine thyme leaves, EVOO, kosher salt, pepper, and grapes, then arrange on a single layer of parchment paper.

4. Roast for approx. 10 minutes, shaking the pan once about halfway through to rotate the grapes a bit.  The skins of the grapes will split and wither slightly – this is when you know they’re ready to come out of the oven.


5. Serve warm or cool alongside whatever other hors d’oeuvres you have, or just enjoy on their own!