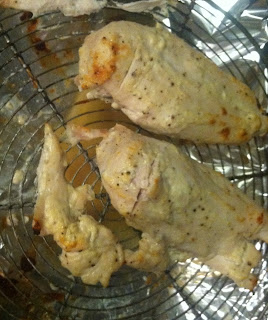
Perfect Chicken

Cooking chicken in a pan was always kind of tough for me – I used to worry about undercoooking it, then overcooking it, then practically burning it until it was either way too tough or dry – until I discovered this technique.  It’s so hands-off it’s ridiculous, gives the chicken a perfect coat of flavor and “kick”, and leaves it juicy and tender, every time. 

PERFECT CHICKEN (adapted from The Kitchn) (serves 2-4)
– 1.5 lbs chicken breasts, cut into strips, or chicken strips
– 1/4 C. Flour
– 1 egg, lightly beaten
– Chopped fresh herbs (thyme, tarragon, rosemary, sage, etc.)
– 1 tsp. dijon mustard (optional)
– 1 tbsp. EVOO
– 1/2 tbsp. butter
– Kosher salt and freshly ground black pepper

1. Pound the chicken breasts to an even thickness, then season with salt and pepper.

2. In a small bowl, lightly beat 1 egg, then combine herbs and mustard, if using, into mixture.

3. Using a pastry brush, lightly coat the chicken with the egg/herb/mustard mixture, then lightly dredge in the flour.

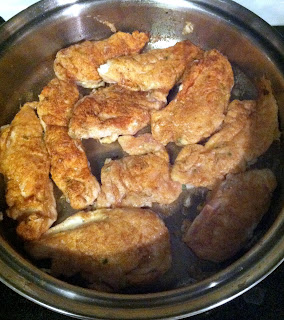
4. Meanwhile, in a large saute pan, heat olive oil and butter over medium high heat. When hot, add the chicken and cook for approx. 1 minute to sear and brown them on one side.

5. Flip the chicken breast strips over, then turn the heat to low.  Put the lid on the pan, set the timer for 10 minutes, and walk away.

6. After those 10 minute have passed, turn the heat off (don’t take the lid off the pan throughout this process – it’s tempting, but you just have to have faith in the end result…and there’s a life metaphor somewhere in there) and leave the chicken breasts covered in the pan for another 10 minutes.


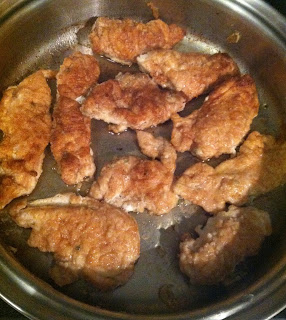
7. When those 20 total minutes are up, remove the lid and check to make sure the chicken is cooked throughout (it will be). The chicken should be seared and golden, tasty, moist, and flavorful. For all of you who’ve struggled with cooking chicken in a pan like I did, this is a game-changer. Enjoy.

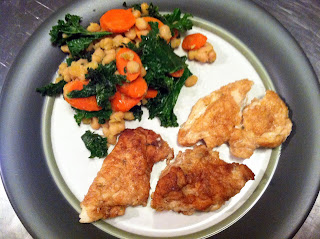
Perfect chicken with Kale, Carrot, and White Bean Blend


French Onion Chicken


I’ve had an aversion to cooking with chicken thighs since a recipe gone wrong a couple of years ago. When I read about this recipe, though – chicken thighs spiked with dijon mustard, mixed with deeply caramelized onions and topped with a bubbling gruyere – I figured it was time to put them back into the mix. This recipe ended up being one of the tastiest, most deliciously reheated dinners (and lunches) we’ve had in a while.

FRENCH ONION CHICKEN (serves approx. 4)

– 2 large vidalia onions, sliced into thin half-rounds
– 2 lbs. boneless skinless chicken thighs
– 1/2 c. grated Gruyere
– 1 tbsp. butter
– 1 tbsp. EVOO
– 2 garlic cloves, sliced
– 1 tbsp. chopped fresh rosemary
– 1 & 1/2 c. beef broth
– 1/2 tbsp. balsamic vinegar
– 1 tbsp. dijon mustard
– Kosher salt and pepper to taste

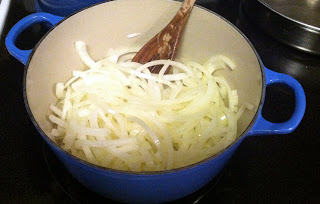
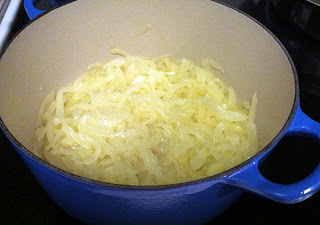
1. Caramelize your onions. This, if done properly, will take upwards of 45 minutes. Slate had a cute article about browning your onions a couple of months ago: Why Recipe Writers Lie About How Long It Takes To Caramelize Onions, and you can cut down the time on these if you’re in a hurry, but if you can, try to take the full 45 minutes to caramelize the onions.  You can even do this a day or 2 ahead, and then reheat them.


2. Melt the butter and olive oil in a dutch oven over medium heat, then add the onions and a sprinkling of salt and pepper. Stir, stirring occasionally, for up to 45 minutes.

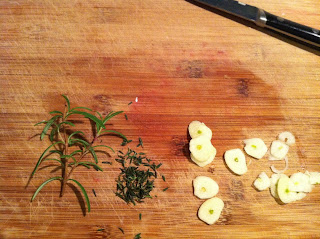
3. When onions are a rich golden brown color, add the sliced garlic and chopped rosemary, then stir to combine.


4. Add 1 C. beef broth slowly, stirring the pan to scrape up any bits that are stuck to the bottom. Turn heat down to a simmer and let stand for 5 minutes, or until slightly reduced.  Take onions off the heat and set aside.

5. While the onions are caramelizing, heat another pan over medium-high heat. Pat chicken thighs dry and season with kosher salt and pepper. Add chicken to the pan and sear to brown the chicken, approx. 3 minutes on each side. When browned, remove from pan and set aside.

6. Add the remaining 1/2 C. beef broth the pan that just held the chicken.  Scrape up any browned bits on the bottom, then whisk in the balsamic vinegar and dijon mustard. Simmer for approx. 5 minutes or until reduced.
6. Heat oven to 325.

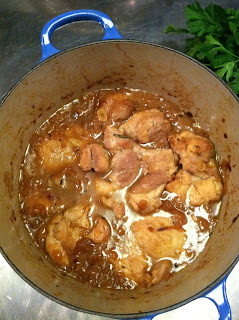
7. Put the browned chicken thighs over the onions in the dutch oven. Pour the beef broth/vinegar/dijon mixture over this, then place a lid on the dutch oven and bake at 325 for 30 minutes.


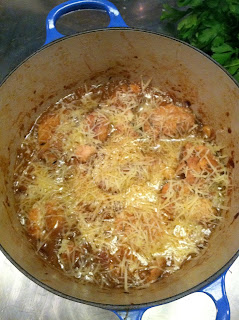
8. After 30 minutes, remove chicken from the oven, and turn the oven to broil.  Sprinkle gruyere cheese over the dish, then return to the oven and broil for a few minutes, until the cheese is melted and bubbly.
Chicken topped with gruyere, before melting it.
We thought this was fantastic – it was all I could do not to drink the leftover sauce. Completely delicious and definitely added to the rotation!  I hope you enjoy it as much as we did.


Greek Yogurt Chicken


Greek yogurt is everywhere nowadays. I’ve started using it in baking, cooking, even in dressings. But a Greek yogurt coating? On chicken?? When I first read about this on Pinterest, I thought it sounded totally gross, but I was too curious to find out how it would be. Turns out, it’s healthy, flavorful, and creates a little tangy coating that keeps the chicken juicy. This recipe can be ready from start to finish in an hour, tops, which gives you enough time to make a nice side salad, or steam some veggies, and have yourself a nice glass of wine. We’ve used this recipe dozens of times, and it’s just one of the easiest, most delicious ways we make chicken.

GREEK YOGURT CHICKEN

– Chicken breasts
– 1 container greek yogurt (I like Chobani)
– Freshly grated parmesan cheese, approx. 1/3 cup
– 1/2 tsp. garlic powder 
– 1 tbsp. kosher salt
– 1/2 tsp. pepper


1. Preheat oven to 375.

2. In a “breading” bowl, combine the yogurt, cheese, and seasonings, stir to combine.

3. Place a cooling rack over a deeper roasting pan lined in foil. This creates a “convection” type of cooking for those of us with basic ovens (someday, Viking convection oven. I’m coming for you!).

4. Coat the chicken with the mixture. You really don’t need a lot of it – it’s a ton of flavor in even a thinner coating. 

5. Bake for 45 – 55 minutes, depending on your oven. It seems like some folks have had a lot of luck with this coating turning golden, almost “fried” looking, but whatever color it ends up being, just make sure you make a small slice to check that it’s cooked all the way through.

Summer Rolls with Peanut Sauce-Marinated Tofu or Chicken

Peanut Sauce marinated chicken and tofu summer rolls, yummo.


One of my very favorite things to eat is anything in a “summer roll” – a very thin rice paper that you soak briefly in hot water to make it pliable, and then quickly wrap any fillings in it like a little asian burrito. When I lived in Colorado, there was this amazing asian restaurant that would serve this tofu summer roll with this incredible peanut dipping sauce. I tried a bunch of recipes to duplicate this sauce, but ultimately landed on one you can just buy in the store. It’s delicious, and for someone who has a real aversion to anything spicy, but is marrying someone who would eat spice every day, it has enough heat to create a solid middle ground for both of us. Working with rice paper is pretty fun once you get the hang of it – the key is to work quickly, and not overstuff it, since the paper is really thin (ummm…because it’s made of rice grains. You get the picture). I marinate both tofu and chicken in the peanut sauce, since some people still think “protein” only means “meat”.  As a side note, it’s really important to get organic tofu and check that it’s a brand that contains no GMOs (Genetically Modified Organisms), as soy GMOs are especially bad for you.


Ingredients:
– 1 package Nasoya Extra-firm tofu, drained (I take the tofu block out of the package, put it on ultra-absorbent paper towels – I love Viva Paper Towels, and put it in between two heavier plates to get as much water out of it. This takes about an hour and a couple changes of paper towels. I also hear there’s such a thing as a tofu press, which must be a revelation.)
– Bean sprouts
– 1 english cucumber, seeded (if any) and julienned
– chicken tenders or chicken breast strips
– “bean thread” noodles
– rice paper wraps
House of Tsang Peanut Sauce, Bangkok Padang (I found this at Wegman’s)
– Mint, basil (either or, and these are also optional, but you should really try them the first time around)
– julienned carrots (optional)

1. After tofu is drained, cut into 1/4 in. strips and cover with Peanut Sauce, marinate for 2 hours to overnight. These slices also make an amazing snack. 
     –As a side note, my favorite story about vegans and tofu.  When I lived in Boulder, there was a “local interest” story all over the news about a vegan who wanted to personalize her license plate by letting people know about her love of all things soy.  The Colorado DMV wouldn’t approve her suggested license plate because they were concerned “ILUVTOFU” could have a more suggestive translation than, you know, “I luv tofu”.  
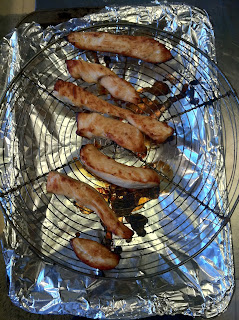
peanut-marinated chicken done “convection oven style”
2. Marinate the chicken strips in the peanut sauce as well. When ready to cook, line a roasting pan with aluminum foil, and put a cooling rack over it. Place the marinated chicken strips on the cooling rack and cook in the oven under the broiler for 3-4 minutes per side, depending on thickness.  I love this little roasting pan/cooling rack technique of cooking chicken, since it basically creates a convection oven type of environment, and covers both sides of the meat way better than something lying flat against a cooking tray.


3. Cook bean thread noodles according to package – this should take approx. 2 minutes in total once the water is boiling.

3. Arrange your little “assembly station”.  You want to have a wide, flat bowl full of hot water, a plate for assembly of the summer rolls, your cooked bean thread noodles, the marinated tofu, the marinated, cooked chicken, the basil/mint, bean sprouts, and julienned cucumber (and carrots, if you’re doing that).


4. Working quickly, dip rice paper in hot water until soft and pliable (approx. 30 seconds). It will become translucent when ready to use. Put rice paper onto a plate and add noodles, tofu or chicken, bean sprouts, basil, mint, cucumber.
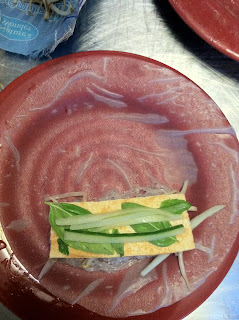
Peanut tofu summer roll

Peanut chicken summer roll
5. Starting from the bottom, roll up like a burrito.Be careful not to overstuff the rice paper. This took me a couple of tries to get the hang of it, but they turn out so well once you do!  Arrange summer rolls on a plate, making sure they don’t touch (they will stick together).

6. Serve with a side of peanut dipping sauce and a delicious salad.