Shredded Red Cabbage Salad with Carrots, Scallions, Cilantro and Lime

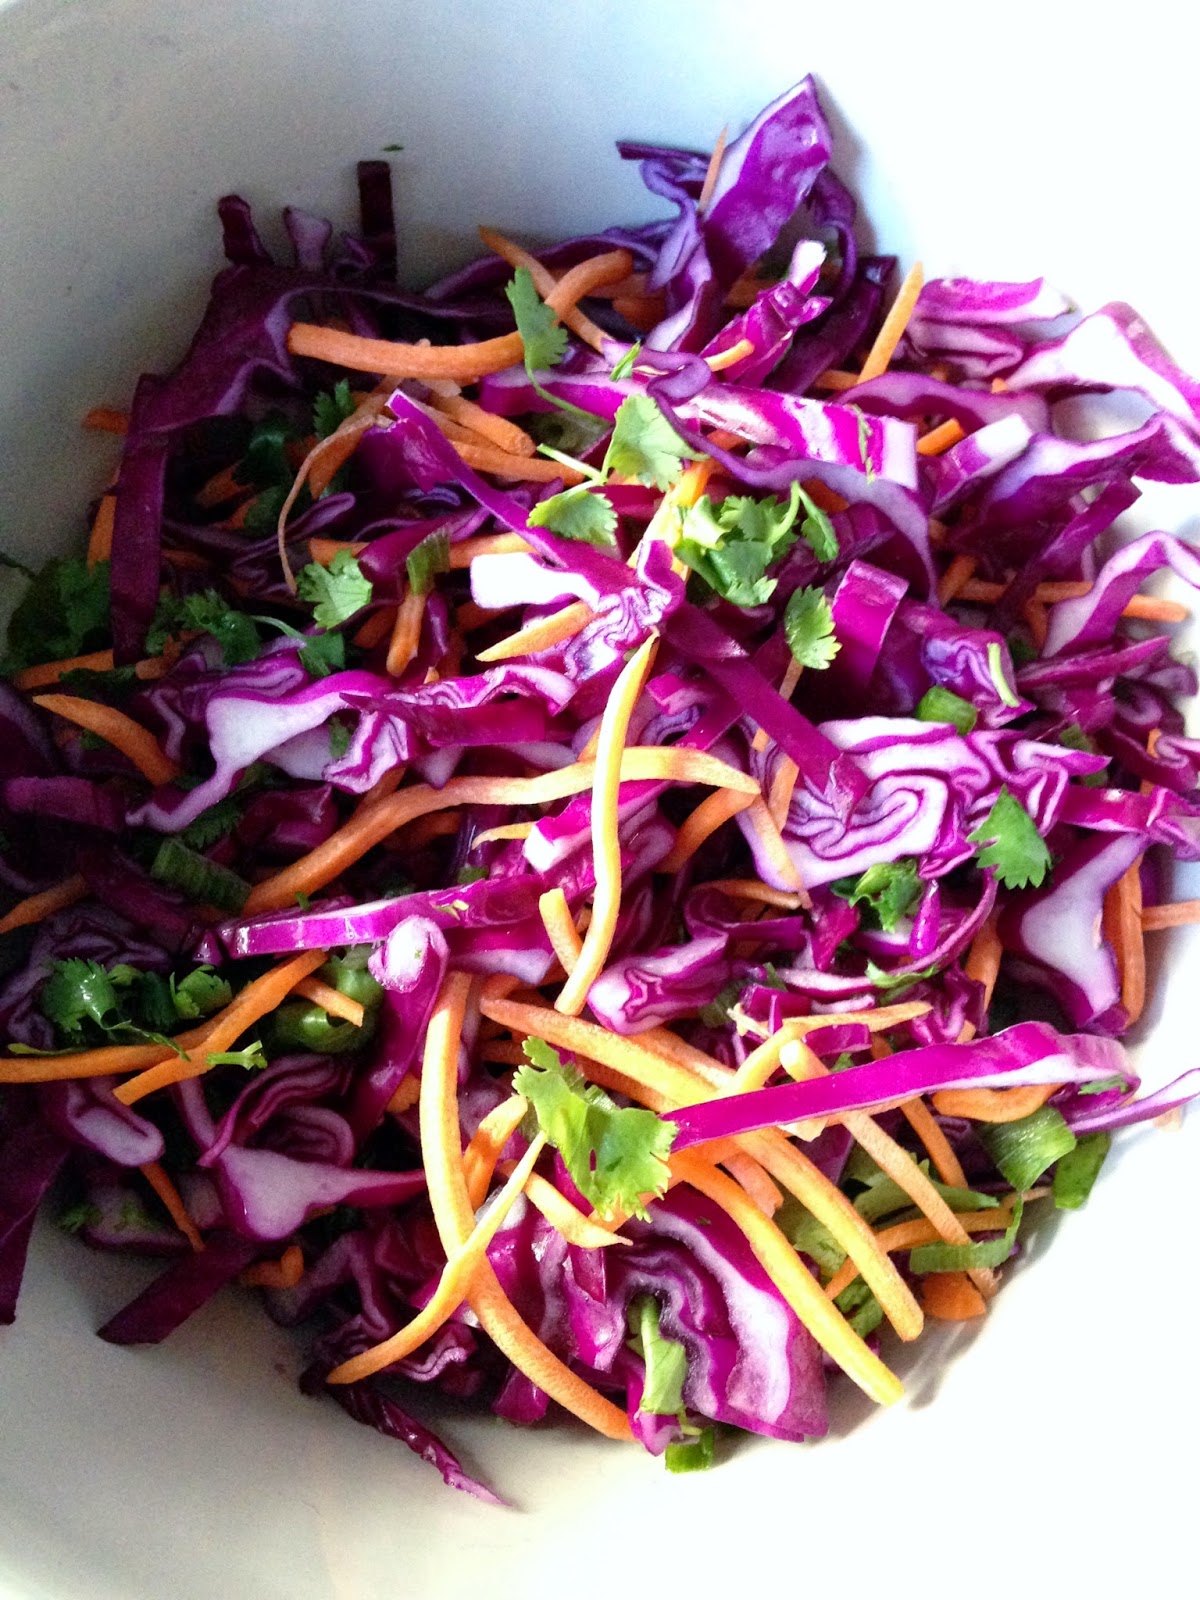
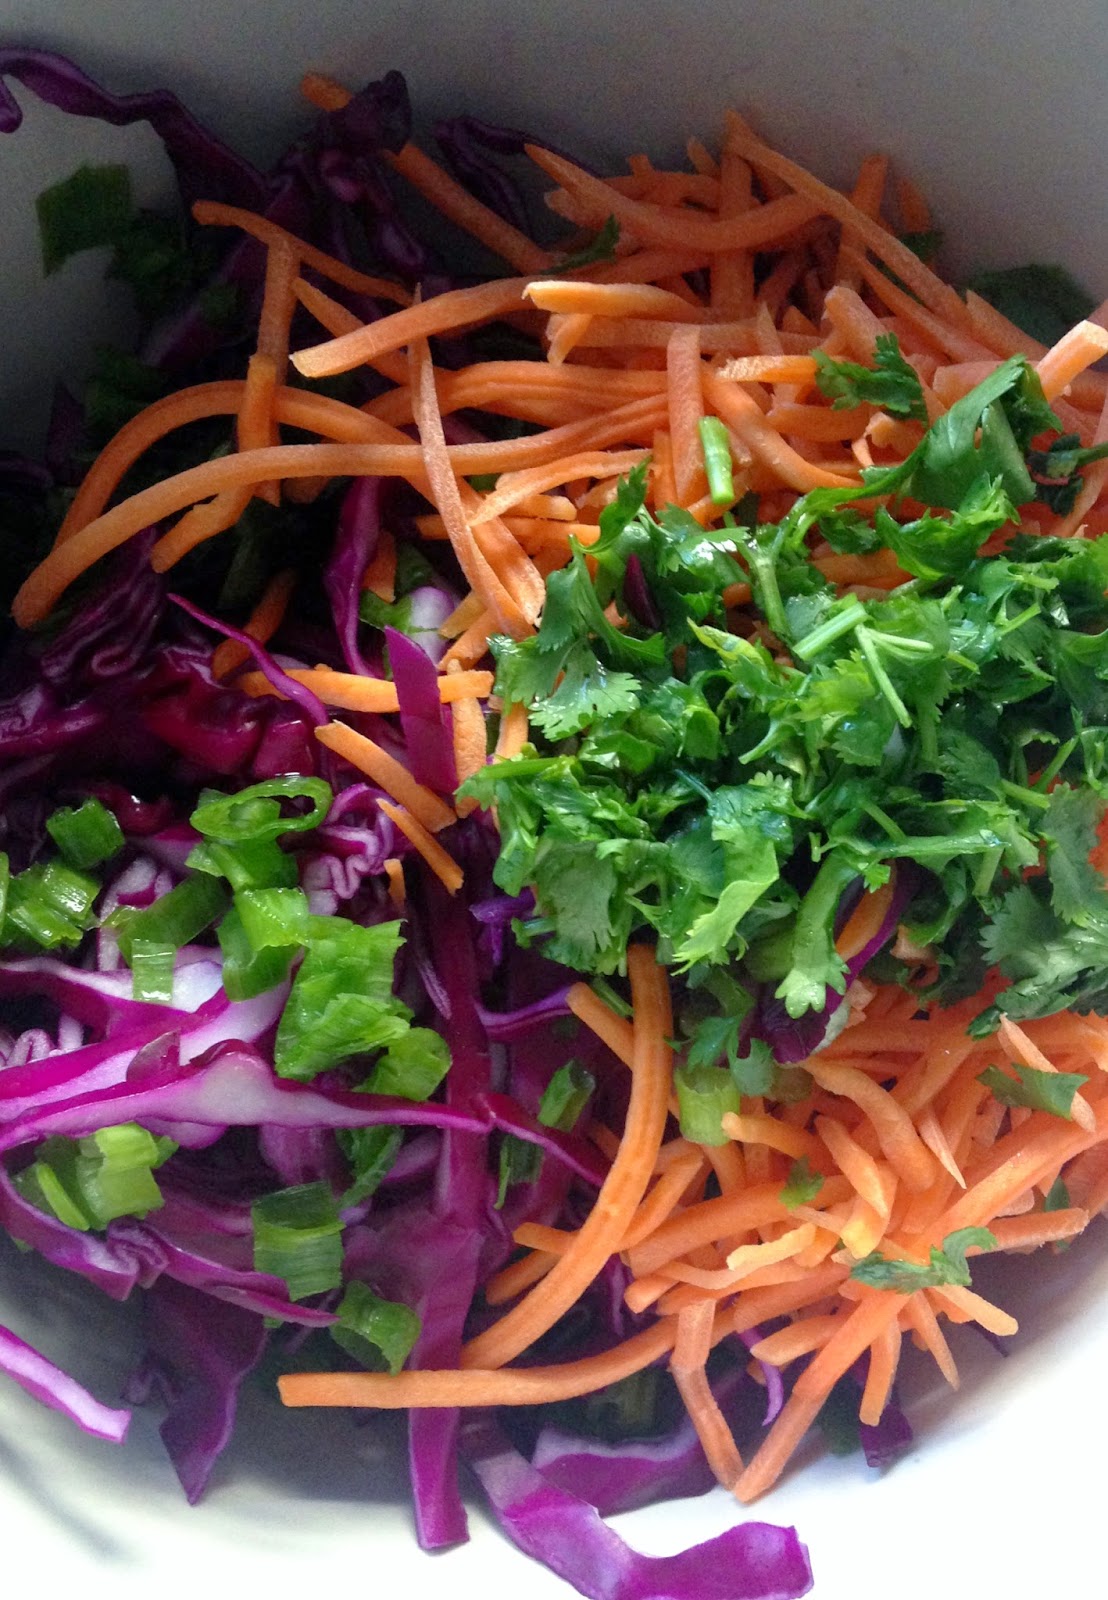
For the record, I think coleslaw is the worst. The name is bad, the texture is weird, the mayo-y ness of it is gross, it’s just yuck. That said: this is not coleslaw. This is antioxidant-rich shredded red cabbage (from the Scranton Farmer’s Market, hurraugh!), carrots, cilantro and scallions, dressed with lime juice, rice vinegar, cumin and olive oil. It’s fantastic. We were making shredded chicken tacos with leftovers from a roasted chicken in lemon gold that we had for Sunday dinner, and decided it needed some crunch, so I threw this together and I’m so glad I did. Brendan came home, took one bite and said, “This tastes exactly like my favorite cabbage salad from my favorite Mexican restaurant in Colorado” soooo….you’re welcome, JBG. This was perfect on tacos, but honestly, I would (and did) eat this with a fork by itself. You can throw it together in 5 minutes, but make sure you let it marinate for about 30, so all the flavors come together into a little colorful shredded salad of deliciousness. 

SHREDDED RED CABBAGE SALAD WITH CARROTS, CILANTRO, SCALLIONS AND LIME (makes enough for 2 as a side or at least 6 small tacos) 
– ½ red cabbage, thinly sliced
– 2 scallions, whites and greens, chopped
– 2 carrots, shredded 
– 1/3 C cilantro, chopped 
– juice of 1 lime
– ½ tsp. cumin
– ½ tsp. honey
– 2 tbsp. rice vinegar 
– 4 tbsp. EVOO 
– kosher salt & pepper to taste 

1. Slice the cabbage into thin strips. 

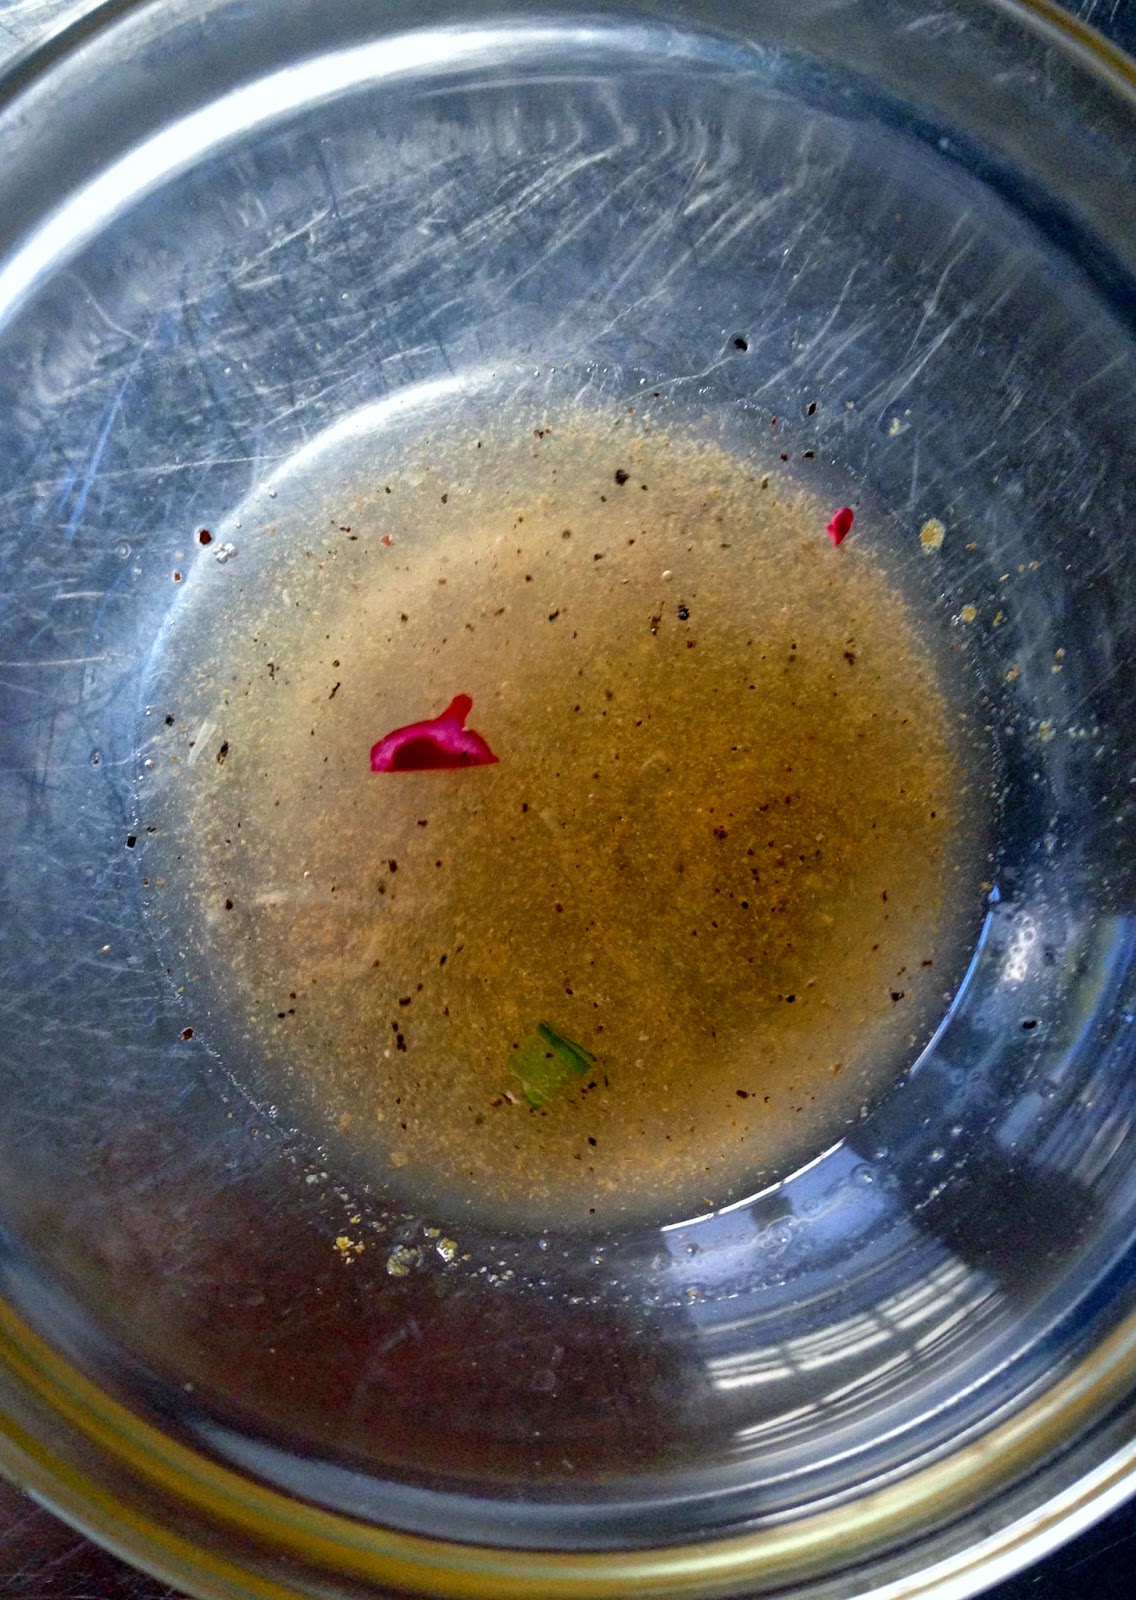
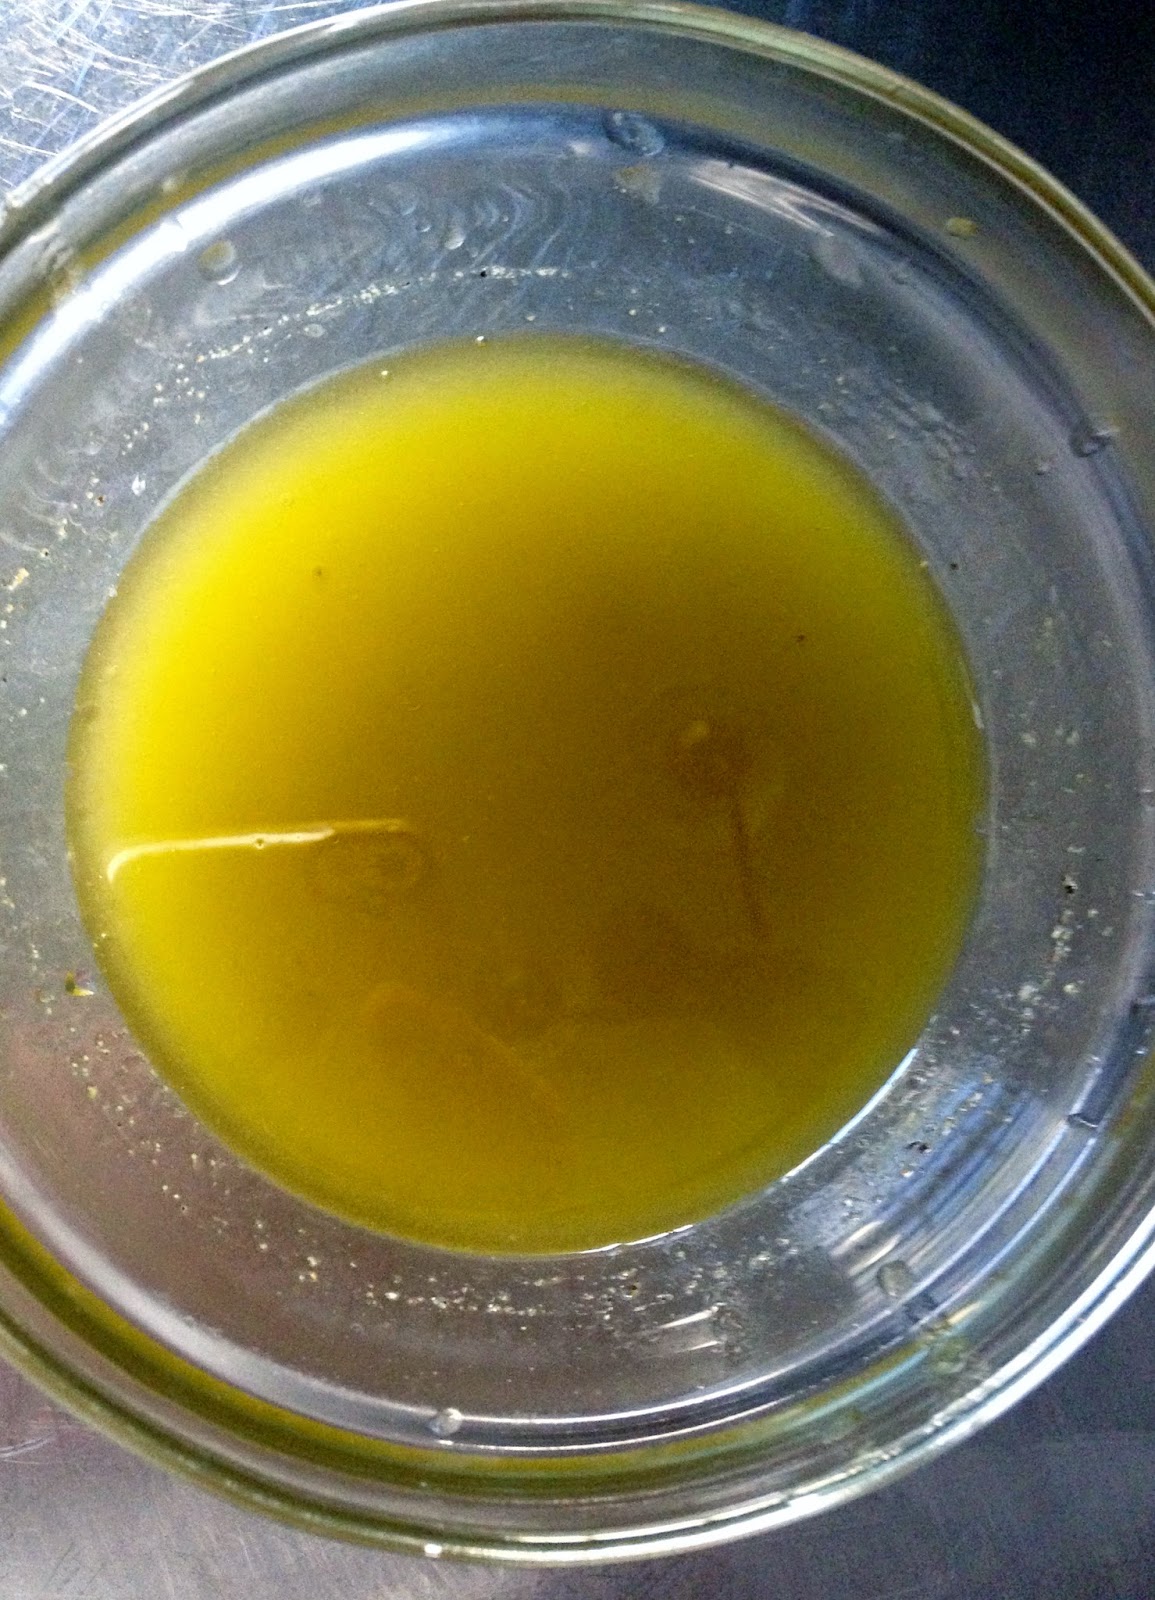
2. In a small bowl, combine the lime juice, cumin, honey, rice vinegar & kosher salt & pepper. Whisk together so the seasonings can blend in well with the acids. Add EVOO and give everything a good mix so it emulsifies. 

3. To the bowl with the cabbage, add the shredded carrots, chopped scallions and chopped cilantro. Mix to combine. 


4. Top the cabbage mixture with the dressing and mix it all together really well. Cover and let it sit for approx. 30 minutes, stirring every once in a while to redistribute the dressing. 

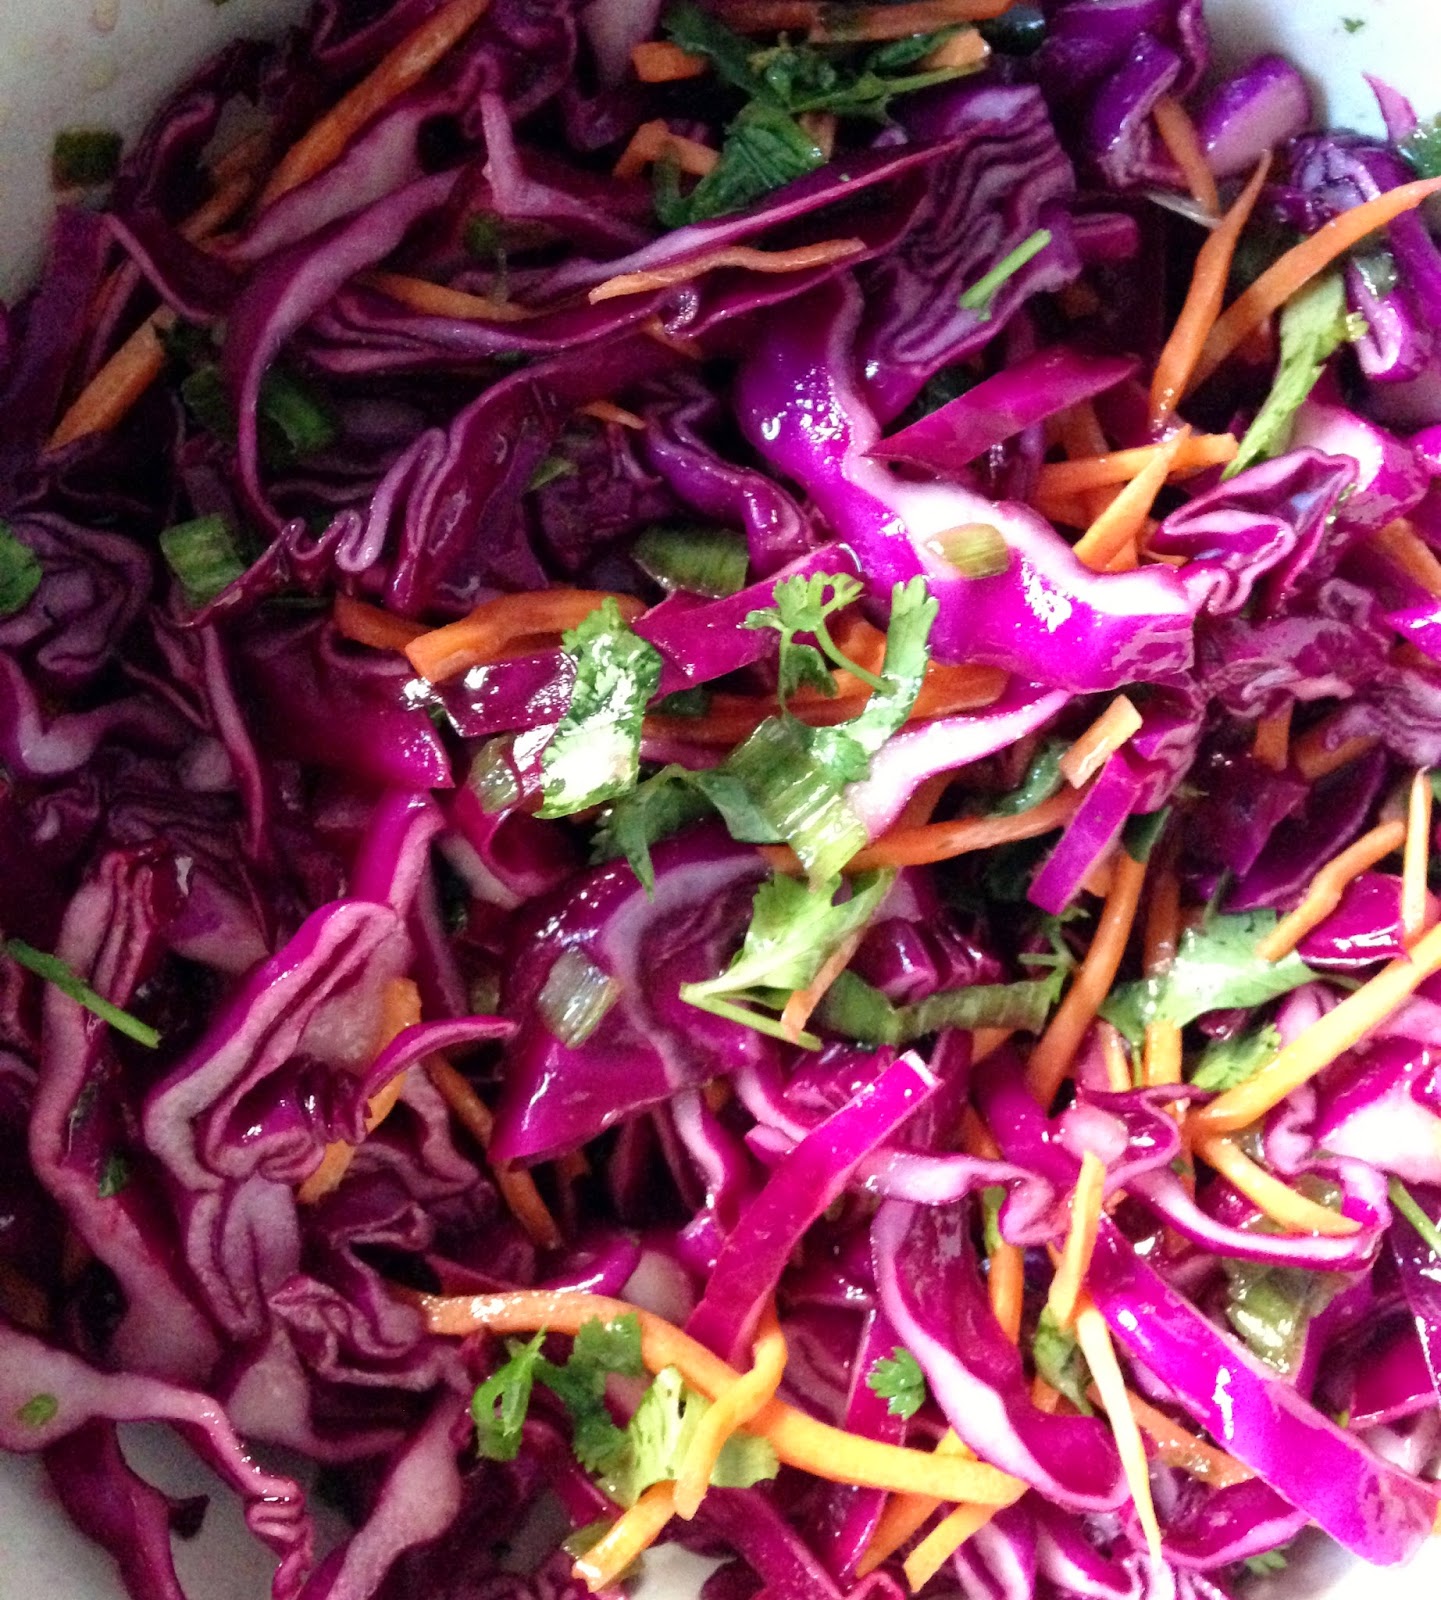
5. Serve on its own or on top of tacos for a perfect crunch and super bright flavor.


Blueberry Pie

 Brendan and I spent one of the most fun/delicious Saturdays I’ve ever had in NEPA at Paupack Blueberry Farm this past weekend. These blueberries were amazing – as big as my thumb, perfectly sweet, growing rampant in the middle of these gorgeous blueberry fields. I felt like I was in a dream. A dream, of course, in which I turned into Violet Beauregard from Willy Wonka & the Chocolate Factory, because we picked about 5 lbs. of blueberries, couldn’t stop eating them, and then I came home and made a blueberry pie, blueberry pancakes and blueberry frozen yogurt. But listen – blueberries are full of antioxidants, right? So really we were just eating healthily. Summer’s winding down – get some in-season berries and throw together this fantastic blueberry pie.  


BLUEBERRY PIE
Crust (makes 2 – 1 for the bottom and 1 for the top of the pie):
– 2 cups all-purpose flour
– 2 tsp. salt
– 1/2 tsp. baking powder
– 1/3 C. super cold butter (I throw this in the freezer for about 10 mins)
– 1/3 C. shortening
– 1/3 C. super cold water

Filling:
– 4 tbsp. cornstarch
– 1/2 C. sugar
– 1/2 tsp. cinnamon
– 1/3 C. cold water
– 5 C fresh blueberries
– 1/2 lemon, juiced
– 1 tbsp. butter
– evaporated milk (for crust)

1. Preheat oven to 400.

2. In a bowl, combine the flour, salt & baking powder. 

3. Add to a mixing bowl of a Cuisinart Food Processor. Cut up the super cold butter into little chunks, add the shortening, and pulse the mixture until it starts to come together and form little pellets of dough. 

4. Add the cold water a little at a time until the dough comes together. Remove from the mixing bowl and form into a ball of dough. Wrap in Saran Wrap and put in the freezer while you get the filling ready. 

5. Combine the cornstarch, sugar, and cinnamon. Add to a sauce pan, turn heat up to medium-low, then add the water. Stir this mixture constantly until it starts to thicken. Remove from heat and set aside.

6. Fold this mixture into the (washed, obvs) blueberries, gently stirring to coat. 

7. Cut dough into half, then, on a floured wax paper or aluminum foil surface and with a floured rolling pin, roll this out into the bottom crust. 


8. Gently flip the crust over into the bottom of an ungreased pie pan.

9. Add the blueberries and cornstarch/cinnamon/sugar mixtures into the pie pan. 


10. Shave a couple little curls of butter on top of the blueberries, then squeeze half a lemon over them.


11. Roll out the top crust, then flip that over the blueberries to form the top crust.


12. Crimp edges, then cut little “breathing” slits into the crust, in whatever pattern you like (be creative!).


13. Brush evaporated milk over the top of the crust, then bake at 400 on the second to lowest rack for 45 minutes.

14. Now, the most difficult part. This has to sit for at least 5 hours to gel together, otherwise you’ll have a watery, runny blueberry pie. It’s torture, I know. Just keep your eye on the prize and think about how awesome blueberry pie for breakfast will be!

15. After 5 hours (you can put it in the fridge to speed things up), cut yourself a slice and enjoy. Summer!!!


California Eggs Benedict

You guys, I think this might be my new favorite breakfast. Poaching eggs is apparently the easiest thing in the world and they look so impressive. Take some avocados, smoked salmon, and the The Best Dressing Ever for a little heat, put them on whole-wheat English Muffins, and you have an unbelievably delicious, healthy-ish, completely filling breakfast that – honestly – puts just about every weekend brunch you could pay for to shame. Brendan and I had these for breakfast this morning, and both of us were taking our sweet time finishing them because we didn’t want to get to that last bite. SO GOOD.

CALIFORNIA EGGS BENEDICT (serves 2)
– 4 fresh eggs
– 3/4 avocado, sliced
– 4 oz. smoke salmon
– 2 whole wheat English Muffins
– a little bit of butter
– a little bit of kosher salt (optional)
The Best Dressing Ever

1. In a smaller sauce pot, heat about 6 inches of water over medium high heat. The temperature here is key – you want it to be bubbling but not boiling. Add a little white wine vinegar and a little kosher salt.

2. Crack 1 egg into a concave ramekin. If the yolk breaks, toss it and start again. 


3. When the water is ready, swirl it with a spatula into a little tornado of water. Gently spill the egg from the ramekin into the “eye” of the tornado. 

4. Let the egg cook for approximately 3-4 minutes. You want the egg yolk to be a little bit set but mostly runny, not firm. When yolk is ready, remove with a slotted spoon and place on a paper towel. Repeat with the other 3 eggs, one at a time.


5. Meanwhile, slice the avocados and get out the smoked salmon.


6. When you add the last egg to the poaching pot, lightly toast the English Muffins. When toasted, add a little butter to melt. 


7. Remove the last egg from the water, turn off the stove, but leave the water on the stove.

8. Have your super talented boyfriend get out his bad-ass camera to take the following pictures.

9. Top English Muffins with smoked salmon and avocado slices.


10. To reheat the first few eggs, add them back to the poaching pot for a minute to reheat in the warm water. Remove and drain.

11. Top smoked salmon and avocado slices with poached eggs.


12. Get out the Best Dressing Ever, and drizzle over the eggs. 


13. Top with a sprinkle of Kosher salt (optional). 

14. Cut into the middle of the yolk so it spills over the English Muffins. Brace yourself for enjoying one of the best breakfasts you’ll ever have.  


Spinach and Artichoke Dip Pasta Bake (with Chicken)

There are certain things that just go together. Bacon and Cheddar. Sour cream and Onion. And of course, Spinach and Artichokes. What is it about that combo that’s so delicious?? I remember being a kid, and having it for the first time at probably the Ground Round or someplace like that, and feeling like my 8 year old culinary world had been blown wide open. There are so many different recipes that I make now, but spinach and artichoke dip is still one of my go-to favorites for a crowd.

This recipe lets you feel like you’re indulging in a classic appetizer for dinner, but actually lightens up everything by replacing the cream cheese with Greek yogurt and halving the sour cream, using about 1/2 of the cheese and adding protein-y chicken. Plus – pasta!!!  This makes a ton, keeps really well, is able to be thrown together in 30 minutes, and will have your dinner companions full and happy in an hour and a half total, tops.

SPINACH AND ARTICHOKE DIP PASTA BAKE (WITH CHICKEN) makes about 10 servings
– 1 lb. chicken tenders, chopped
– 1 box orecchiette pasta, or similar (you want something kind of small that will stand up with this bake – bowties, mini penne or mini rigatoni would also be good)
– 2 9-oz. boxes creamed spinach (creamed is key)
– 2 15-oz.cans artichoke hearts, drained and chopped
– 1.5 cups mozzarella cheese, shredded
– 1/3 c. parmesan cheese
– 1 5.3 oz container plain greek yogurt
– 1/3 c. sour cream
– 1 cup pasta water (reserved)
– 1 tbsp. EVOO
– Kosher salt & pepper
– 1 tbsp. butter
– 1/3 c. panko bread crumbs

1. Set your oven to 375.

2. In a large pot, boil water, then salt it kind of heavily. Add pasta and cook until 2 minutes before its “al dente” stage. BEFORE YOU DRAIN IT, grab a cup of the pasta water out and set aside to let it cool. Drain the pasta.

3. In the same pan, heat 1 tbsp. EVOO over medium heat. Add chopped chicken, which has been seasoned with kosher salt and pepper.


4. Cook until the chicken is almost all the way cooked through, stirring occasionally but letting it get a little browned.

5. While the chicken is cooking, heat up the creamed spinach in a microwave.

6. In a large bowl (use one bigger than you even expect will be big enough), combine the creamed spinach, 3/4 c. shredded mozzarella, and the chopped artichoke hearts. Add a little of the parmesan cheese and combine everything.


7. In a separate bowl, combine the greek yogurt, sour cream and a little more of the parmesan cheese.


8. Take the almost-fully cooked chicken off the stove and put the chicken on a plate.

9. Add chicken and pasta to the spinach/artichoke mixture. Combine well.

10. Mix the greek yogurt/sour cream blend with the cooled pasta water, a little at a time, until the sauce is pretty thin but still has enough consistency to coat a spoon.


11.Spray a casserole dish with a little olive oil. Add about half the chicken/pasta/spinach/artichoke mix. Top with 1/4 c. of the shredded mozzarella, then half of the greek yogurt/sour cream blend.


12. Add the rest of the chicken/pasta/spinach/artichoke mixture. Top with the rest of the greek yogurt/sour cream blend, then another 1/4- 1/2 c. of the shredded mozzarella and the rest of the shredded parm.


13. In a small pan, melt 1 tbsp. butter, then toast the panko breadcrumbs. Top the casserole with the breadcrumbs.


14. Cover with aluminum foil, then bake for about 20 minutes. Uncover, put on the lowest rack, and cook for another 20 minutes – just make sure the chicken is cooked through.

15. Serve and feel like you got away with getting to eat a big bowl of healthy-ish spinach and artichoke dip for dinner!

Cape Cod 2014

I’m finally back after nine days of one of the best vacations of my life. This is the second summer in a row that I’ve gone up to Cape Cod, and I hope that this is the beginning of an awesome summer pattern. It is so unbelievably gorgeous up there, so relaxing and just so charming. Here’s what I did for the past week and a half:

– Read 3 different books and 1 new screenplay

– Ate some of the best food I’ve ever had and did not cook a single thing

– Went bike riding, much to Brendan’s delight

– Saw JAWS on the Cape but didn’t see any sharks in real life, luckily

– Had at least one lobster roll a day

– Averaged 13,000 steps until my goddamn fitbit battery ran out of juice (obsessed)

– Slept until about 10am most mornings

– Spent EVERY. SINGLE. DAY. on the spectacular beaches of Chatham

– Got to have some serious quality time with my mom, dad, little sister, boyfriend and family friends – and what’s better than that?  I love you guys – thanks for a wonderful vacation!!

Spent the halfway point at Pepe’s Pizzeria in Connecticut, holy moly. Bren and I split almost a full pie of the fresh tomato and shrimp.

Finally at the beach!

The incomparable hydrangeas that populate the Cape, and our first lobster roll of the trip at the Squire

Family dinner at Pisces, which was beyond delicious and really cute too.

One of my favorite parts about our relationship is how easily we can make each other laugh (even when one of us is brushing their teeth)

Mom and Dad on the beach

Family <3

Probably my favorite dinner of the trip at Del Mar, where I had stuffed zucchini blossoms, about half of Brendan’s mushroom tart, local Cod and this incredible blueberry pie

My mom (waving from the door) is the cutest

Sunsets on the beach

Best lobster roll of the trip at The Canteen in  the ever-eclectic Provincetown

Brendan’s first time seeing Jaws, ever!! No better place to do it than 20 miles away from where it was filmed. 

An entire cooler of whoopie pies (and the most amazing breakfast burritos ever) at The Corner Store

Fresh pasta, The Prisoner wine and hilarious conversation with the world’s greatest parents at Buca’s

A lunch at the Wild Goose Inn that still makes me full just thinking about it – incredible

Amazing dinners and late night dance parties

Beach reading and cocktail hours with Dad

Love. 

See you next summer!


Cape Cod

I’ve been up on the Cape since Friday and won’t be back until Sunday, so I’m sorry for the lack of posts – I haven’t been doing any cooking (but have been doing a whole lot of delicious eating).  New recipes when I’m back. In the meantime, enjoy the gorgeous views from Chatham!


Lump Crab and Avocado Stacks

Kitchen Hacks. Do you own a measuring cup? Yes? Congratulations, you can make a really pretty-looking dinner with minimal effort. What is it about meals presented in neatly-rounded stack format that make them so appealing? I don’t know, but this is one of my favorites. I had some of my girlfriends over for a little dinner last week, and made these along with pear, prosciutto and honeyed goat cheese apps, those polenta fries with sage and a giant platter of one of my most-indulgent-while-still-being-healthy salads, an avocado and tomato salad with lemon olive oil and toasted almonds over arugula. Yummo. This is perfect for summer. 

LUMP CRAB AND AVOCADO STACKS (makes 5 1-cup portions)
– 20 oz. lump crab (make sure you get lump or jumbo lump)
– 4 avocados, mashed into larger chunks
– approx. 1/4 c. fresh cilantro, chopped
– 2-3 limes, juiced
– zest of 1 lemon
– 2-3 dashes of cumin
– chopped fresh chives
– kosher salt and pepper

1. Cube avocados, then mash gently (you still want them to be chunky so this can stand up to the crab). Mix in 1/2 the lime juice, a little kosher salt and about half the cilantro. Taste and adjust.


2. In a separate bowl, gently combine the lump crab, chives, the rest of the lime juice, cumin, lemon zest,  and a little kosher salt and pepper. Taste and adjust.


3. Now comes the fun part! Grab a 1-cup measuring cup, and gently put a layer of the crab mixture in the bottom of it. Add the avocado mixture, packing it in gently.

4. Get a plate, and swiftly but with confidence (don’t be nervous, this is going to look great!) flip the measuring cup upside down. Pull the measuring cup up, leaving the crab and avocado mixture. 


5. Step and repeat with the other plates. Serve and enjoy with a delicious lemon-marscapone cake (Goddamn Jonelle. That thing was too good.) Girlfrandz.


Poached Eggs with Thyme over English Muffins with Avocado, Cheddar and Tomato

Ok, seriously. Do you guys have any idea how simple it is to make poached eggs? These were the result of my first time ever making them. !!!  If I can do it this easily, you can too. There are a couple basic tricks that will make this a piece of cake. Get ready to wow whoever’s lucky enough to be over for breakfast.

POACHED EGGS WITH THYME OVER ENGLISH MUFFINS WITH AVOCADO, CHEDDAR AND TOMATO (serves 2)

– 4 eggs, super fresh (fresh is key)
– 2 whole English muffins, cut in half
– Fresh thyme
– Good cheddar, cut into curls
– Avocado slices (about 1/2 an avocado)
– Slices of plum tomato 
– splash of white wine vinegar
– kosher salt & pepper
– butter

1. Heat about 5 inches of water in a pot – temperature is key here. I slowly brought up the heat on this to medium, medium high, so that it was starting to gently bubble but definitely not boiling.

2. Crack an egg into a ramekin, making sure you keep the yolk intact.
3. When the water temperature is at that perfect “starting to bubble, definitely not boiling” temperature, throw in a splash of white wine vinegar and a little kosher salt. Make sure the salt dissolves.

4. Get a spatula and swirl the water in the pot into a little whirlpool. While the water’s spinning, gently slide the egg into the middle of the whirlpool (the eye? Do whirlpools have an ‘eye’ like tornadoes do?). You’ll see the egg start to swirl itself together, as it cooks. If it sticks to the bottom of the pot, gently nudge it up with the spatula.

5. Leave it alone for about 4-5 minutes. You want the egg center to be runny, not overcooked. This is probably the only hard part about this, trying to gauge when it’s ready. Keep practicing – it’s a delicious experiment.

6. When the egg is ready, scoop out with a slotted spoon. Set on paper towels to drain. Repeat with the rest of the eggs. 
 

7. Meanwhile, toast the english muffins. Top with a little butter, avocado slices, tomato slices and cheddar curls.

8. Put the eggs on top of the assembled english muffins. Top with a little kosher salt & pepper, and some fresh thyme, too.

9. The best part – gently cut into the yolk of the egg – the poached yolk is all you need for a topping on one of the most delicious breakfasts you’ll ever have.


Polenta Fries with Sage

Polenta fries. They’re healthier for you than traditional fries, about 100 times more delicious, and super simple to throw together, especially if you use pre-cooked polenta. You can mix up any sort of seasonings to dress them up, serve with any sort of dipping sauce, but for a little dinner party app, these – topped with sage and served alongside a little bowl of pasta sauce – were perfect. I had some of my girlfriends over for dinner and these were gone in about 10 minutes flat.

POLENTA FRIES WITH SAGE (serves 5)
– 1 package of polenta
– 2 tbsp. fresh chopped sage
– 2 tbsp. butter
– Kosher salt & pepper
– Pasta sauce (for dipping)

1. Preheat oven to 375.

2. Using a package of precooked polenta, cut into fry-shaped pieces. Place on one layer on a baking sheet.


3. Melt butter.  Add chopped sage to this, some kosher salt & pepper and mix well.


4. With a pastry brush, lightly coat both sides of the polenta fries.


5. Bake for about 20-30 minutes, flipping once or twice, until crispy.

6. Drain on paper towels, serve alongside a side of pasta sauce.


The Best Dressing Ever? Ever.

I tend to get a little obsessed with certain things. I can remember being younger and taping a song I loved off the radio (most likely, something by En Vogue, Richard Marx, or PM Dawn…yeah, yeah. It was the ’90s.) and playing it over and over until I’d start to get sick of it, then not be able to listen to it at all, then putting it away for a couple months, and then digging it out, listening to it and thinking “Why in the world did I ever stop listening to this??”, and repeating the cycle. Also – for those of you who remember trying to perfectly tape a song off the radio, props to you as it took serious skillz to capture the beginning and end of the song at just the right times before the DJ came back on and ruined it. This mp3 generation has no idea how much fun they’re missing out on.

Anyway, I did the same thing with books (David Sedaris and Chuck Klosterman? Check.). Same thing with Netflix – I realize that I should probably have more shame in admitting I binge-watched all 4 seasons of Breaking Bad in a week and a half just to catch up to the second half of season 5 and be able to watch the final episode in real time. But…I don’t. That show was awesome.

And, of course, food. I went through a meatball phase, a black olive phase, an artichoke phase, and I’m pretty sure I’ll always be in an avocado and feta phase.

But this dressing. This. Dressing.  It’s incredible. I want to put it on everything. I want to eat it with a spoon straight out of the jar. It’s creamy without being fattening, unbelievably flavorful, actually healthy, has the perfect texture, is a little tangy and packs a bit of heat, too. It’s fantastic. It’s a game-changer. If this is a phase, it’s one I never want to end.

THE BEST DRESSING EVER (adapted almost exactly from the gorgeous “It’s All Good”)
– 1/4 c. lime juice (2-3 limes – use a citrus reamer to get the most juice as possible)
– 1/2 tsp. kosher salt
– 1 tsp. honey
– 5 scallions, chopped (white and green parts)
– 1/2 smaller jalapeno, seeded and diced
– 1/3 cup fresh cilantro, chopped
– 6 oz. plain Greek yogurt
– 1/3 C. EVOO

1. Prep everything. Don’t skip the jalapeno – I hate spicy things but this amount of heat is perfect, perfect, perfect. Just make sure you wash your hands really well after cutting it!

2. Combine everything in a food processor (in order of ingredients listed) or a blender until well combined.


3. Store in a mason jar – this will keep for a week, or 2 days if you love it as much as we do.  Meet my latest obsession.  <3